Wholesale For WooCommerce Lite is the free version of the Wholesale For WooCommerce plugin. It provides essential features to help store owners manage wholesale customers, set role-based pricing, and offer discounts on products, variations, and categories. Designed for small to medium-sized businesses, this lite version lets you easily streamline wholesale operations while maintaining compatibility with your existing WooCommerce store setup.
Installation #
- Go to your WordPress Dashboard to Install.
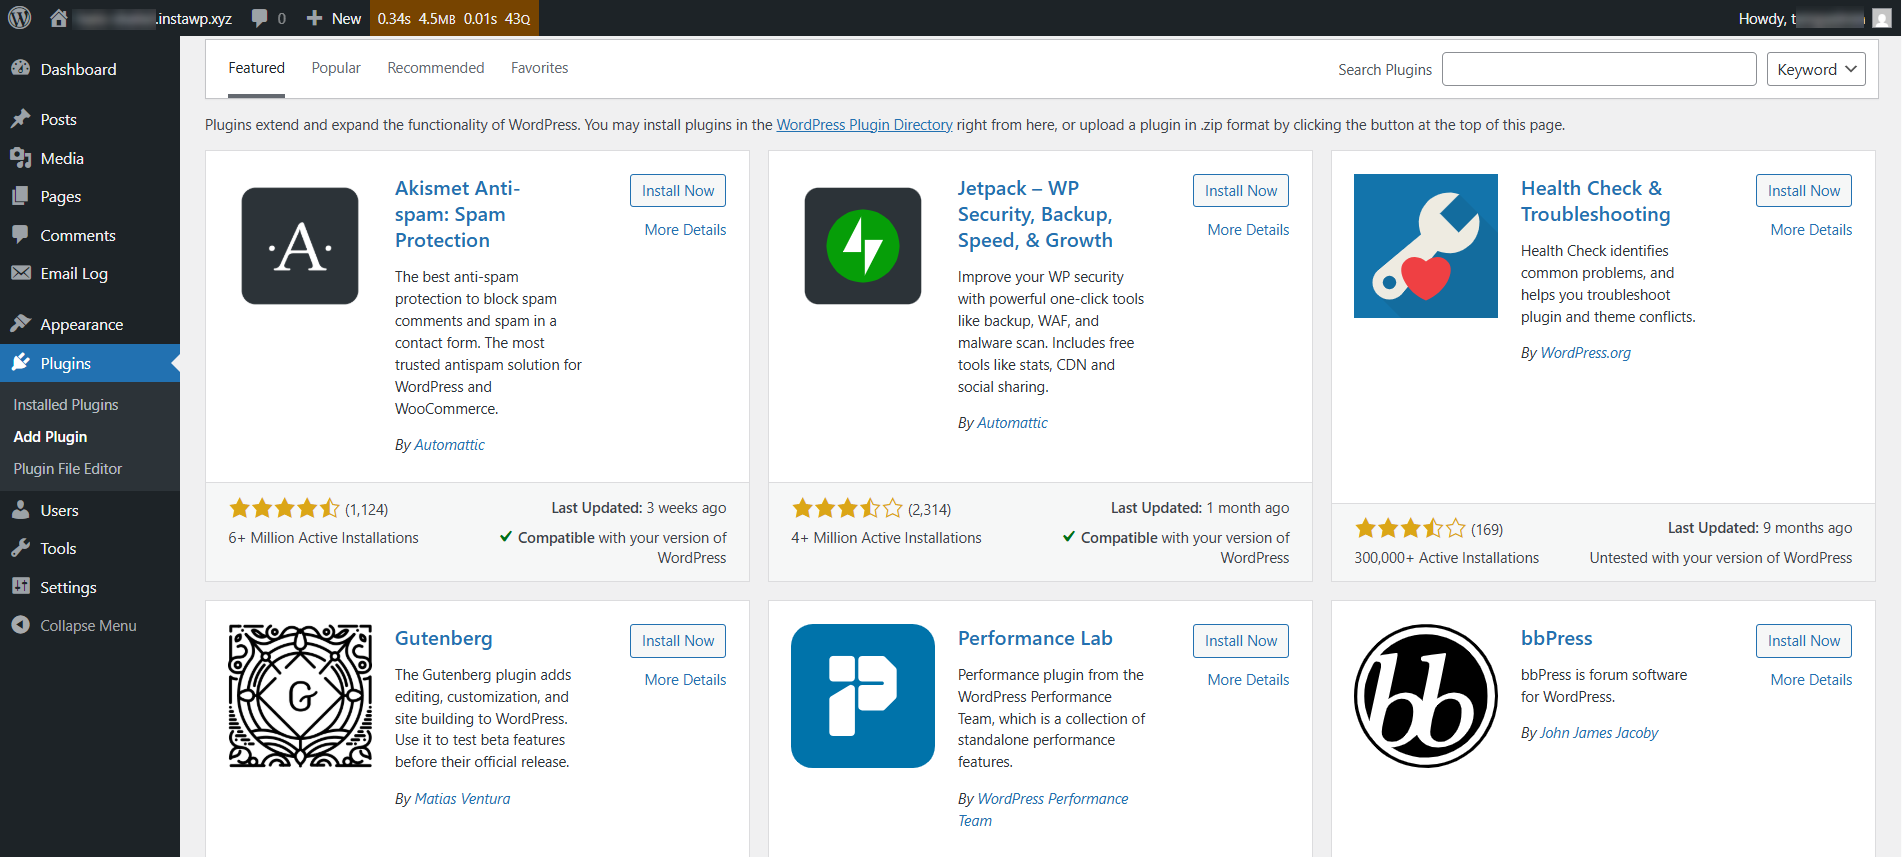
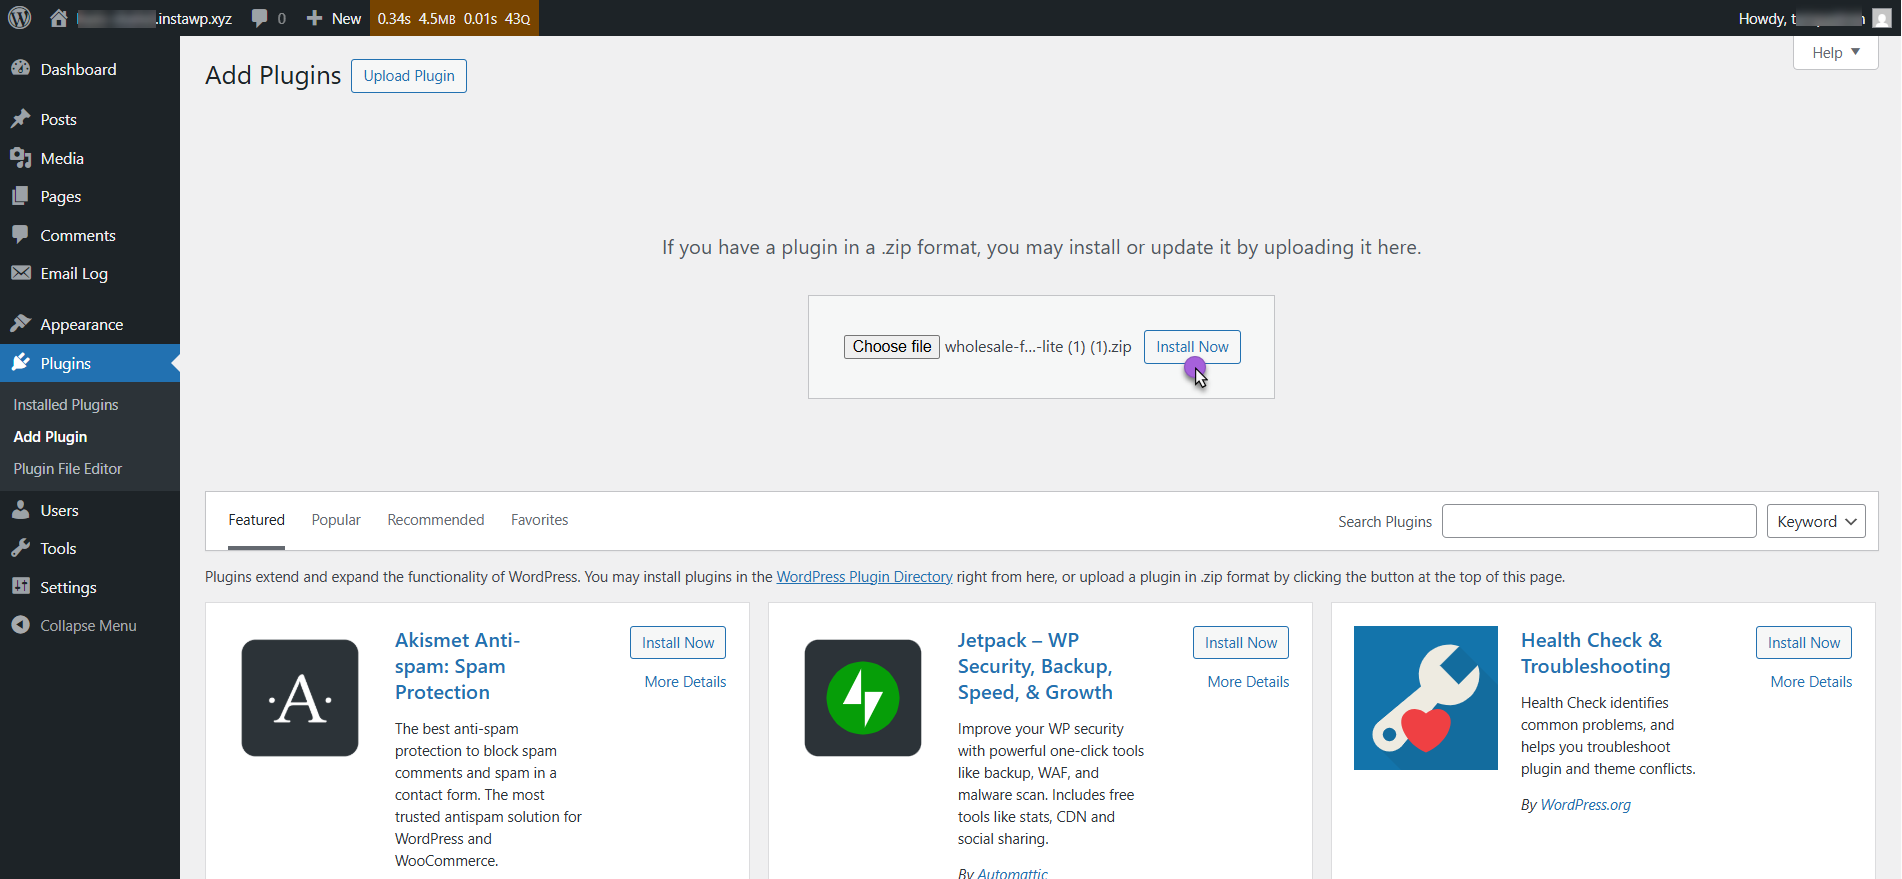
- Click Upload Plugin at the top.
- Click on the “Choose File” button and select Wholesale-For-WooCommerce-Lite-Plugin.zip.
- Click Install Now and Activate the extension.
Wholesale User Roles #
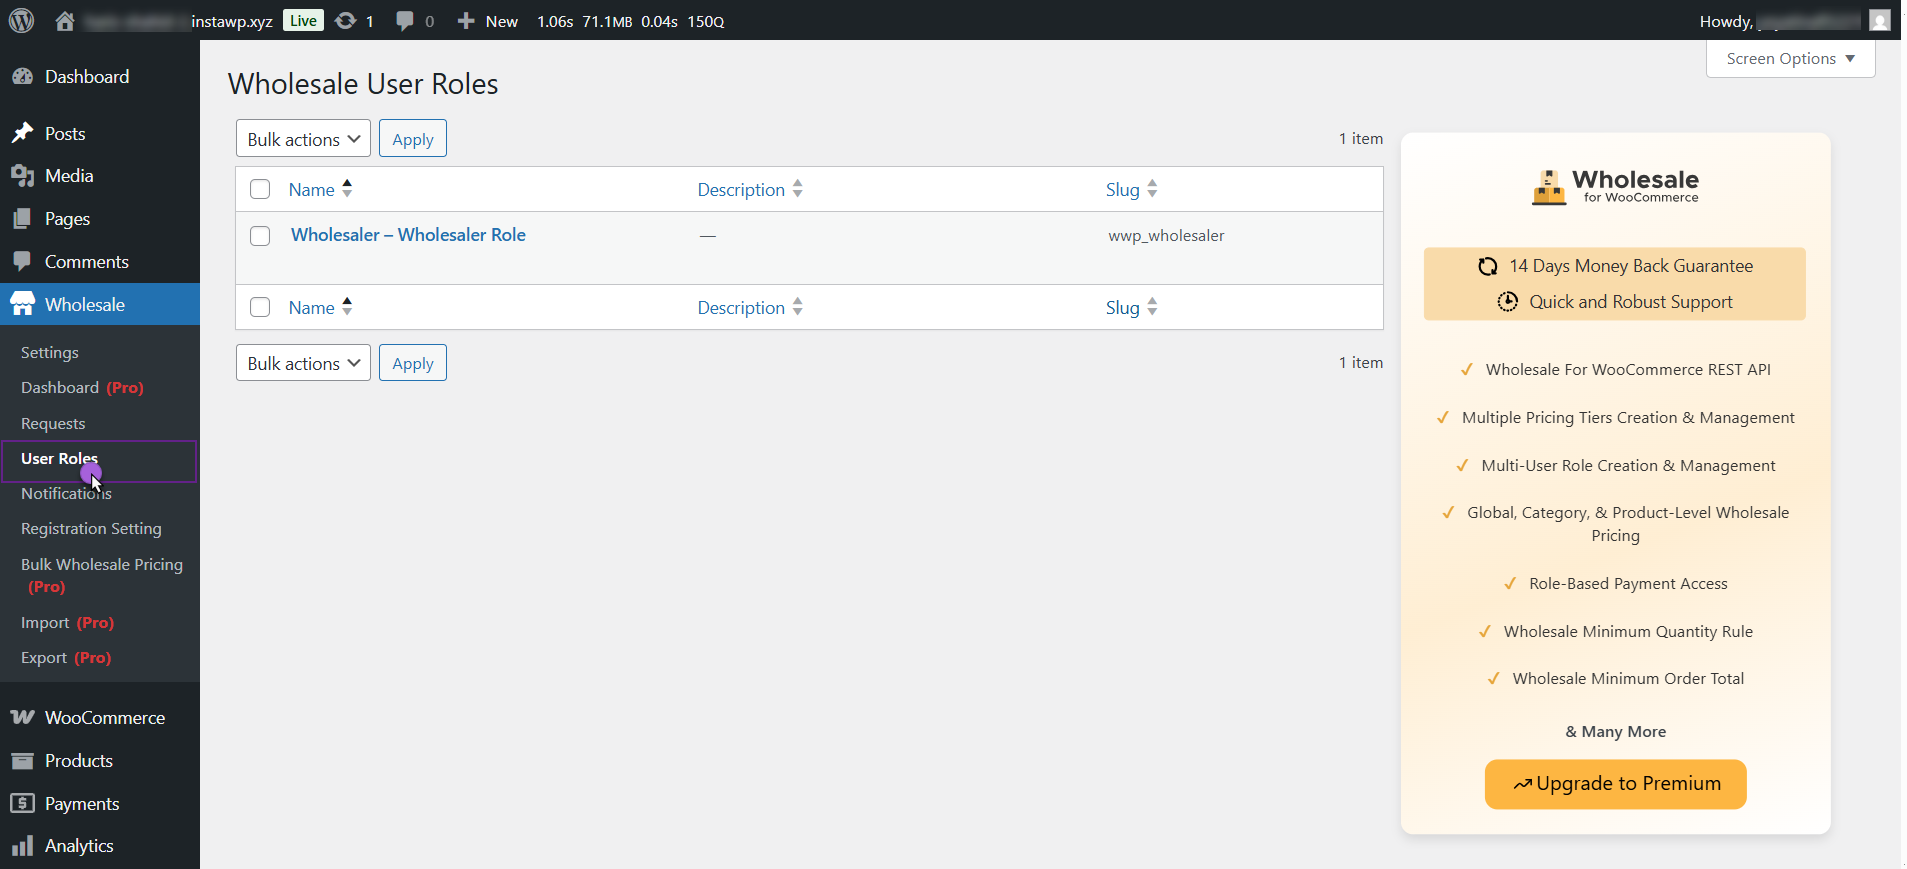
- The Lite version includes only one default wholesale role: ”Wholesaler – Wholesale Role”.
- Upon registration, the users are automatically assigned to the default ”Wholesaler – Wholesale Role” role.
- You cannot create or manage multiple wholesale roles in the Lite version.
- All wholesale customers receive the exact pricing and discount level.
- There are only three tiered pricing options.
- This setup is ideal for stores with basic wholesaler needs.
- To access features like multiple roles, different discounts, or quantity-based rules, you must upgrade to the premium version.
- To view or manage the default wholesale role, navigate to WordPress Dashboard > Wholesale > Wholesale User Roles.
Note: For advanced features like multiple wholesale roles, custom role-based pricing, or minimum quantity rules, consider upgrading to the premium version of the plugin.
How to Add a Customer Upgrade Request Option #
In the Wholesale For WooCommerce Lite plugin, you can allow regular (retail) users to request an upgrade to become a wholesaler directly from their My Account page on the frontend.
Upgrade Tab
- It adds an Upgrade tab to the WooCommerce My Account page, which is visible only to non-wholesale users.
- Users can submit a request to become a wholesale customer by filling out the form.
Custom Message
- You can add a custom message above the request form to guide users.
By default, the message text is: “Upgrade In Wholesaler”.
How to Enable the Upgrade Tab #
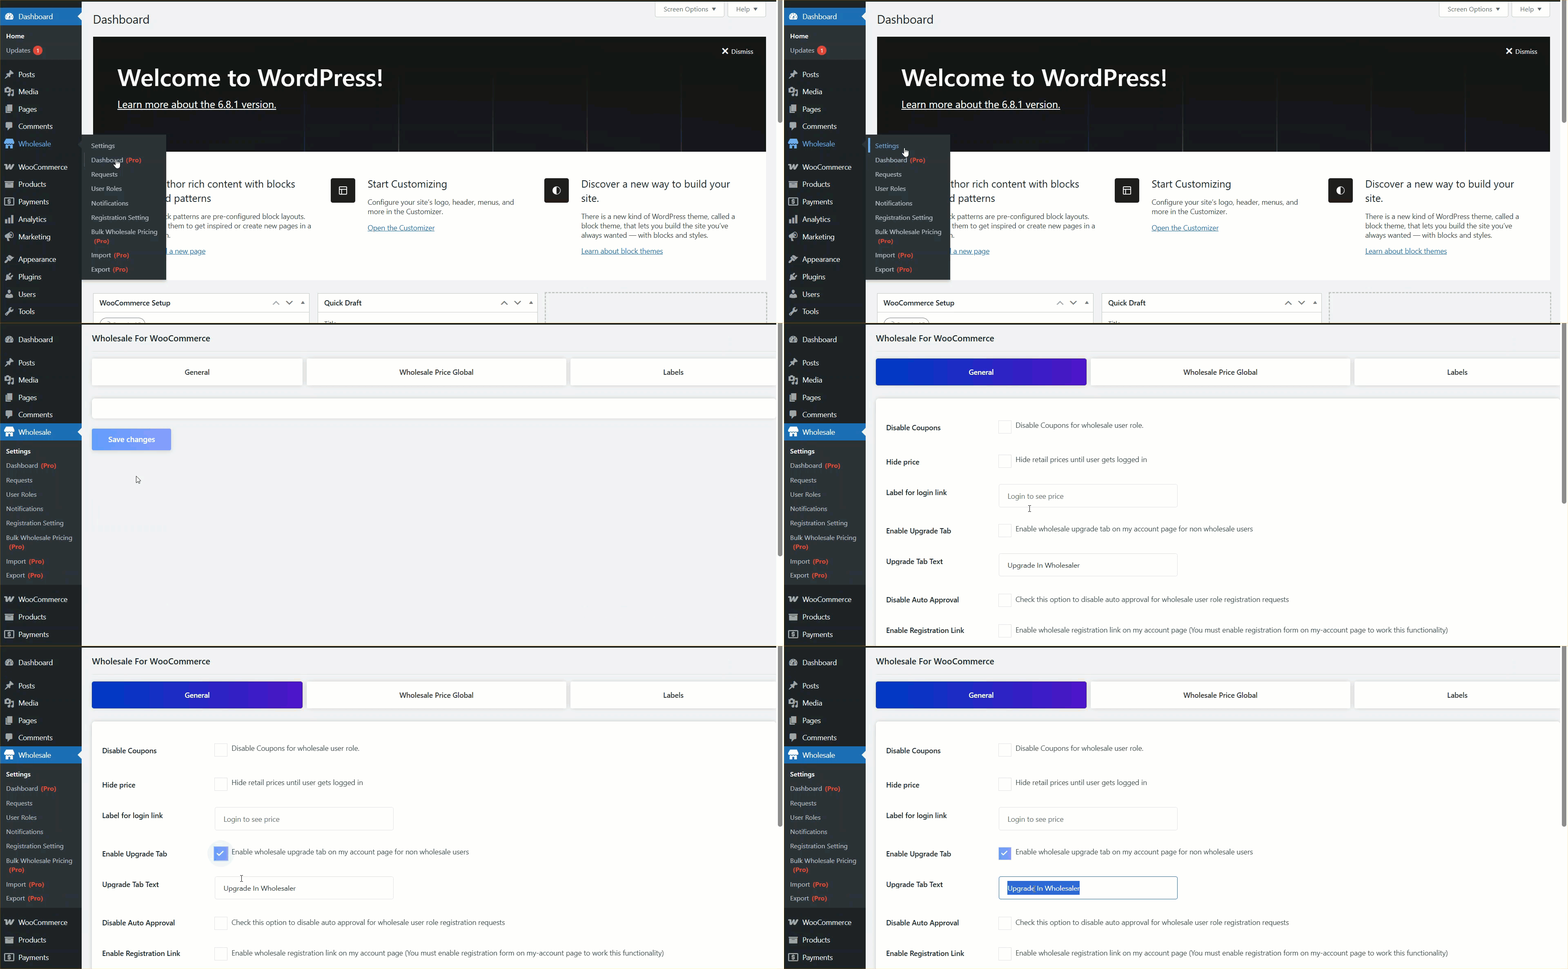
- Go to your WordPress Dashboard.
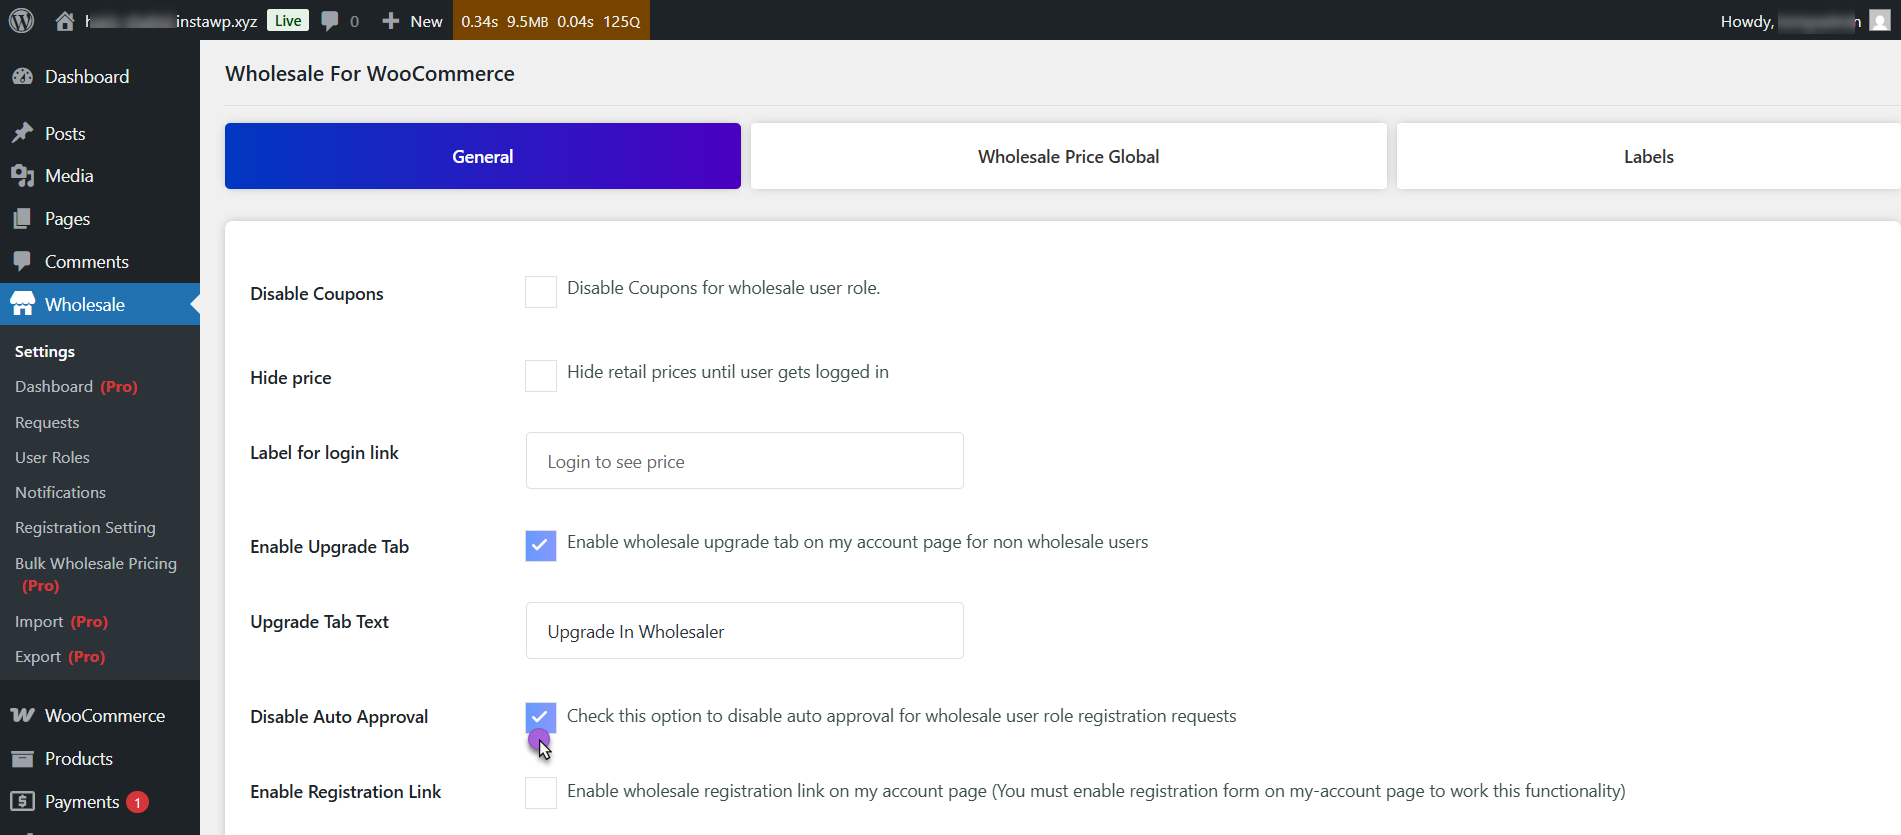
- Navigate to Wholesale > Settings > General.
- Enable the option Enable Upgrade Tab.
- (Optional) Enter a custom message to replace the default text Upgrade In Wholesaler shown above the form.
Front-End Impact ( Customer )
- Go to our website.
- Navigate to the My Account page (must be logged in as a customer).
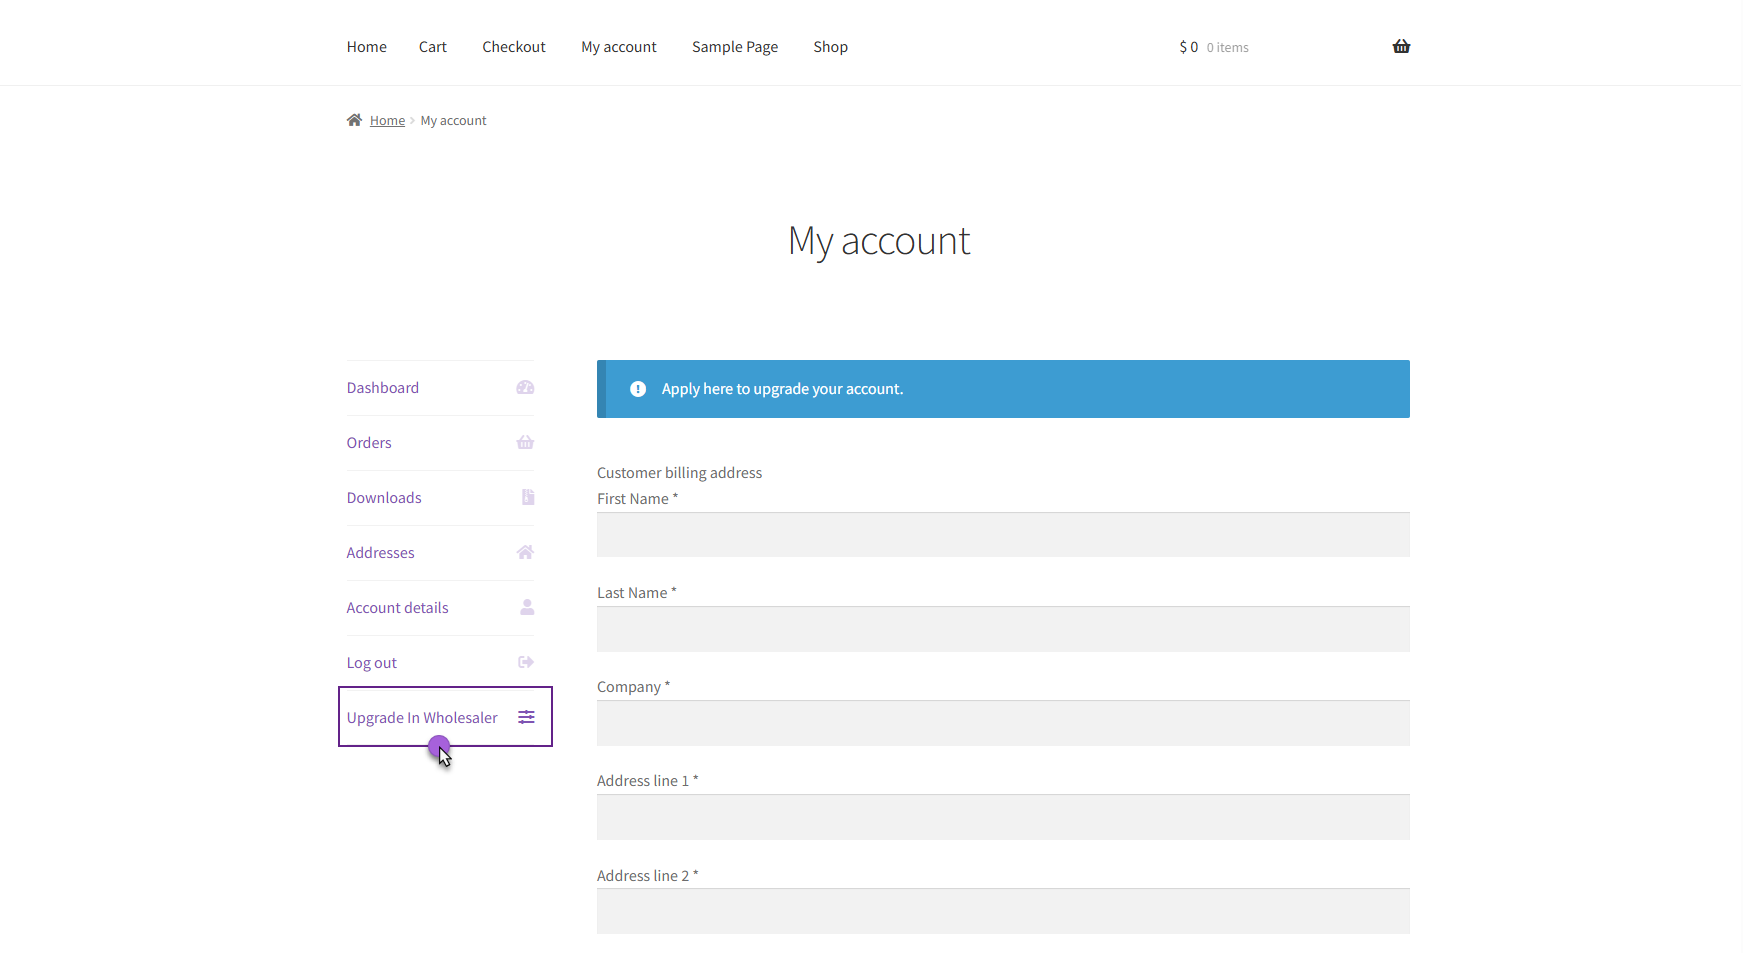
- Click on the Upgrade in Wholesaler tab.
- Fill out the form to request access to a wholesale account.
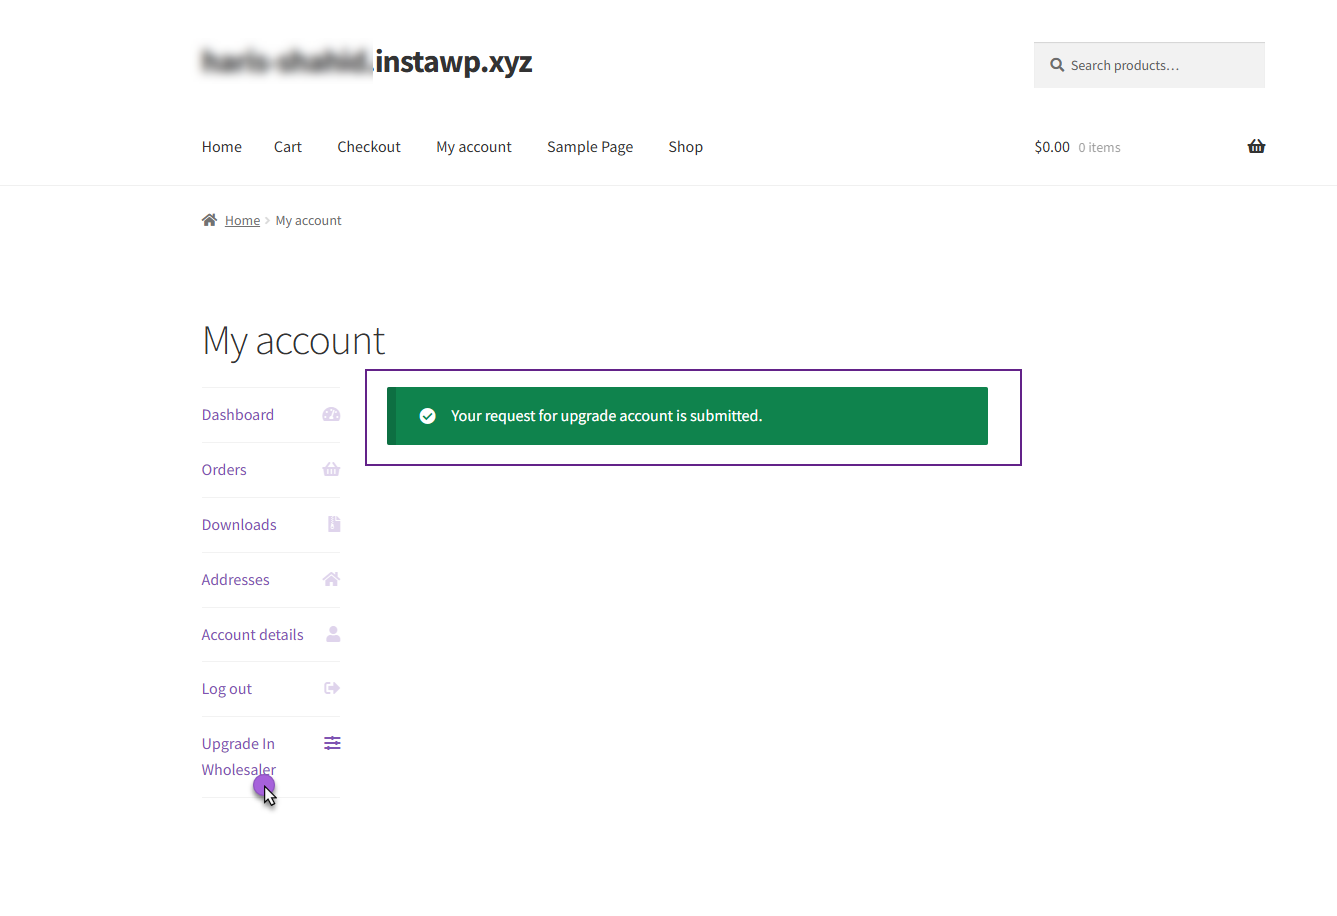
- After filling the form to request a wholesale account.
Admin-End
- After filling out the form to request a wholesale account.
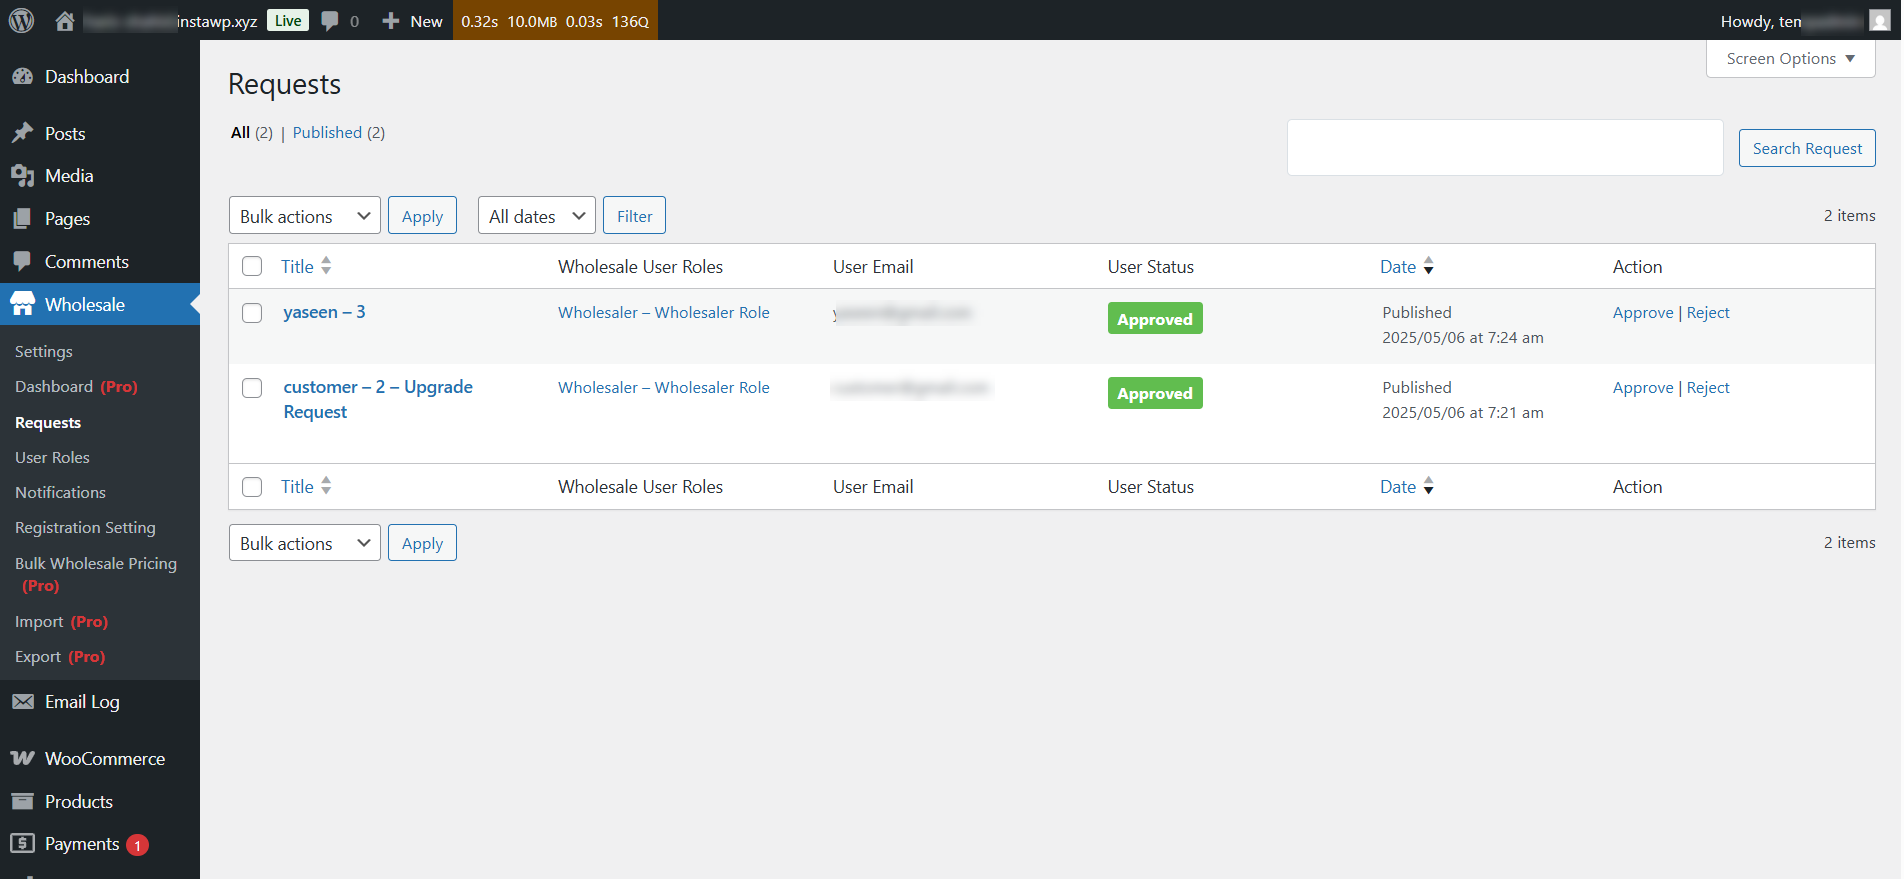
- Navigate to Wholesale > Request.
- Here, the admin will see a list of wholesale registration requests.
Disable Auto Approval #
- Navigate to Wholesale > Settings > General.
- Locate the option Disable Auto Approval for Customer to Wholesale Request.
- Check the box to manually approve wholesale registration requests instead of approving them automatically.
- Click Save Changes to apply the settings.
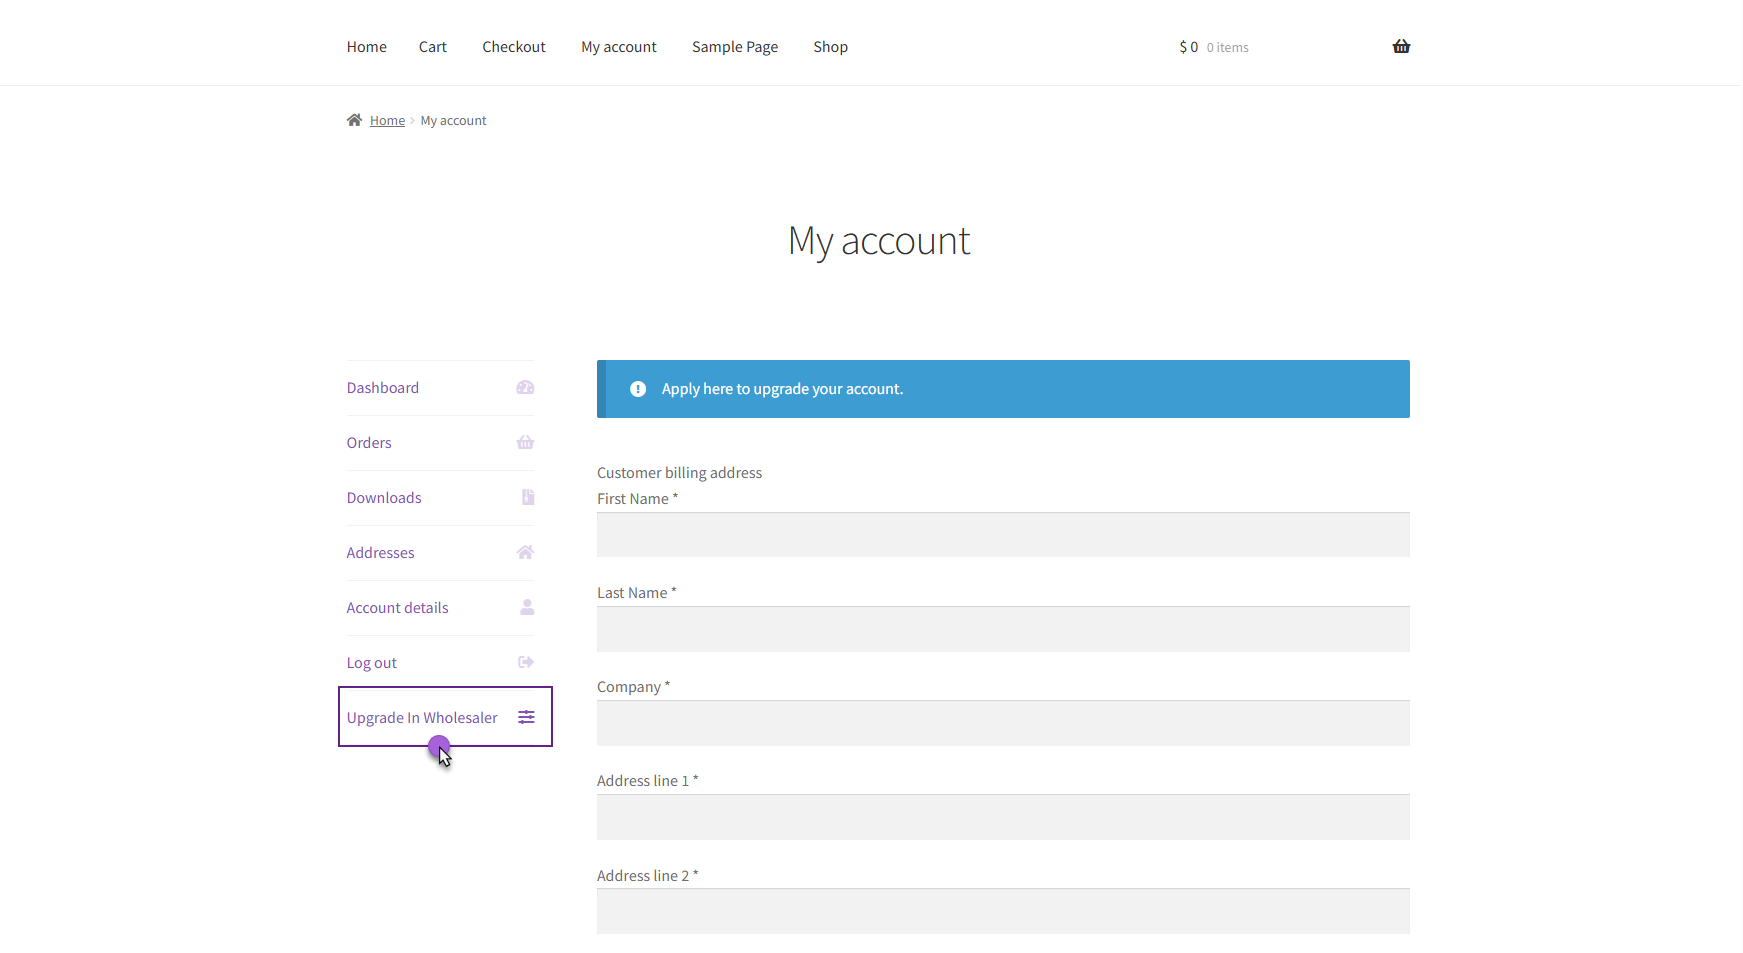
Front-End Impact ( Customer )
- Go to our website.
- Navigate to the My Account page (must be logged in as a customer).
- Click on the Upgrade in Wholesaler tab.
- Fill out the form to request access to a wholesale account.
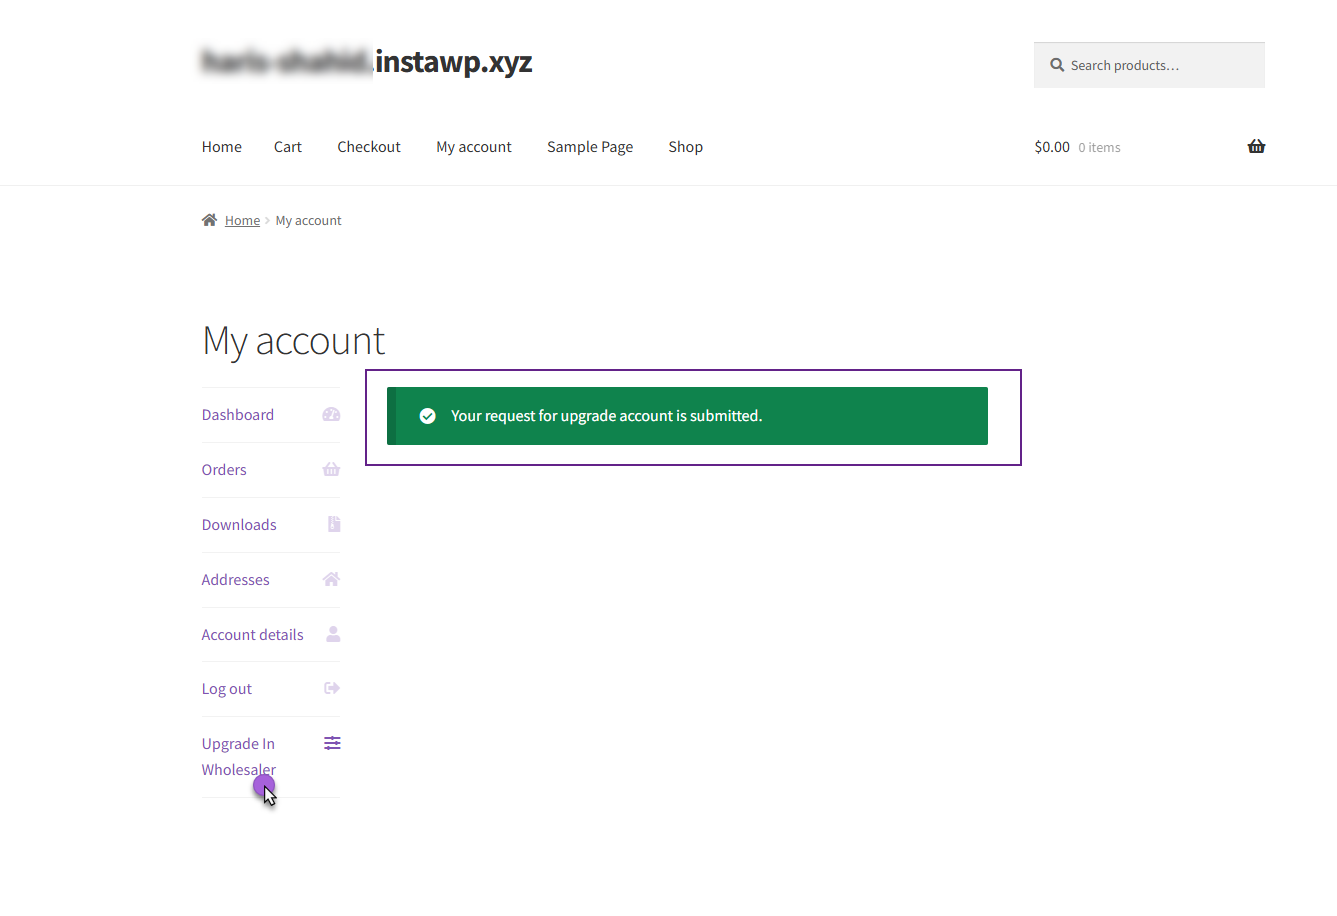
- After filling the form to request a wholesale account.
Requests #
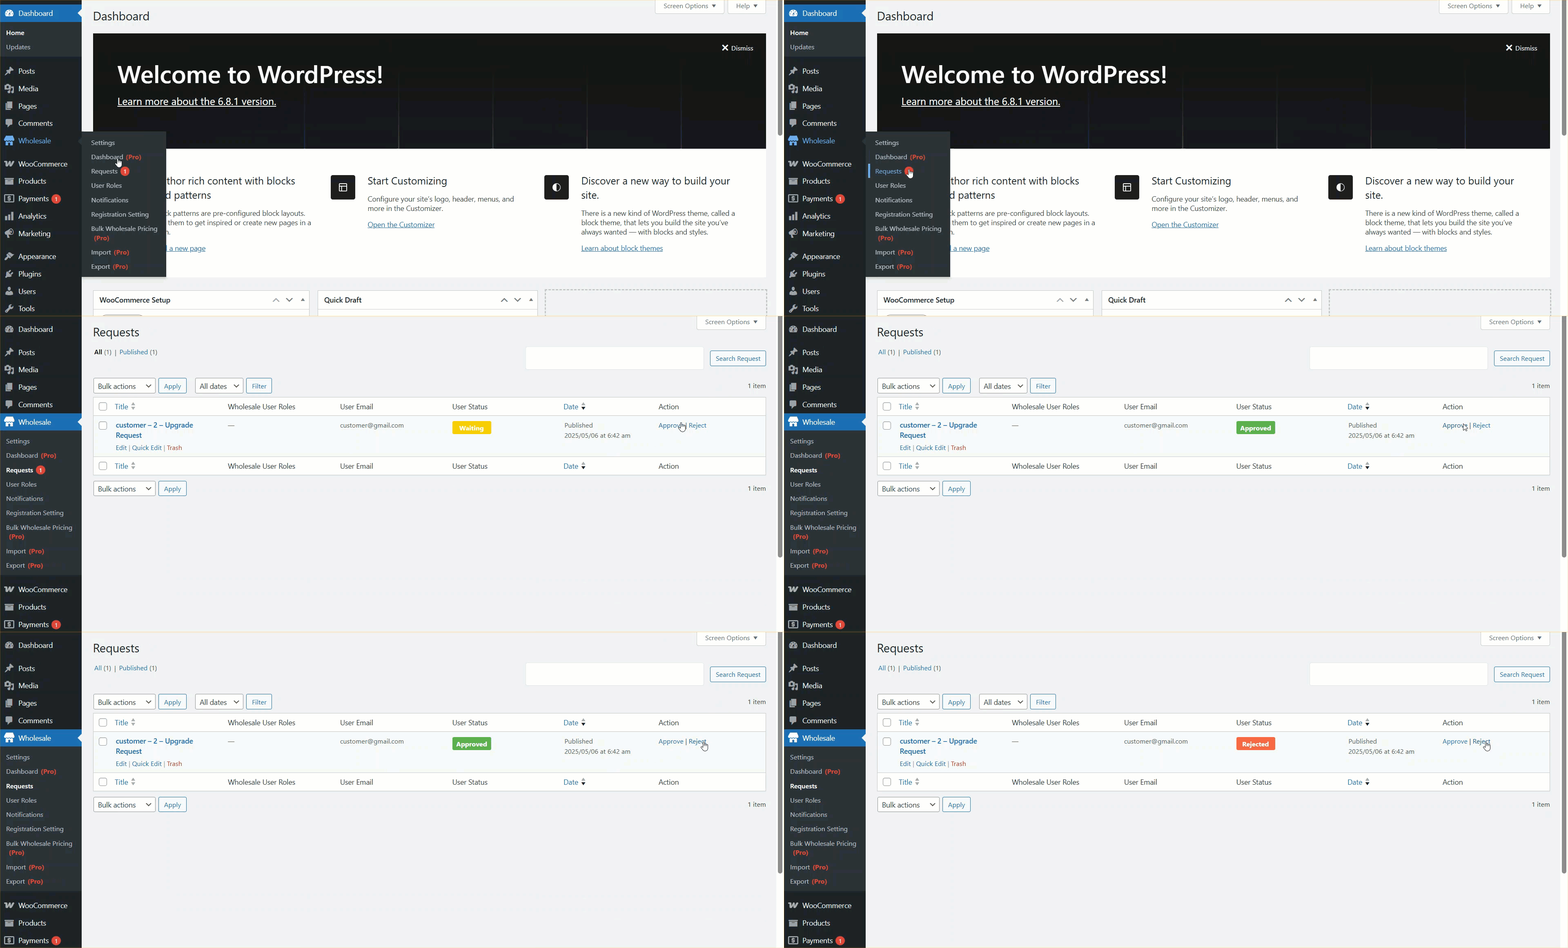
- After filling out the form to request a wholesale account
- Navigate to Wholesale > Request.
- Here, you’ll see a list of pending wholesale registration requests.
- Each request will have Approve and Reject buttons beside it.
- The admin can manually approve or reject each wholesale customer request from this section.
Wholesale Registration Form – Default Fields Setup #
Enable Default Address Forms #
- Navigate to Wholesale > Registration Settings > General Settings.
- Locate the options:
- Enable Billing Address Form in Default Fields
- Enable Shipping Address Form in Default Fields

- Turn on both toggles to enable the Billing and Shipping Address Fields in the default registration form.
- Click Save Changes to apply the settings.
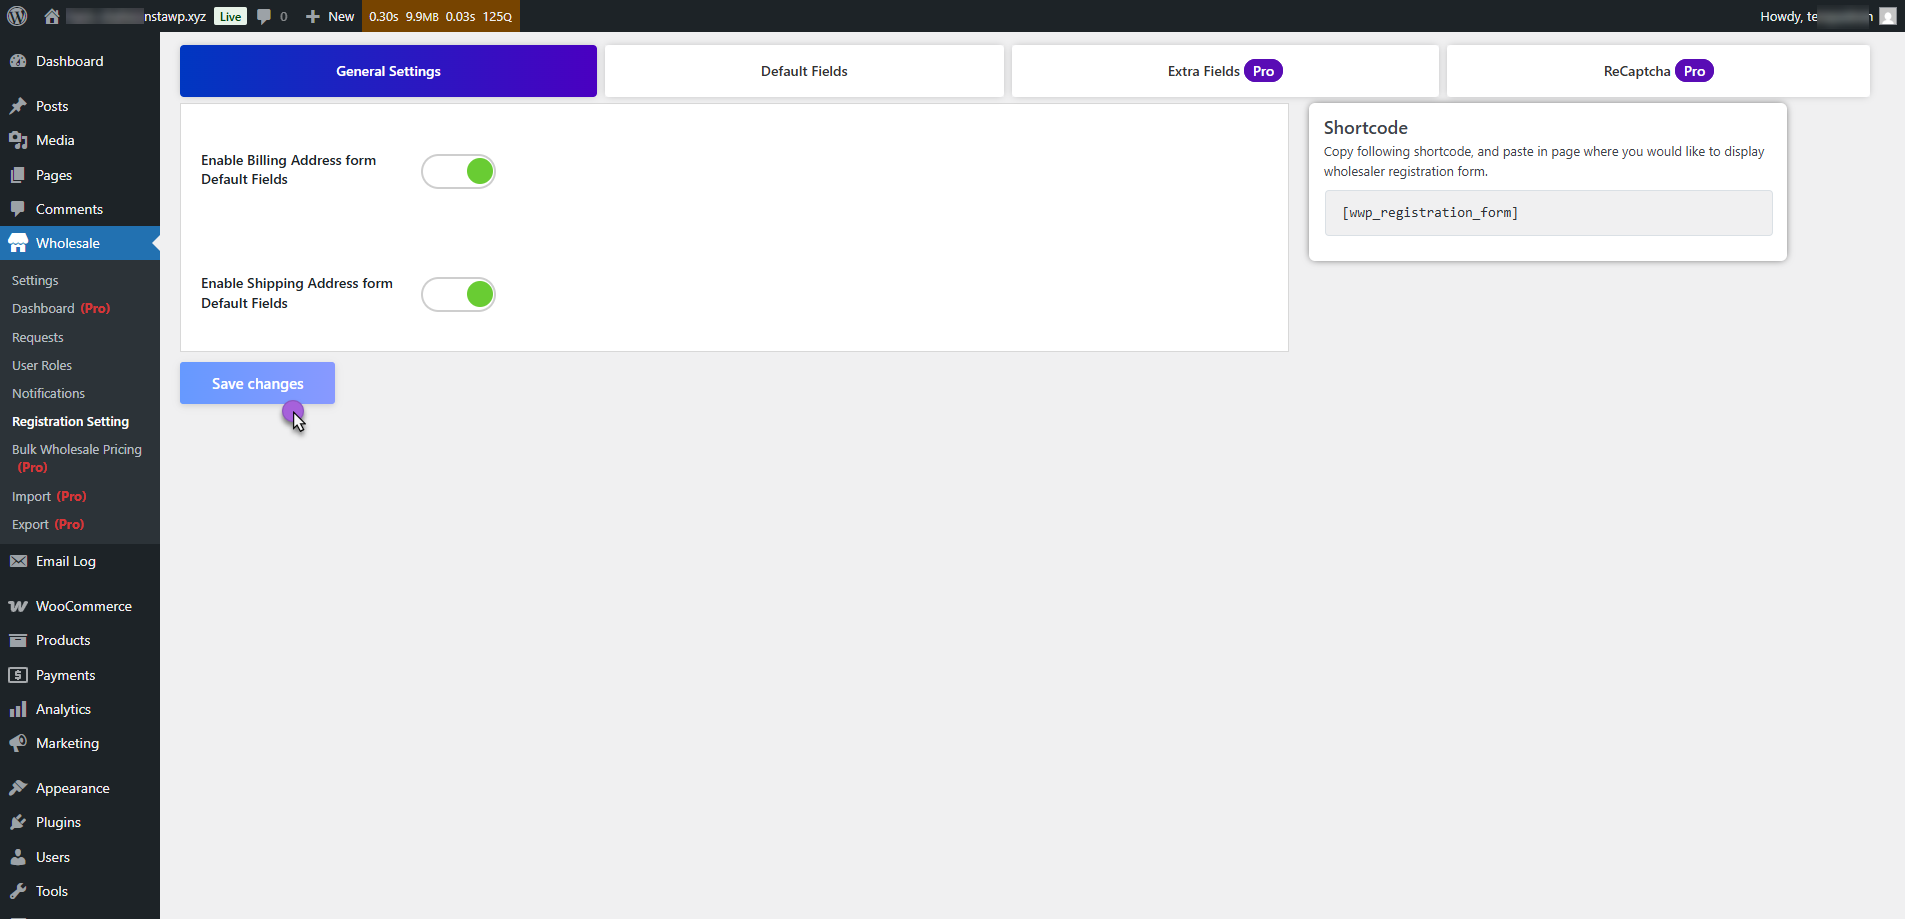
Note: Enabling these options ensures that billing and shipping address fields appear under the Default Fields tab and can be managed individually.
Configure Default Fields #
- Go to Wholesale > Registration Settings > Default Fields tab.
- This section contains all the Form Fields that will appear on the front end using the shortcode [wwp_registration_form].
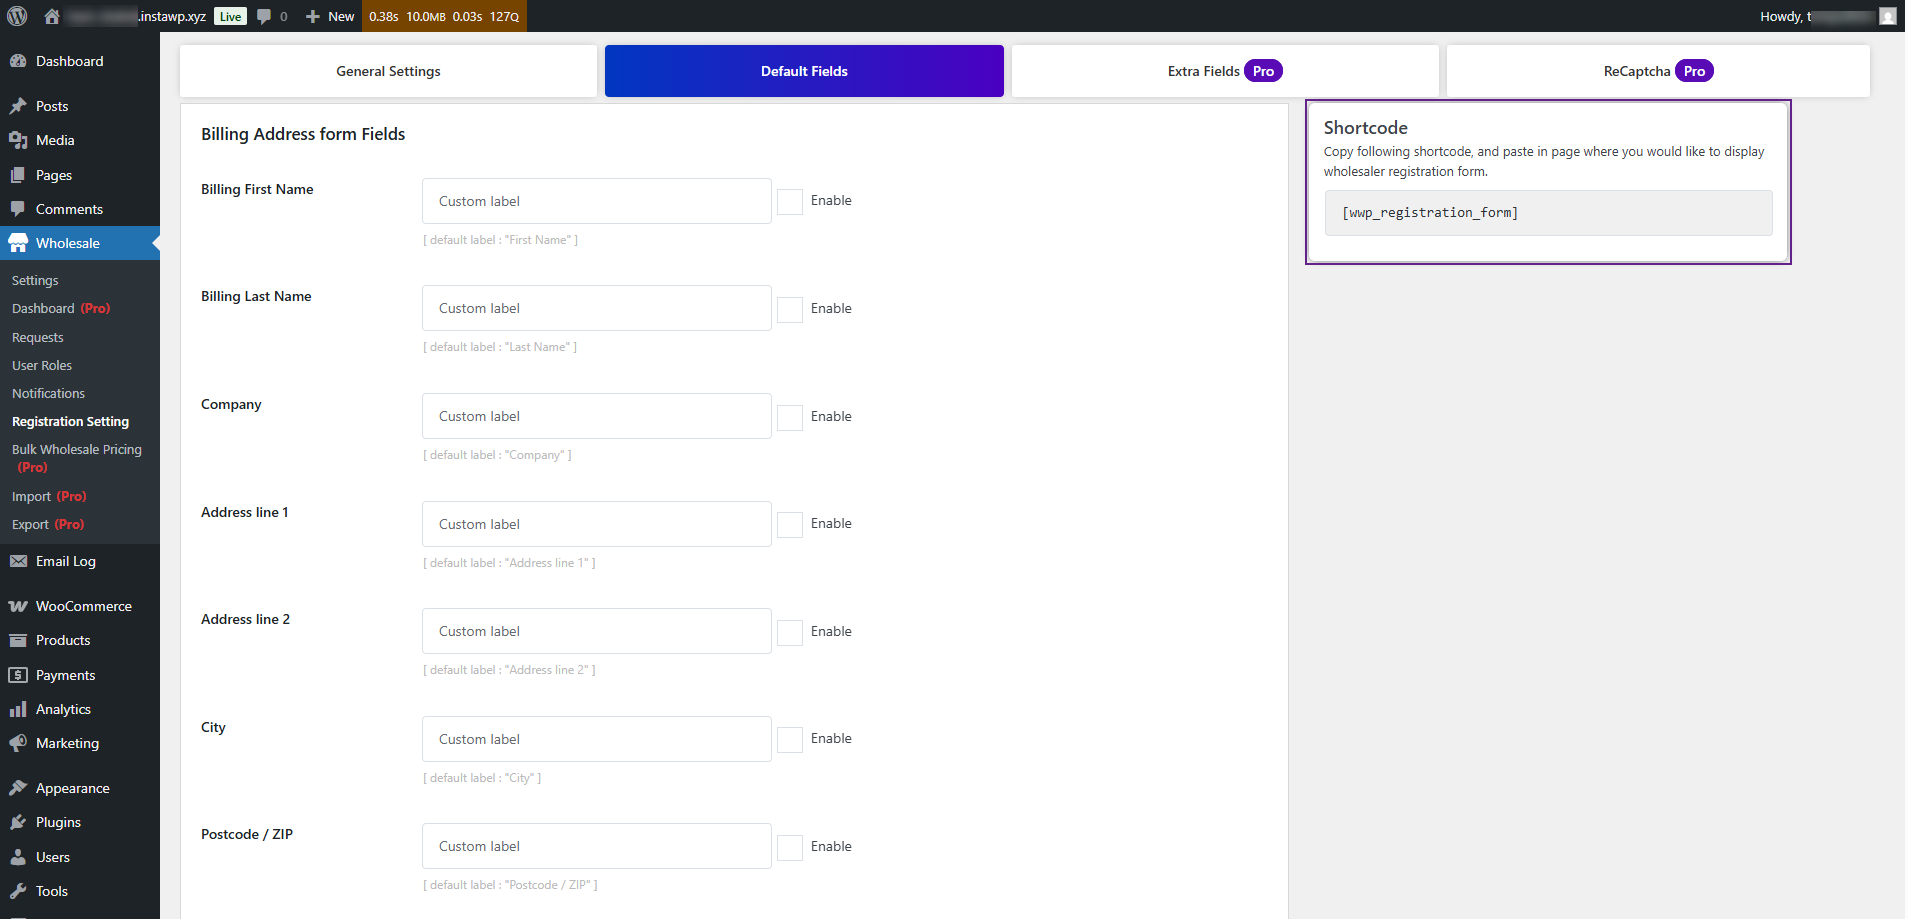
Use the Checkbox To:
- Enable or Disable the entire section of fields.
- Enable or Disable specific fields by checking or unchecking them.
- Edit the labels of each field as needed.
Available Default Fields #
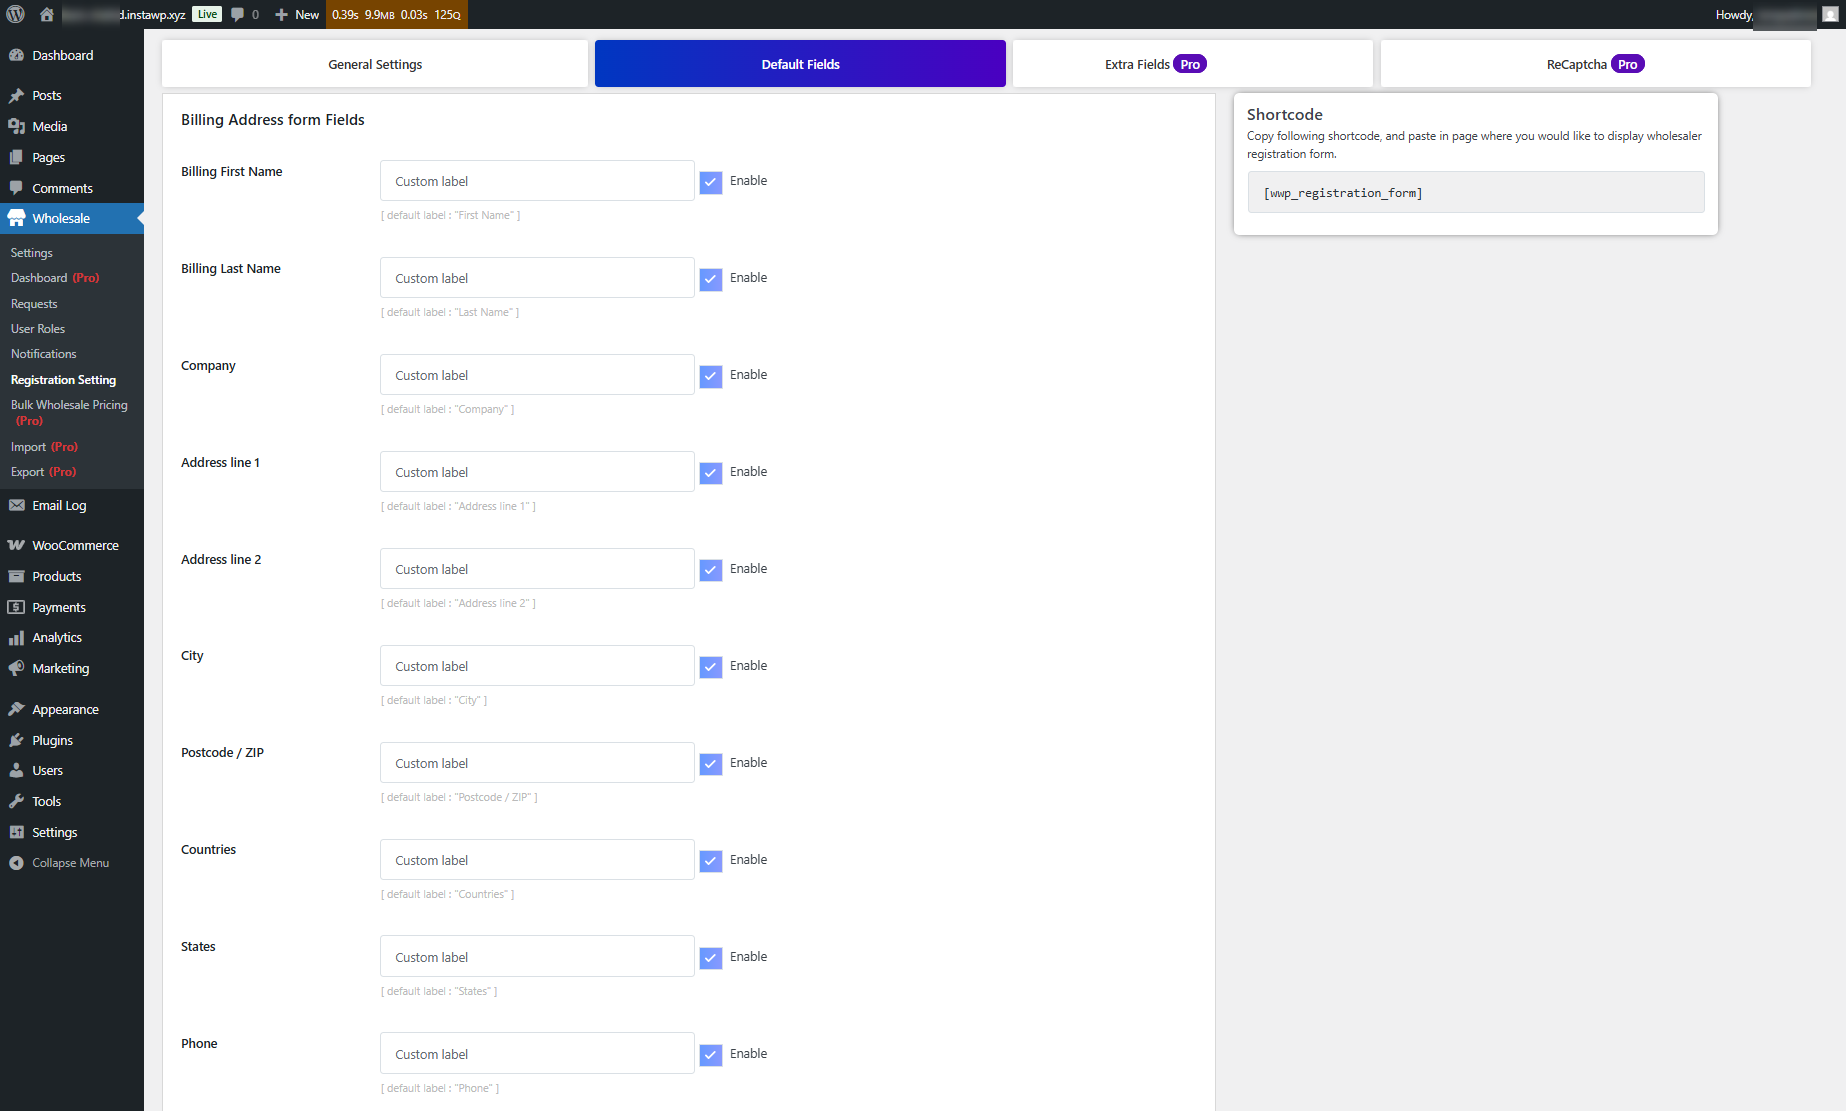
Billing Address Fields:
- First Name
- Last Name
- Company
- Address Line 1
- Address Line 2
- City
- Postcode / Zip
- Country
- State
- Phone
Shipping Address Fields:
- Shipping First Name
- Shipping Last Name
- Company
- Address Line 1
- Address Line 2
- City
- Postcode / Zip
- Country
- State
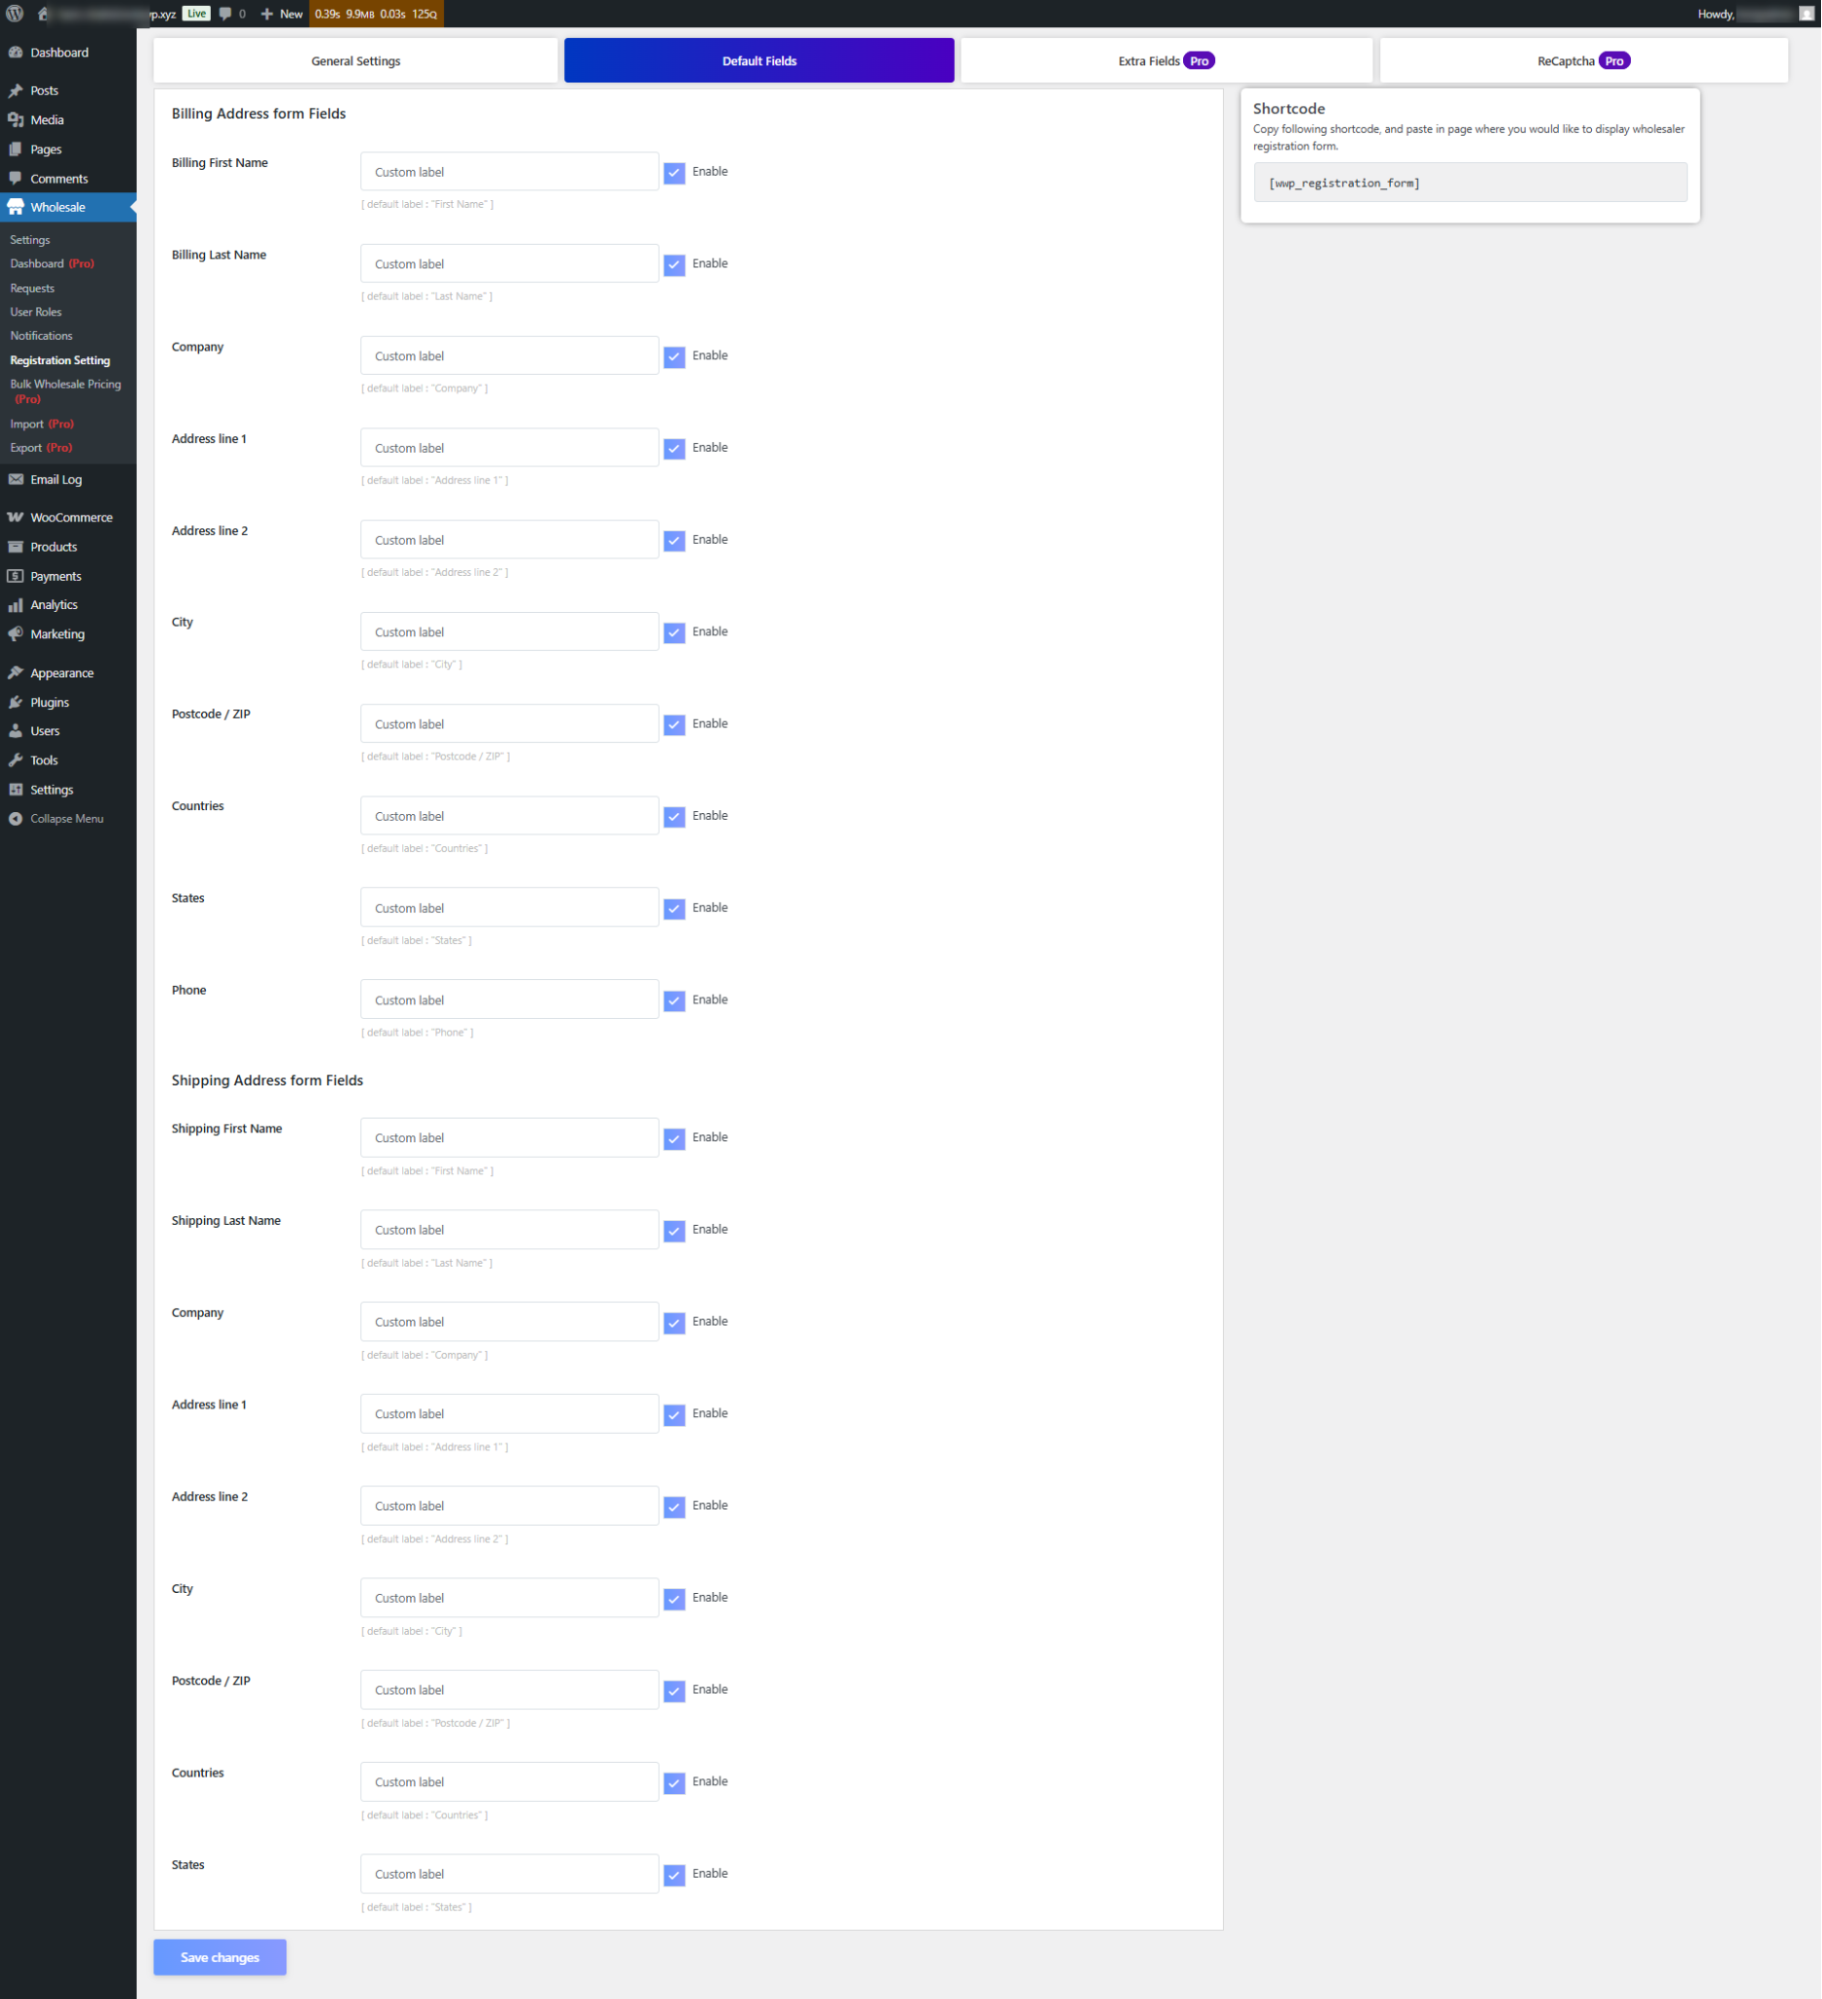
- Click on Save Changes.
Shortcode #
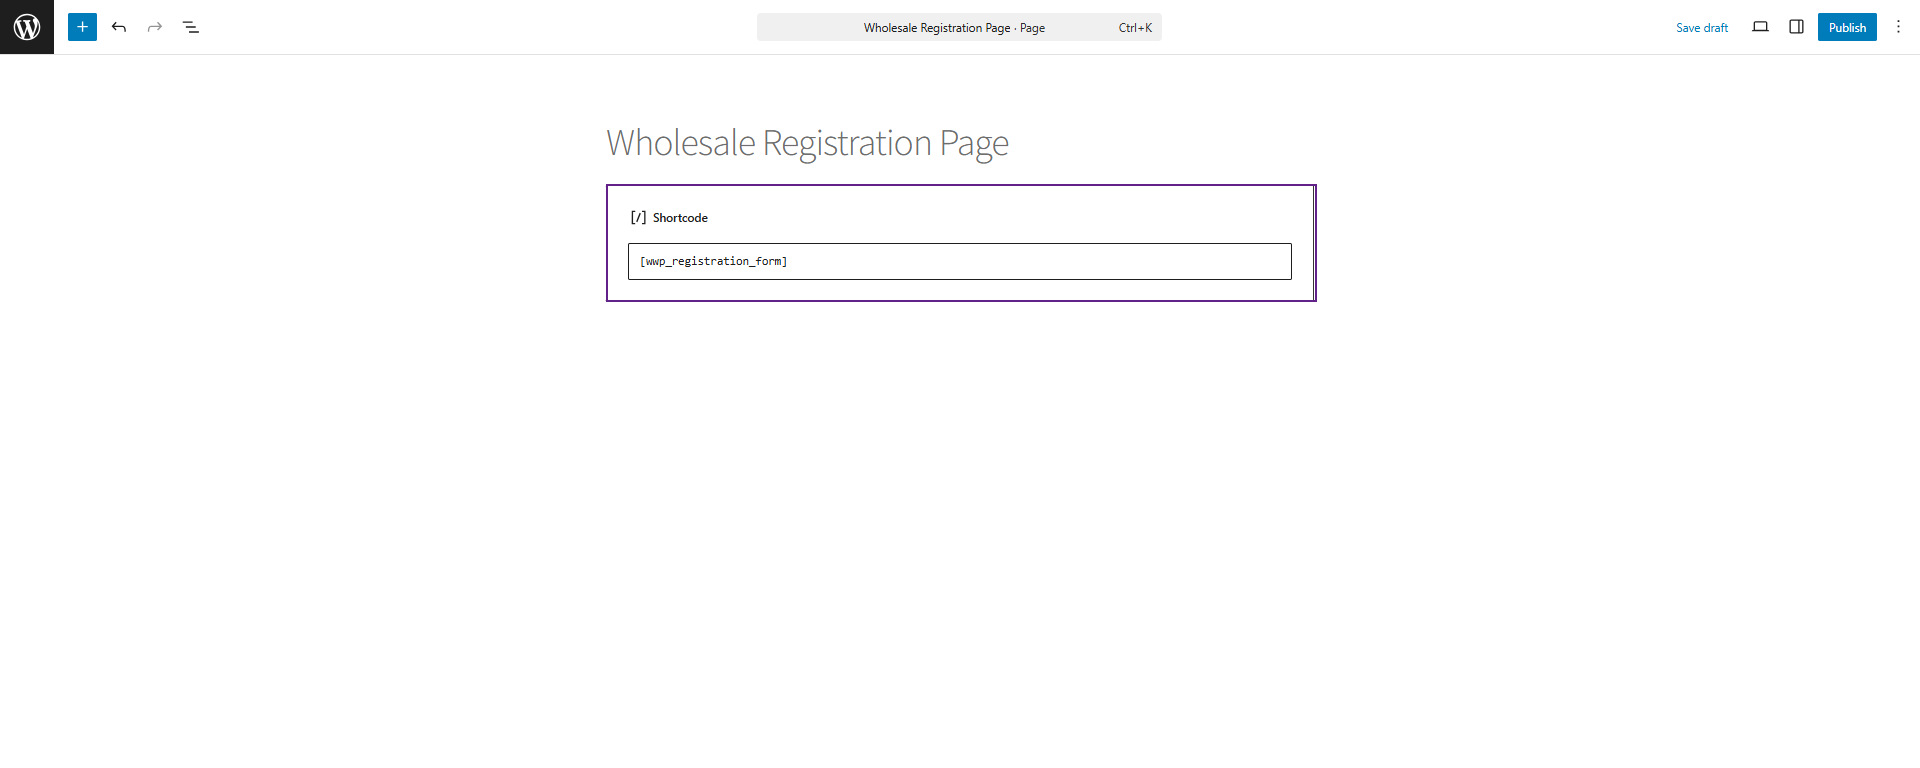
- Go to Pages, Add new or Edit.
- Place the shortcode [wwp_registration_form].
- This will render the wholesale registration form with your selected fields on the front end.
- Click on the Publish / Update button.
Front End Impact
- Go to the Wholesale Registration page.
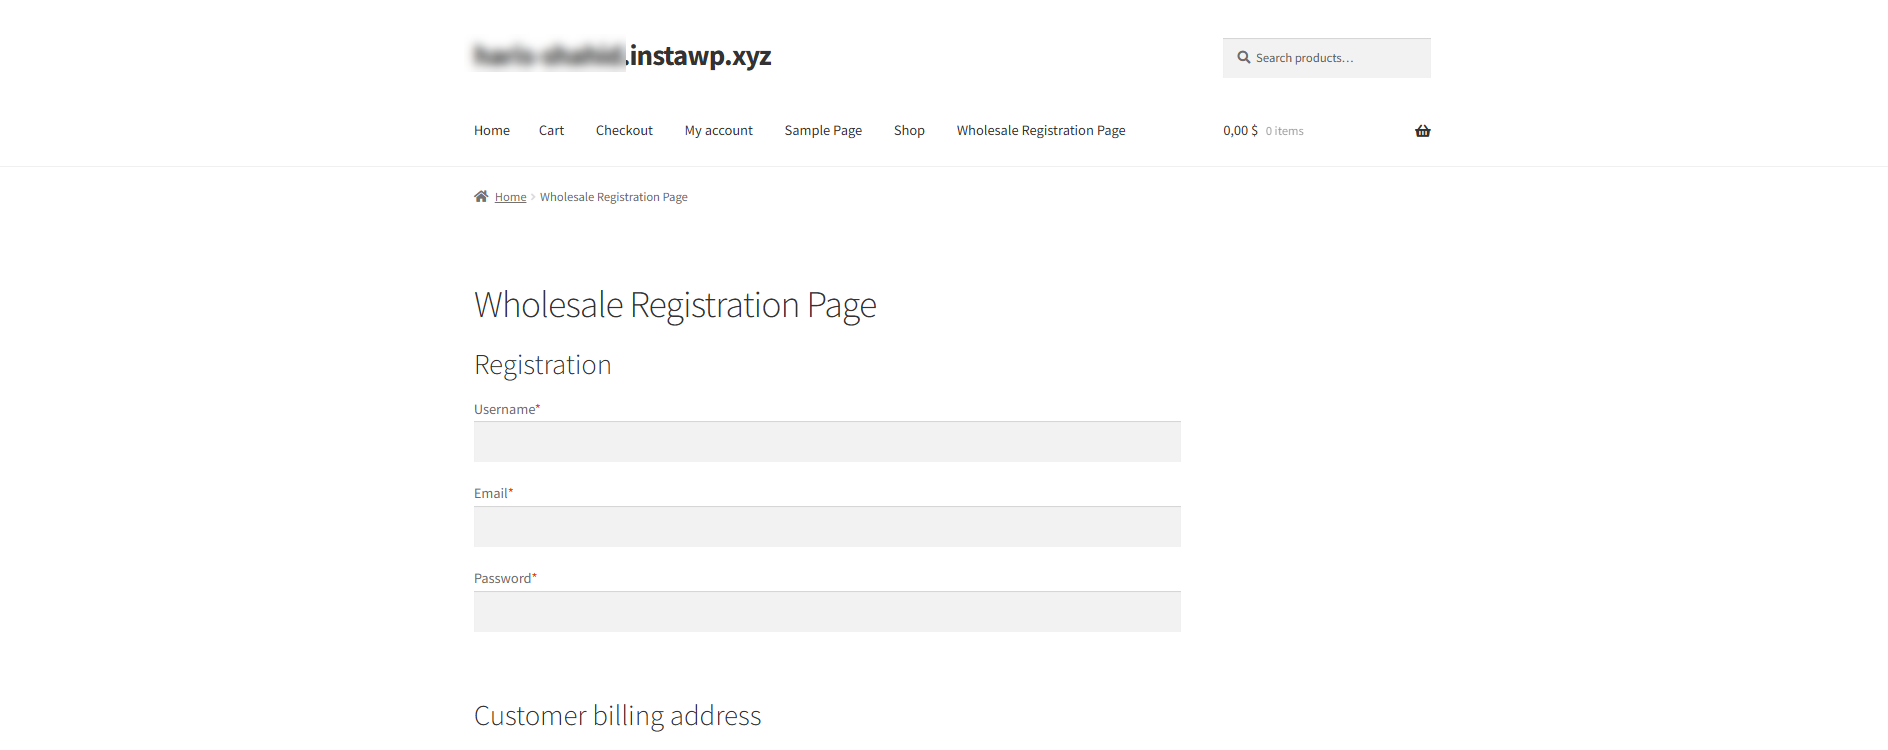
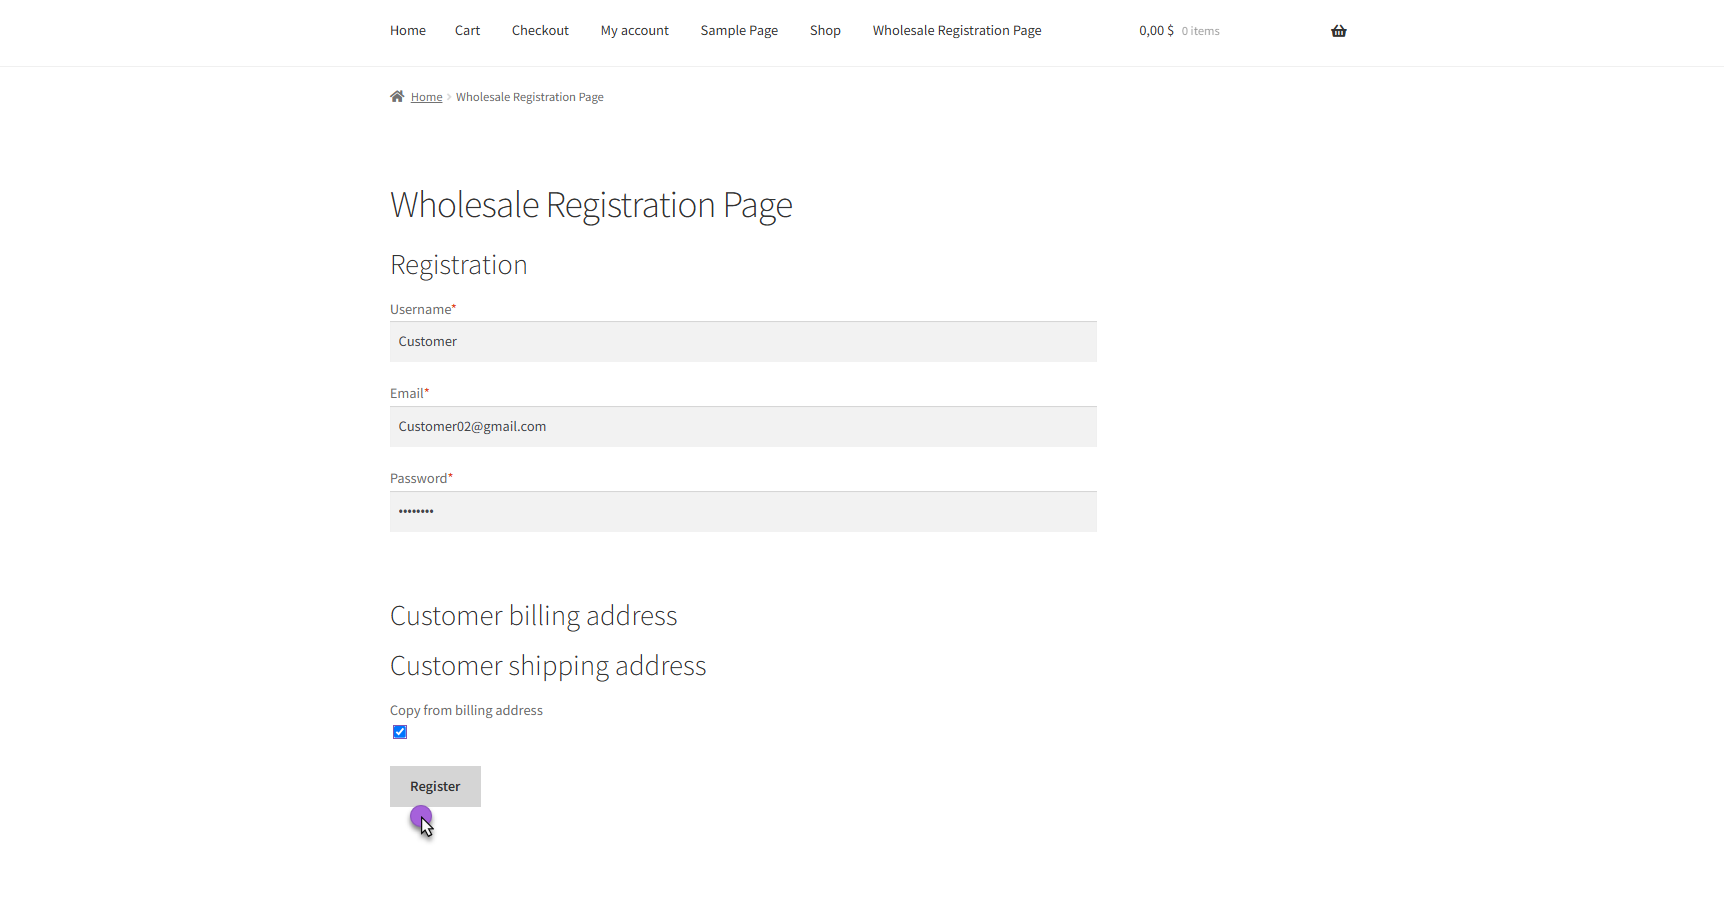
- Enter your username, email, and password (required fields).

- Click the Register button to submit your registration. Your request will be sent to the admin. Once approved, a Wholesale user role will be assigned.
Email Notifications #
You can set up email notifications for your users. The admin will be notified via email when a new registration request is made, and users will be notified when their request is approved.
Notification settings for user registration #
User Registration (this email will be sent to the user when registered as a wholesaler).
- Go to Wholesale Notifications New Request.
- Enable Notification.
- Enter Subject.
- Enter tags and messages that will be sent.

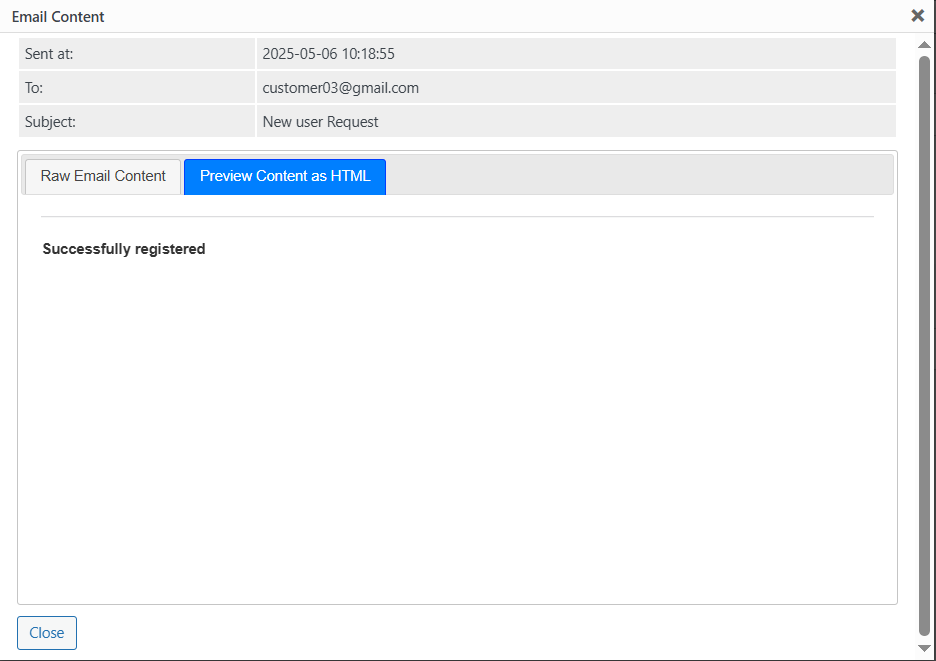
Front End Impact
- Email Sent to Customer.
Wholesale Pricing #
Global Wholesale Pricing #
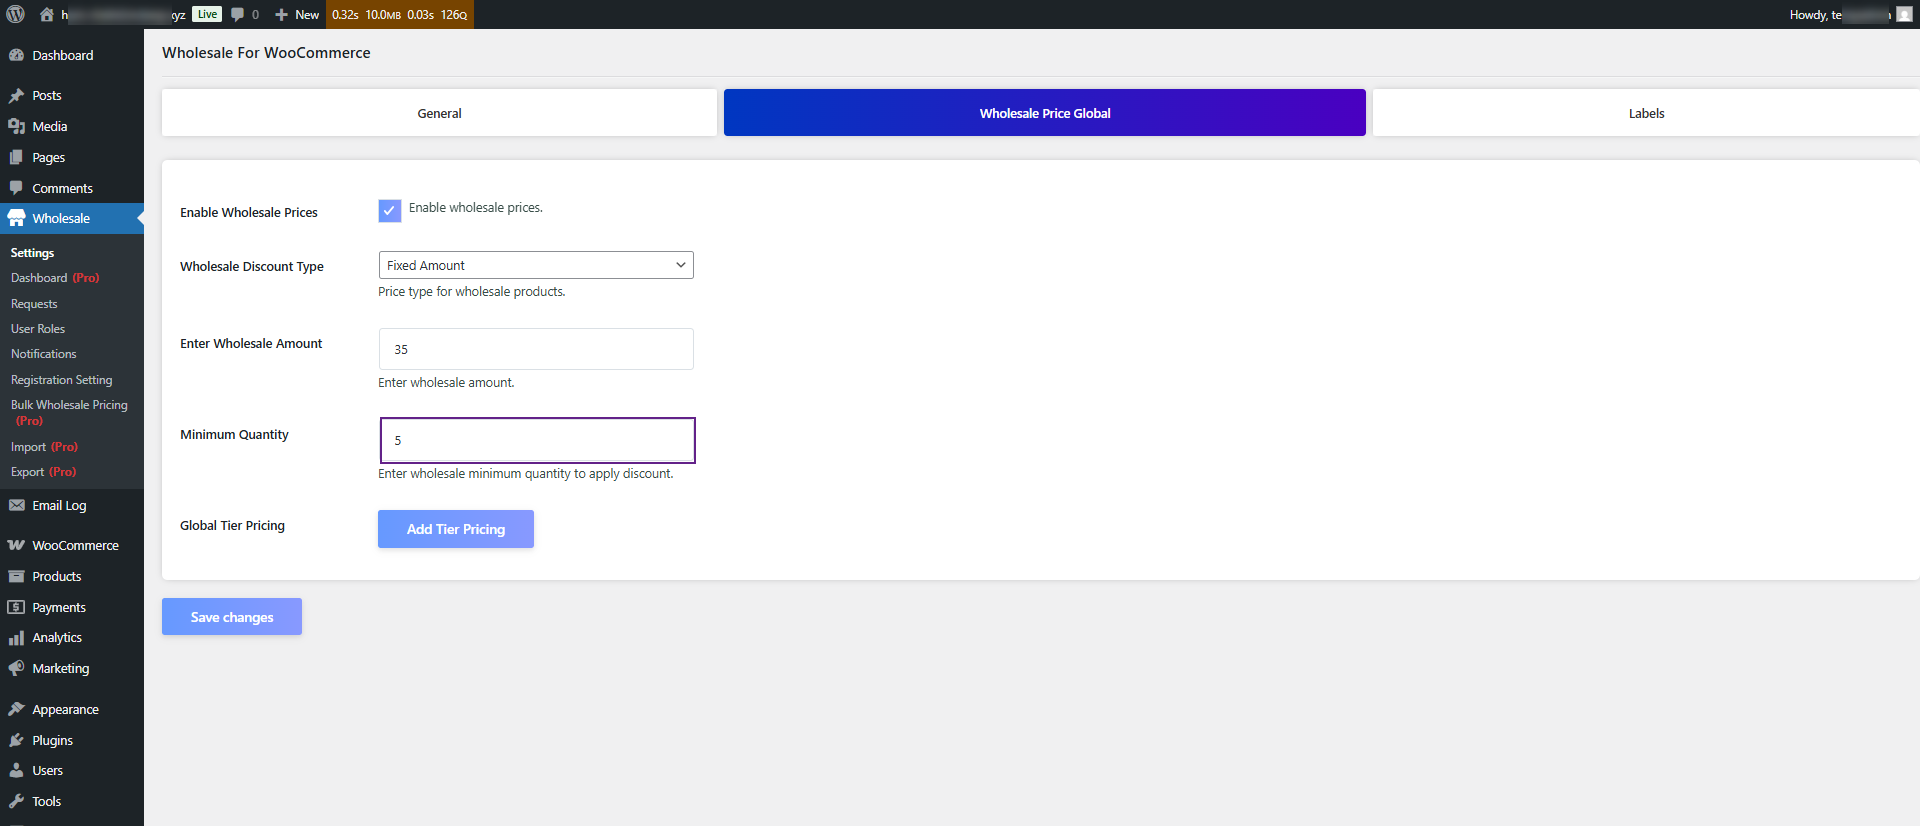
The Global Wholesale Pricing feature allows you to apply wholesale prices across all products that have a regular price.
- Go to your WordPress Dashboard
- Navigate to Wholesale > Wholesale Price Global.
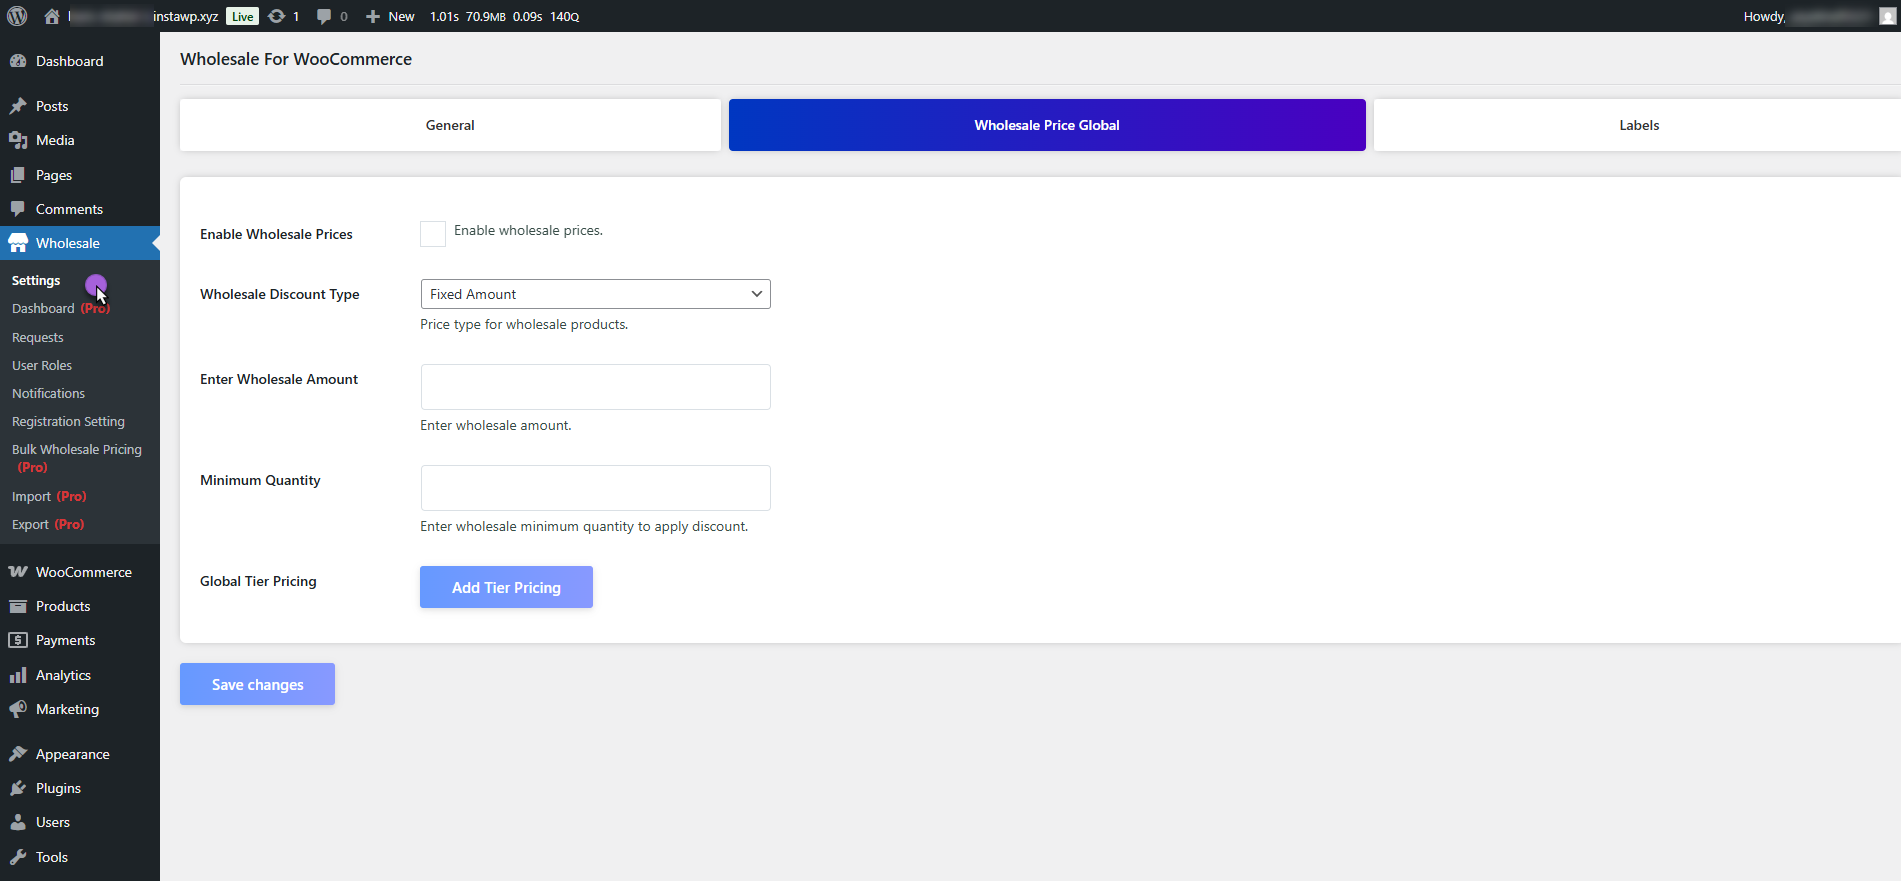
Enable Wholesale Prices
- Activate this option to apply wholesale pricing globally across your store.
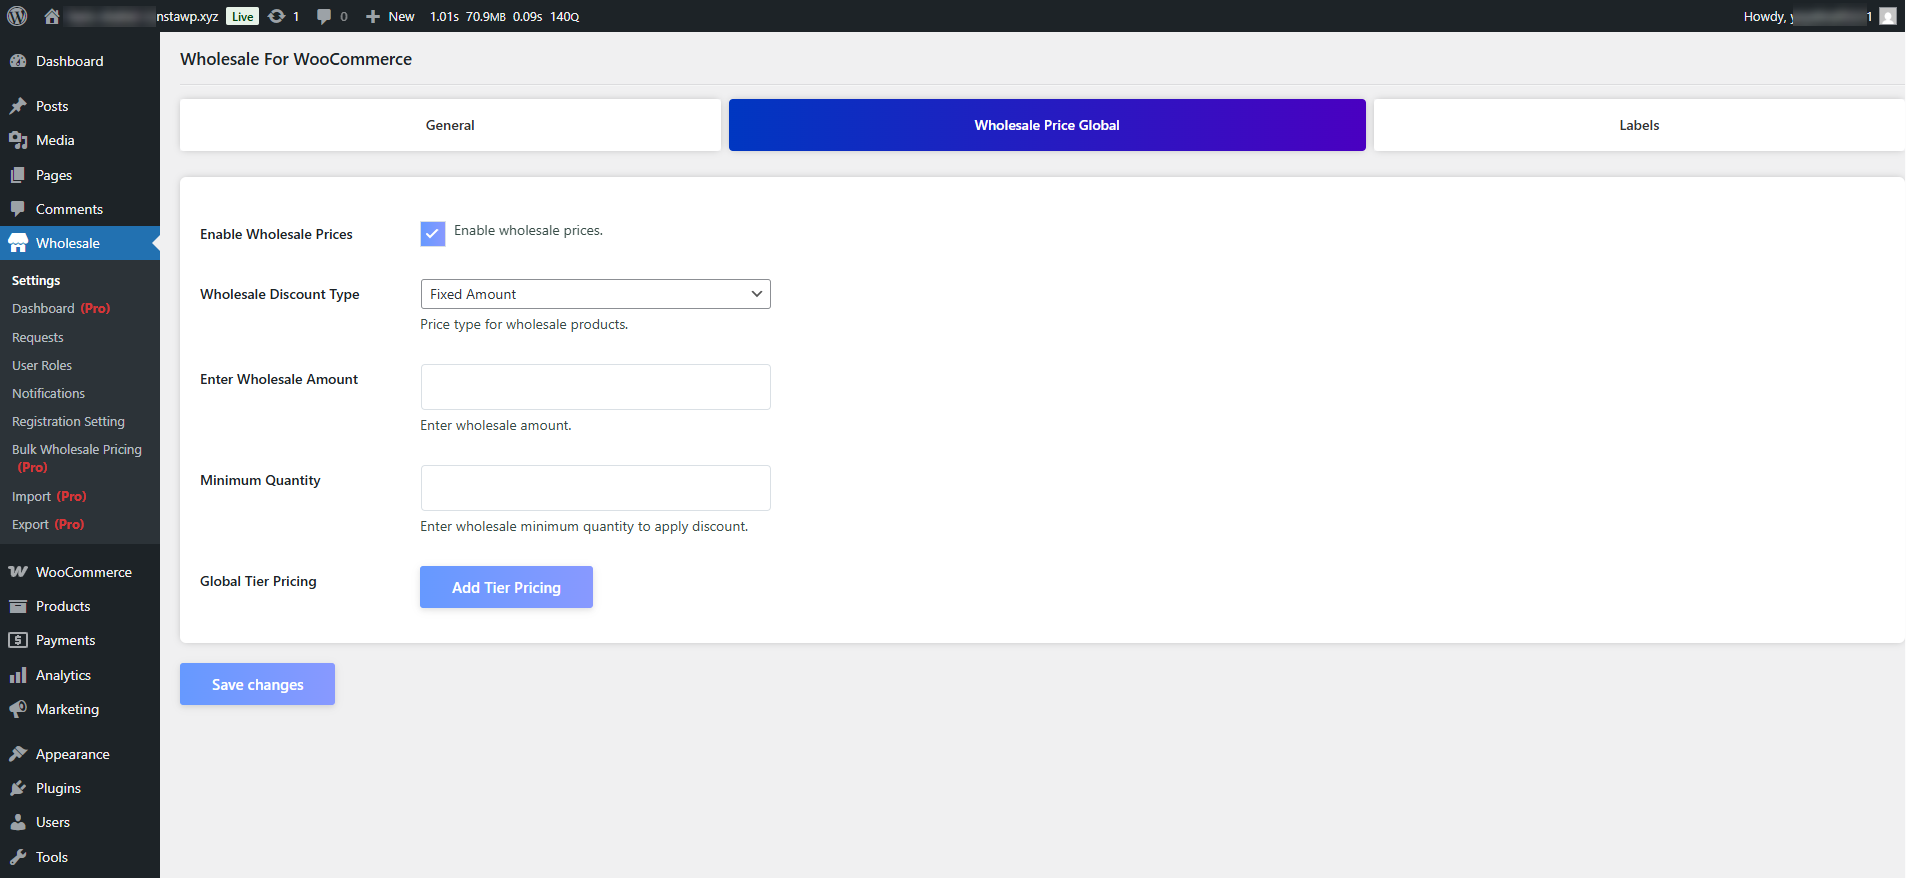
Wholesale Discount Type
Choose the discount type from the dropdown:
- Fixed Amount – Set a specific price for all products (e.g., $25 for every item).
- Percentage – Offer a discount based on a percentage of the retail price (e.g., set to 80 for a 20% discount).
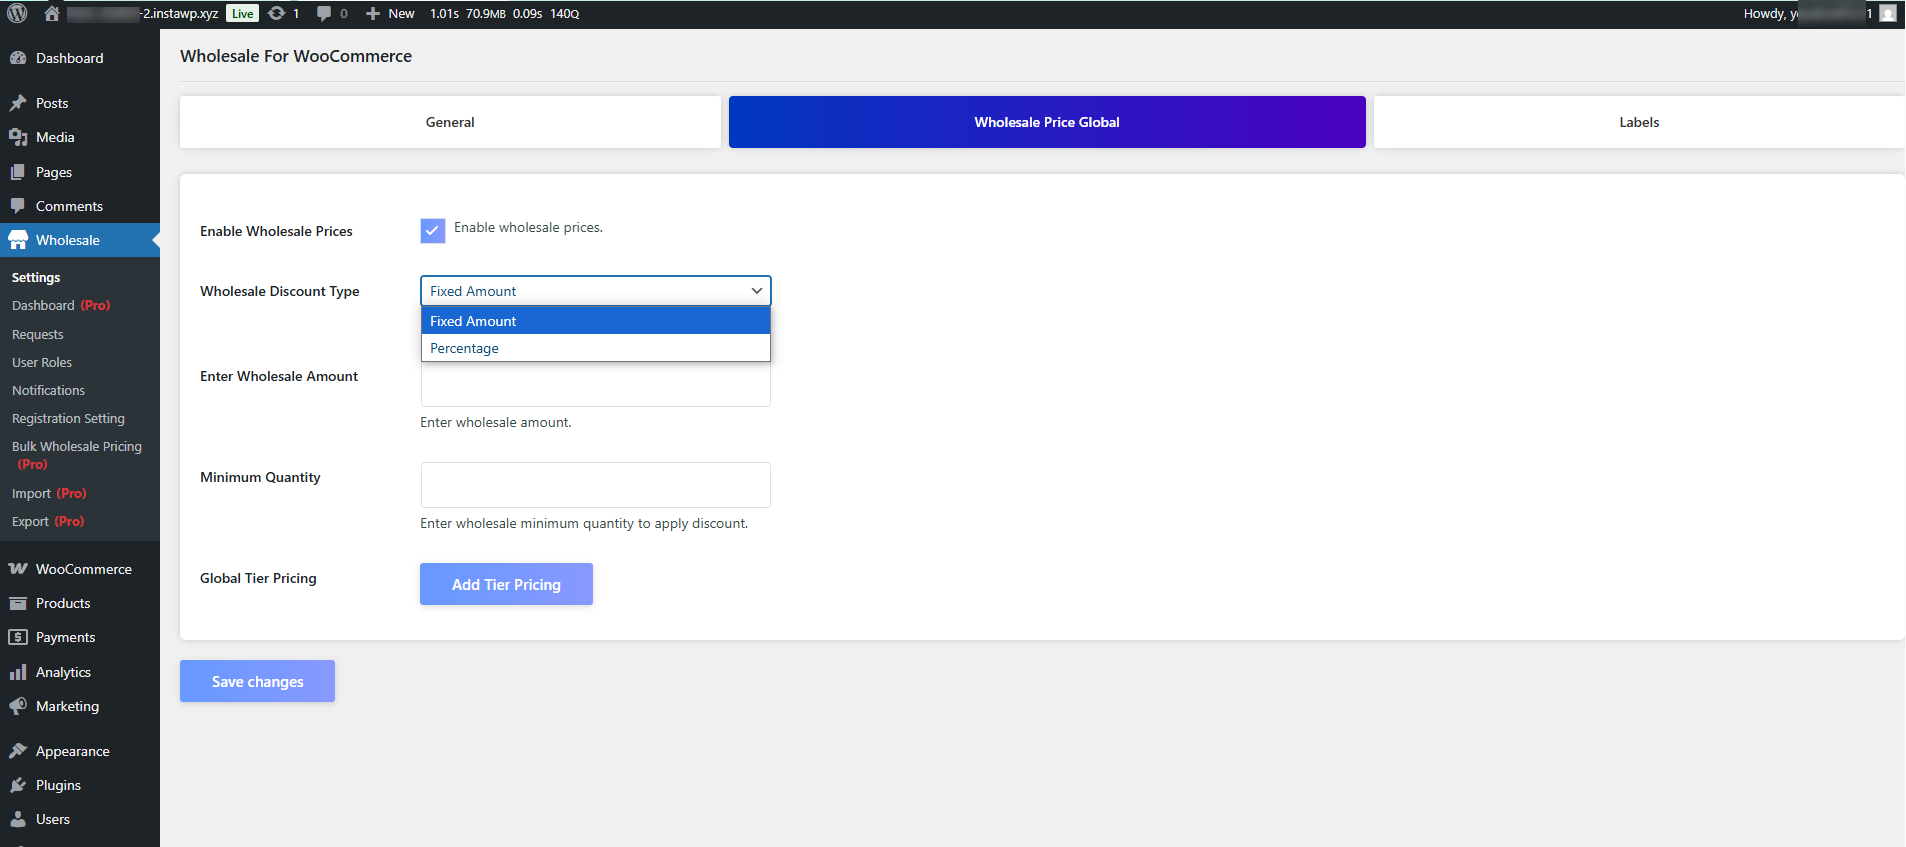
Enter Wholesale Amount
- This is the actual wholesale selling price, not a discount value.
- Applies to all products in your store.
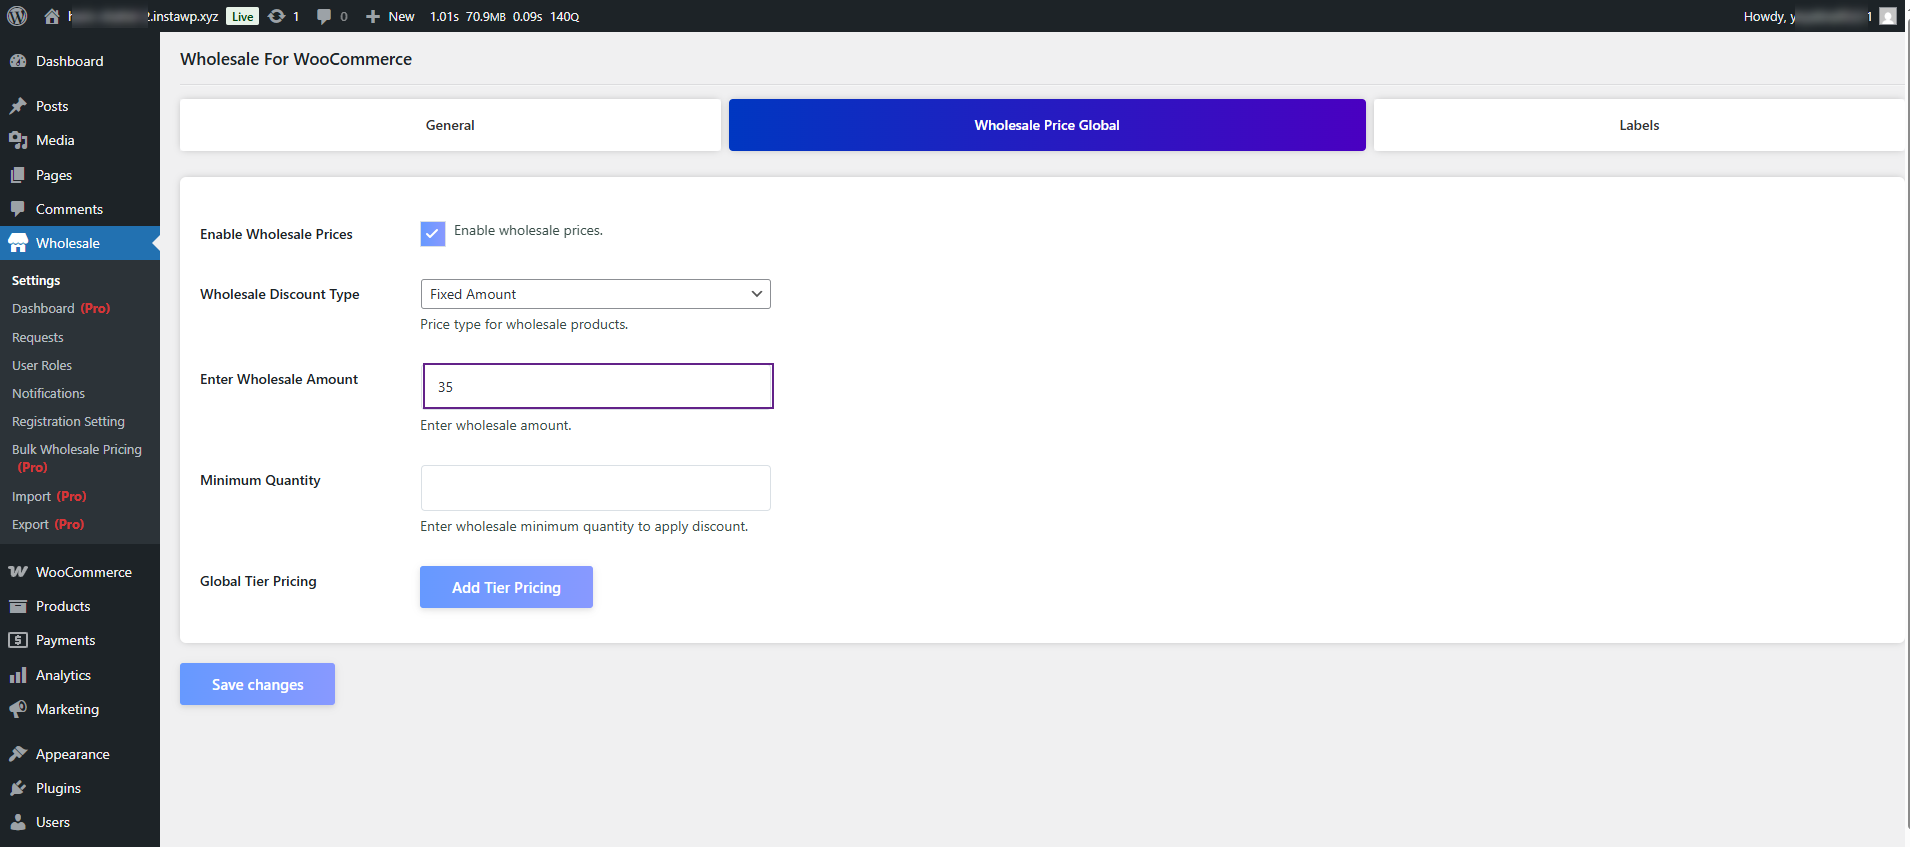
Minimum Quantity
- Set a minimum quantity requirement for wholesale customers to access wholesale prices.
- If the quantity condition isn’t met, the product will be charged at the regular retail price.
Global Tier Pricing (Optional)
- The Tier Pricing feature allows you to create multiple prices for multiple product quantities.
- Individual pricing can be set for different quantities of products.
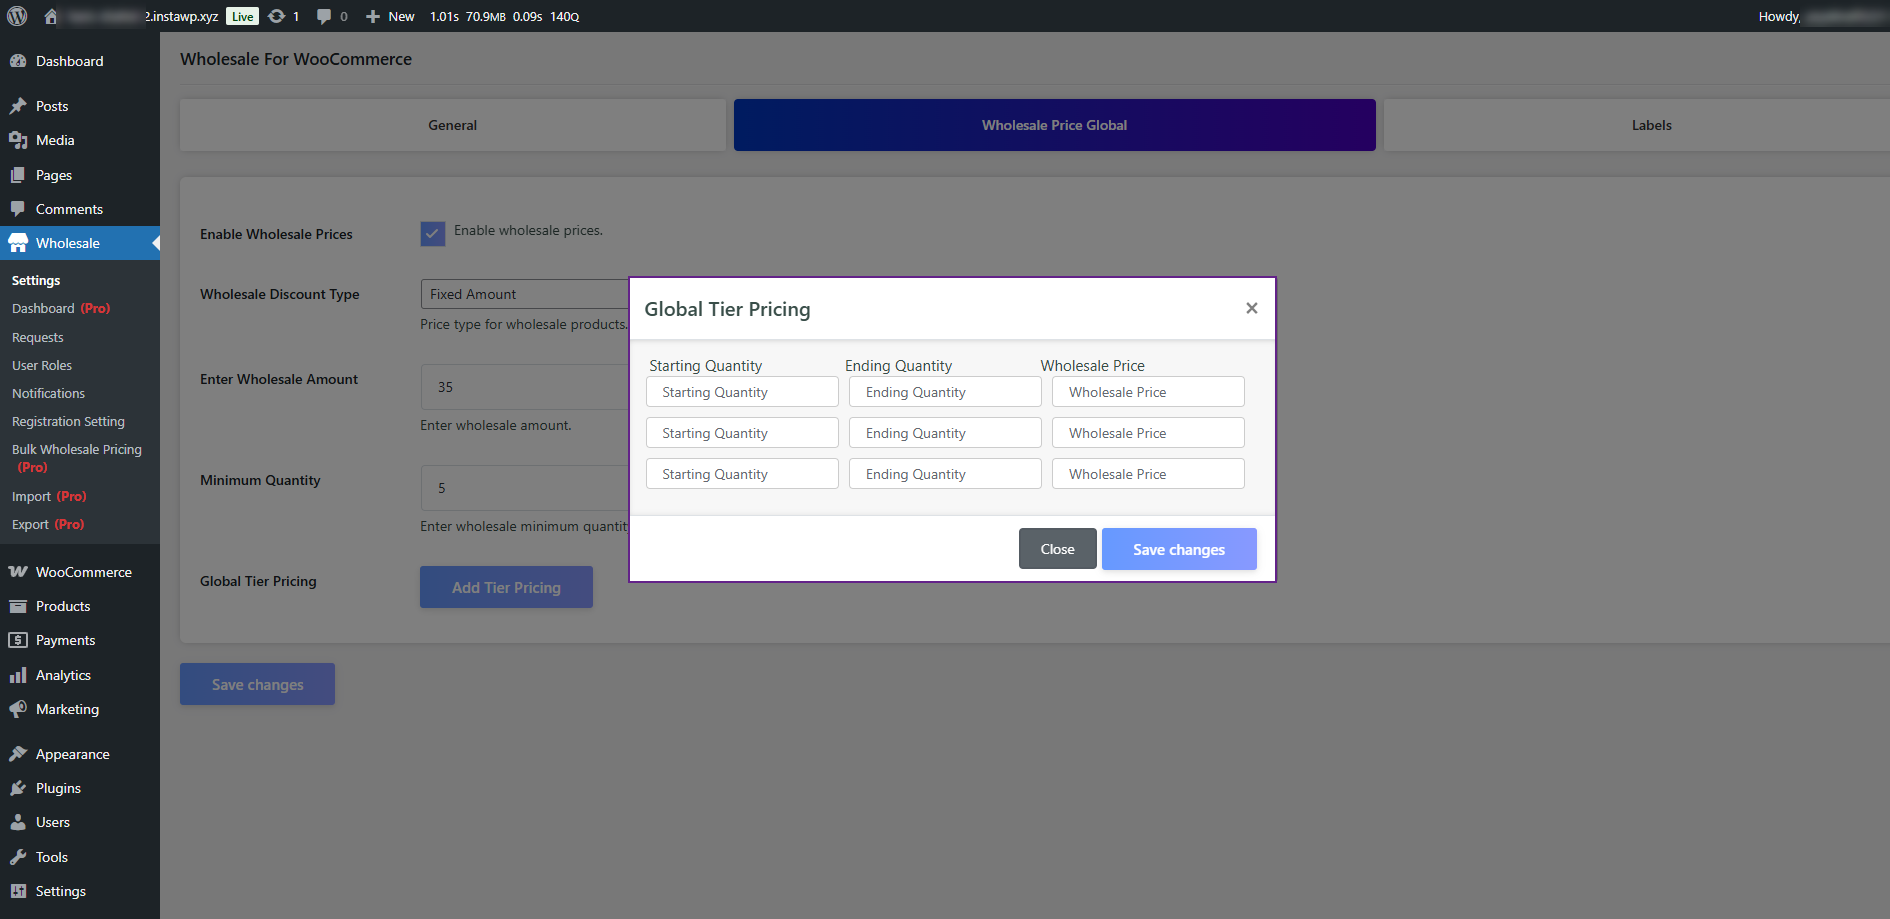
Note: In Wholesale Lite, the admin cannot define pricing for more than three tiers.
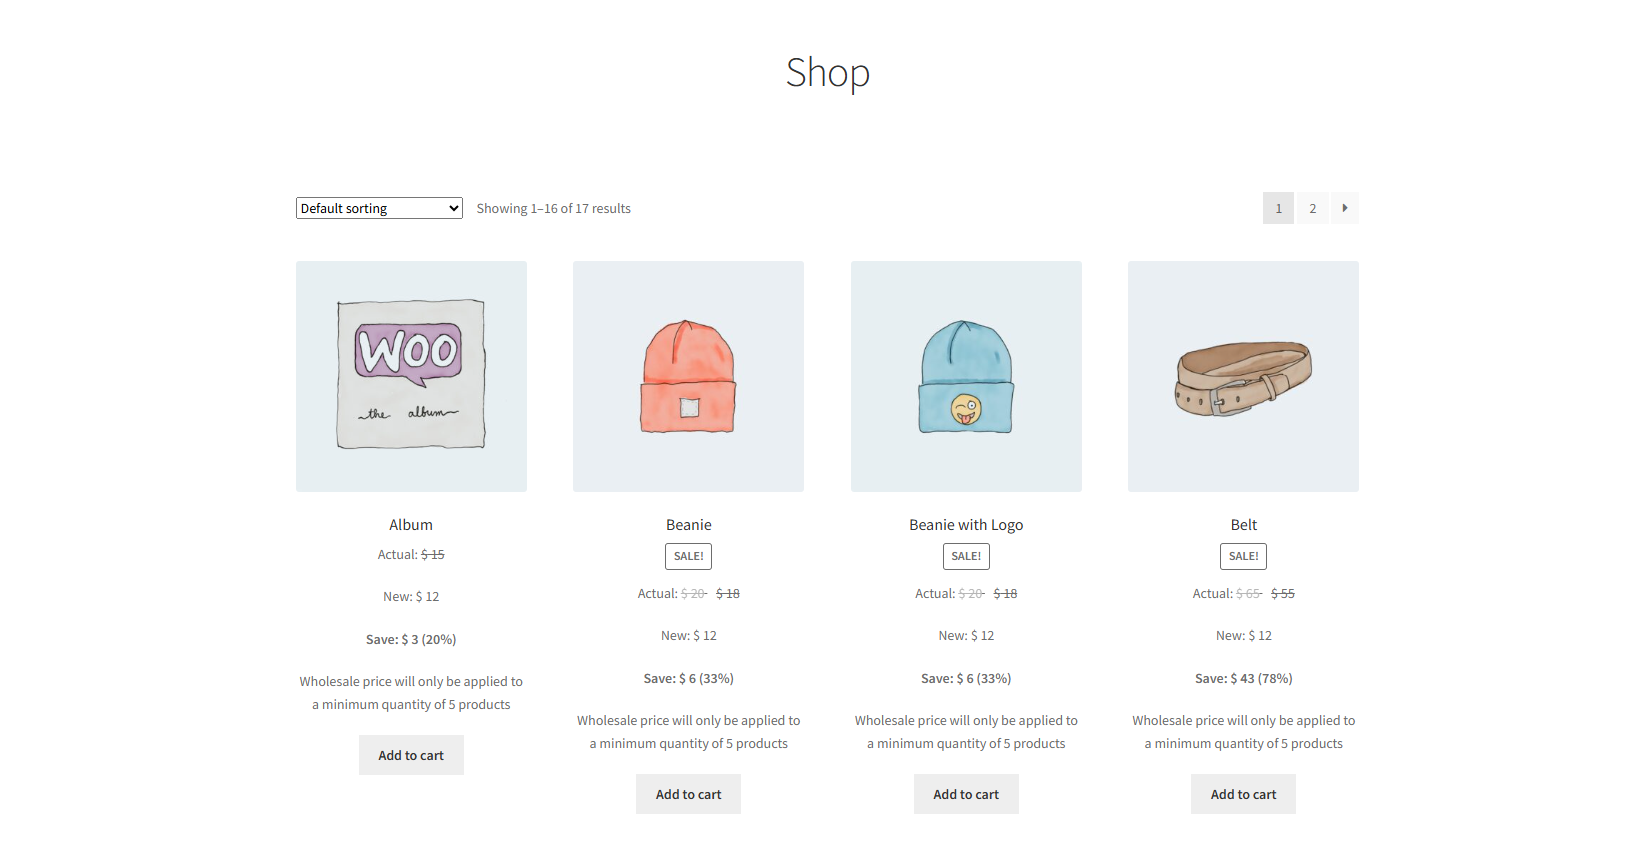
Front-End Impact #
- Go to our website.
- Navigate to the Shop page (must be logged in as a wholesaler).
Product-based Wholesale Pricing for Simple Products #
- Go to Products > All Products in your WordPress dashboard.
- Click Edit on the simple product you want to update.
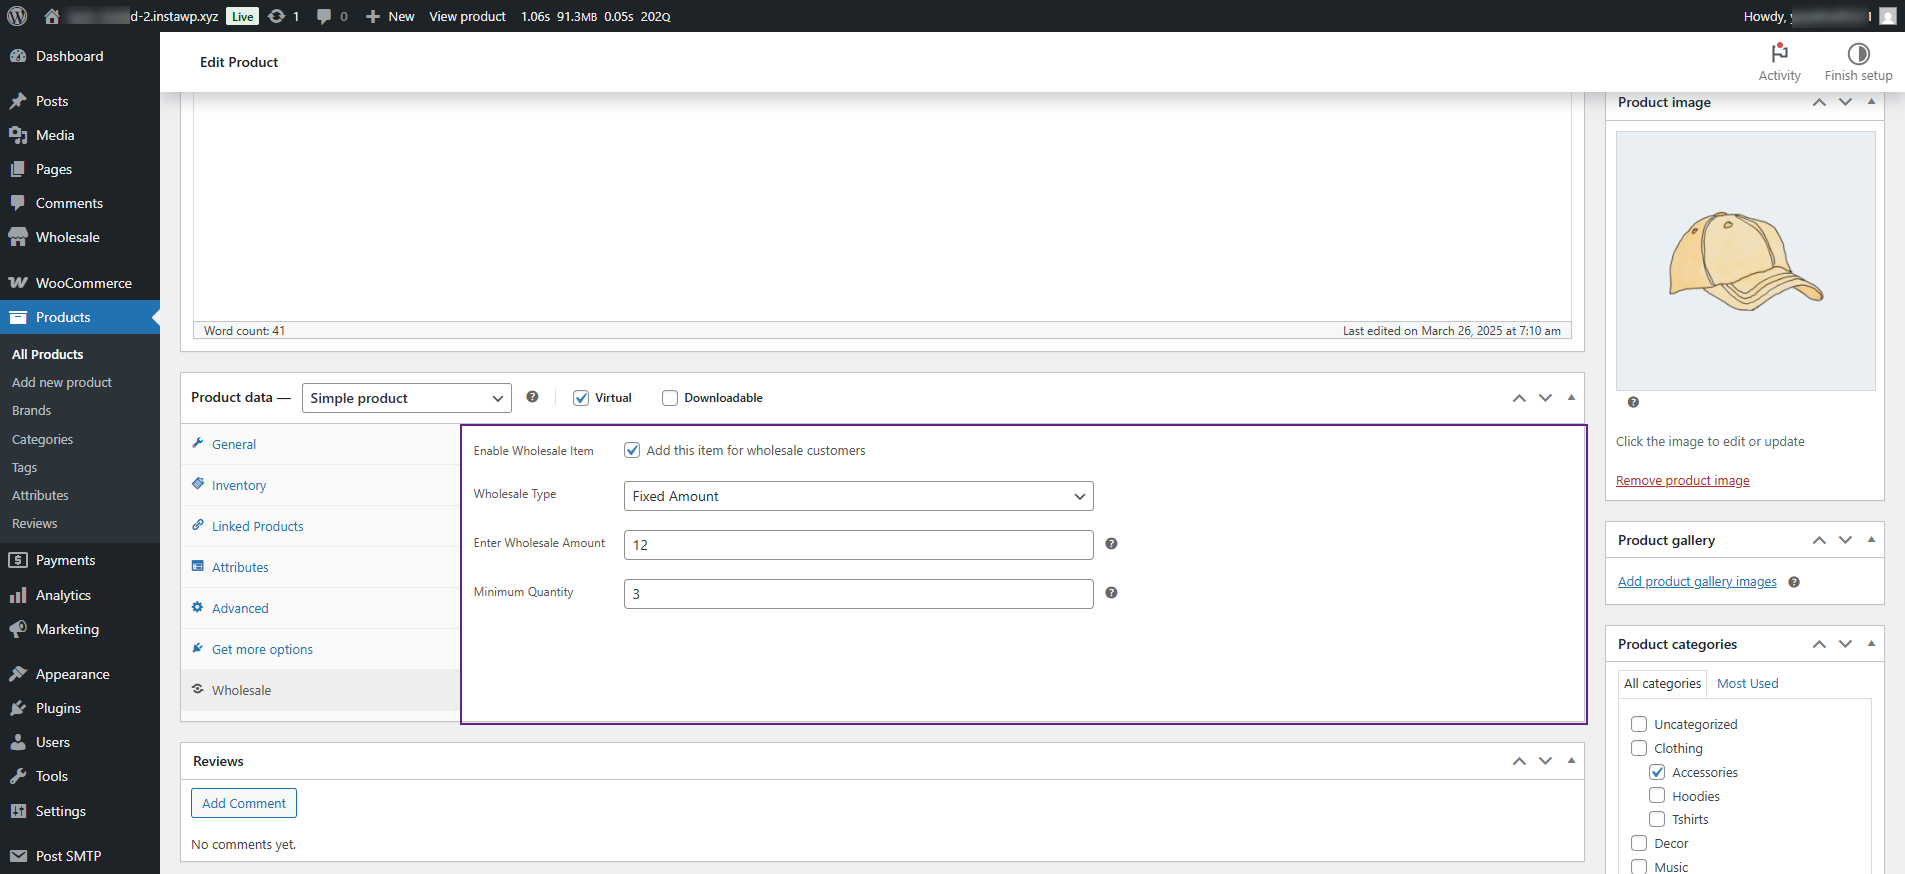
- Navigate to the Wholesale tab in the product data section.
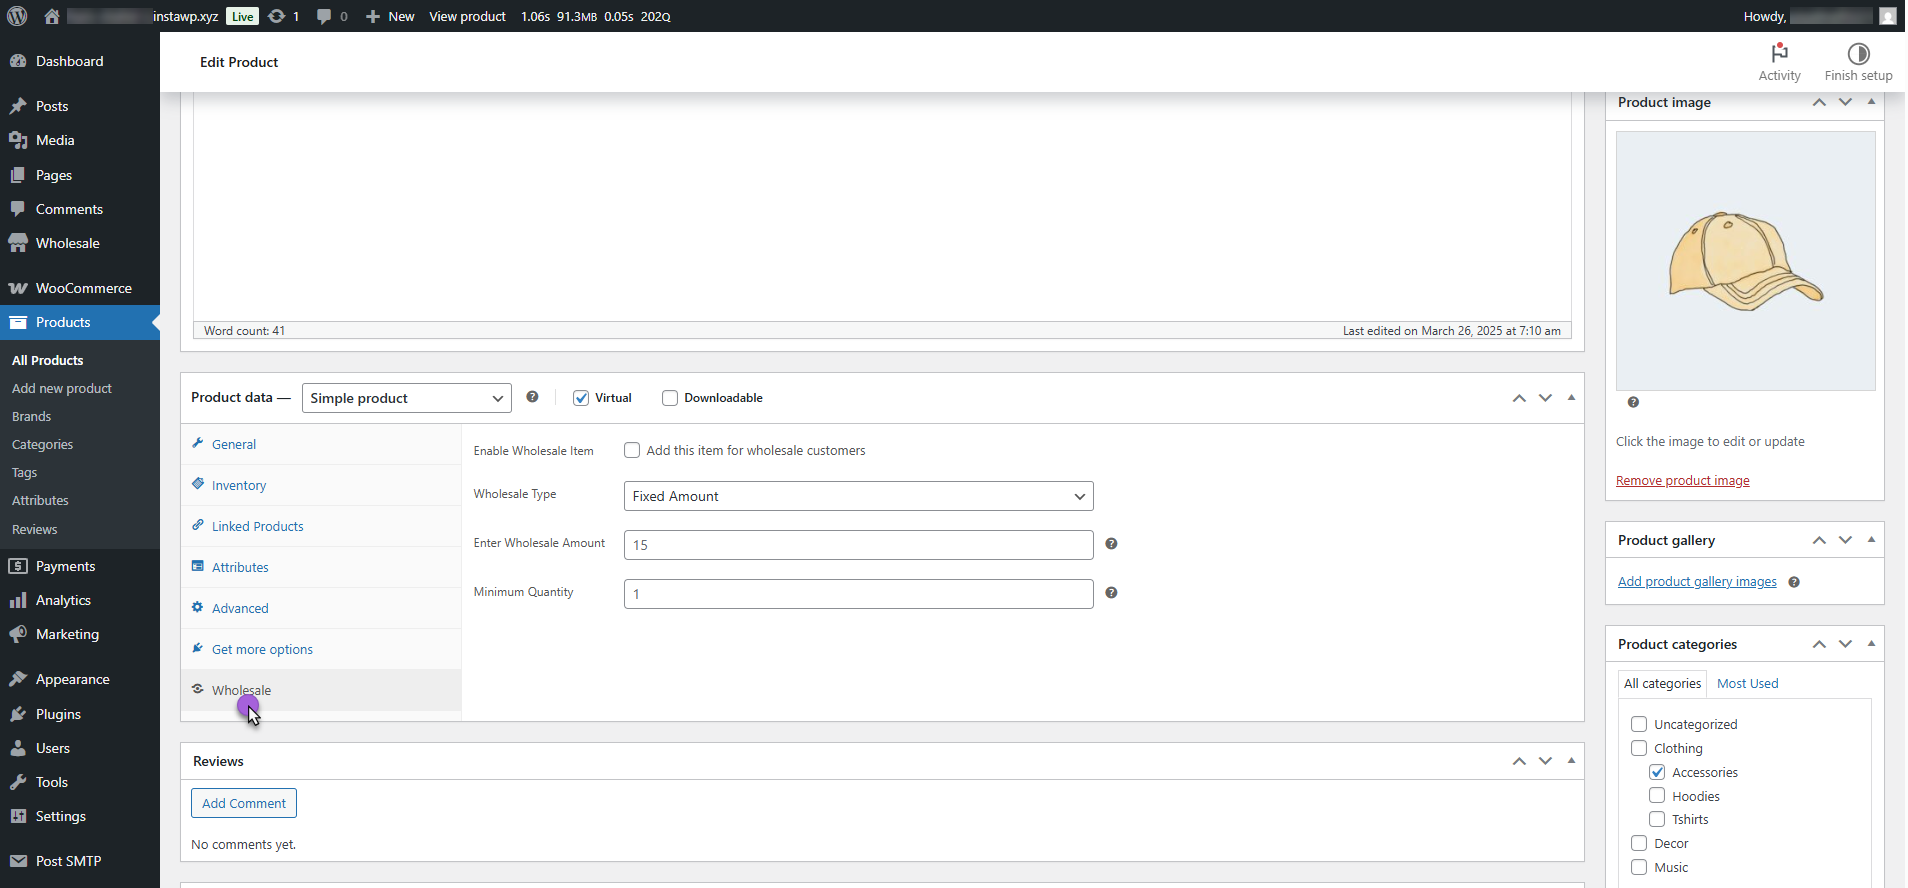
- Check the box Enable Wholesale Item.
- Select the Wholesale Type from the dropdown:
- Fixed Amount
- Percentage
- Enter the Wholesale Amount (the price or discount value, based on the type selected).
- (Optional) Set the Minimum Quantity required for wholesale pricing to apply.
- Click Update or Publish the product.
Front-End Impact #
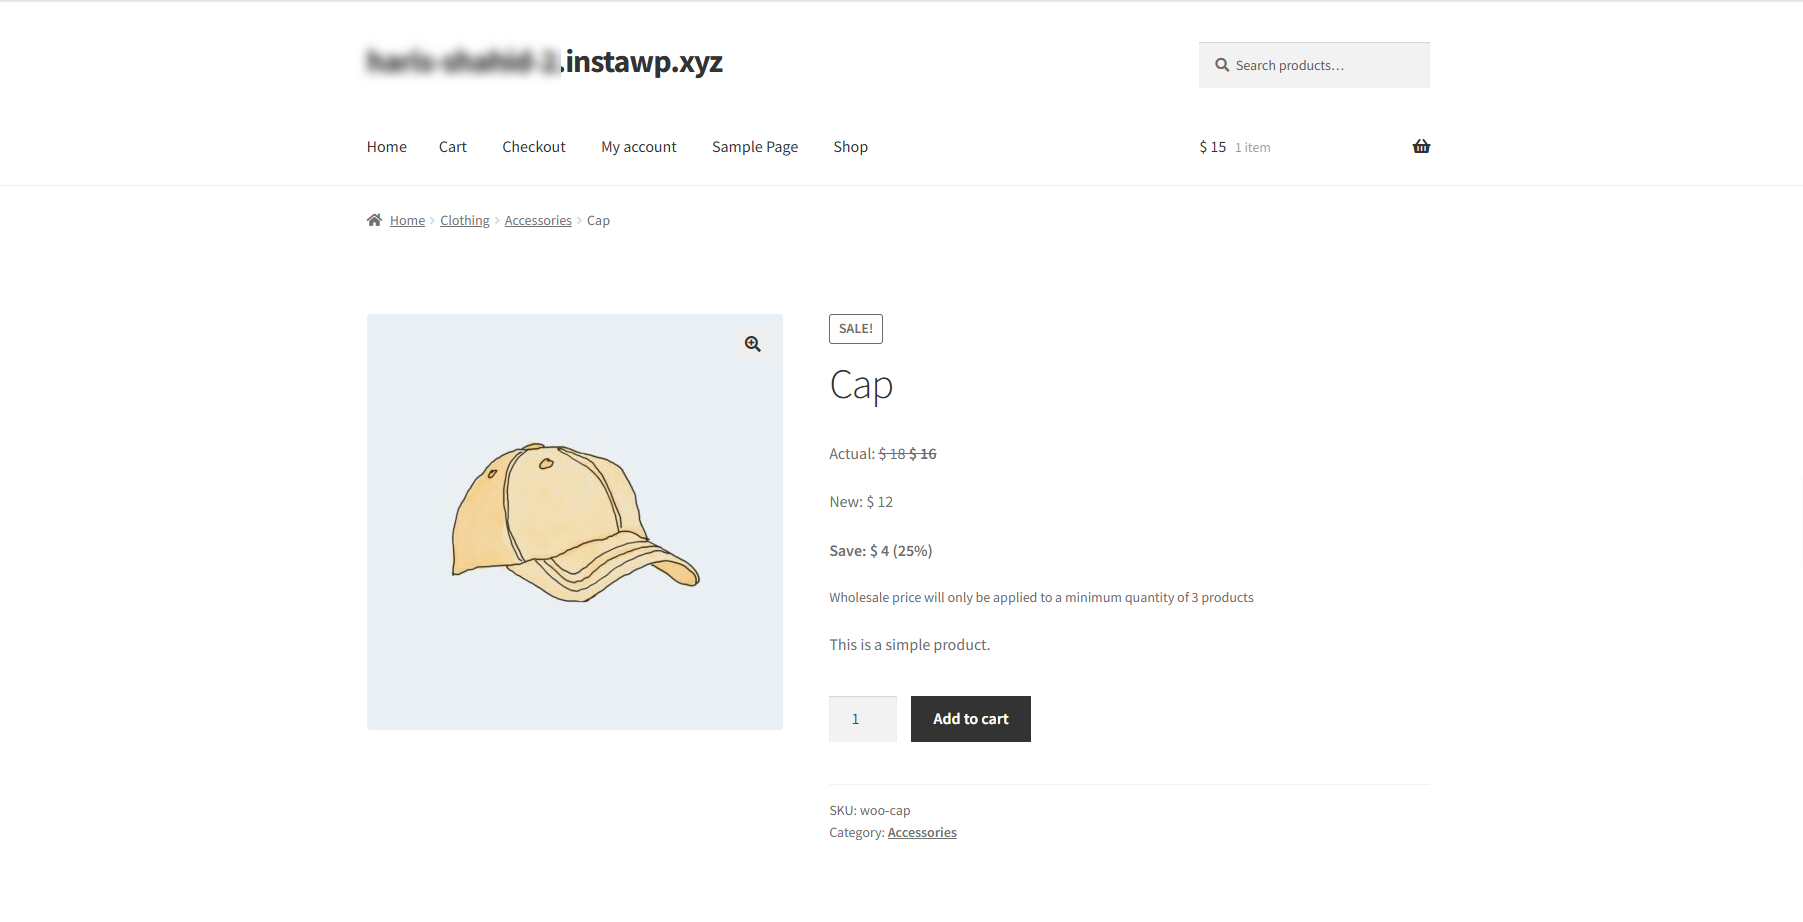
- Go to our website.
- Navigate to the Shop page (must be logged in).
- Click on Wholesale Pricing Product.
Product-based Wholesale Pricing for Variable Products #
- Go to Products > All Products in your WordPress dashboard.
- Click Edit on the Variable product you want to update.
- Navigate to the Wholesale tab in the product data section.
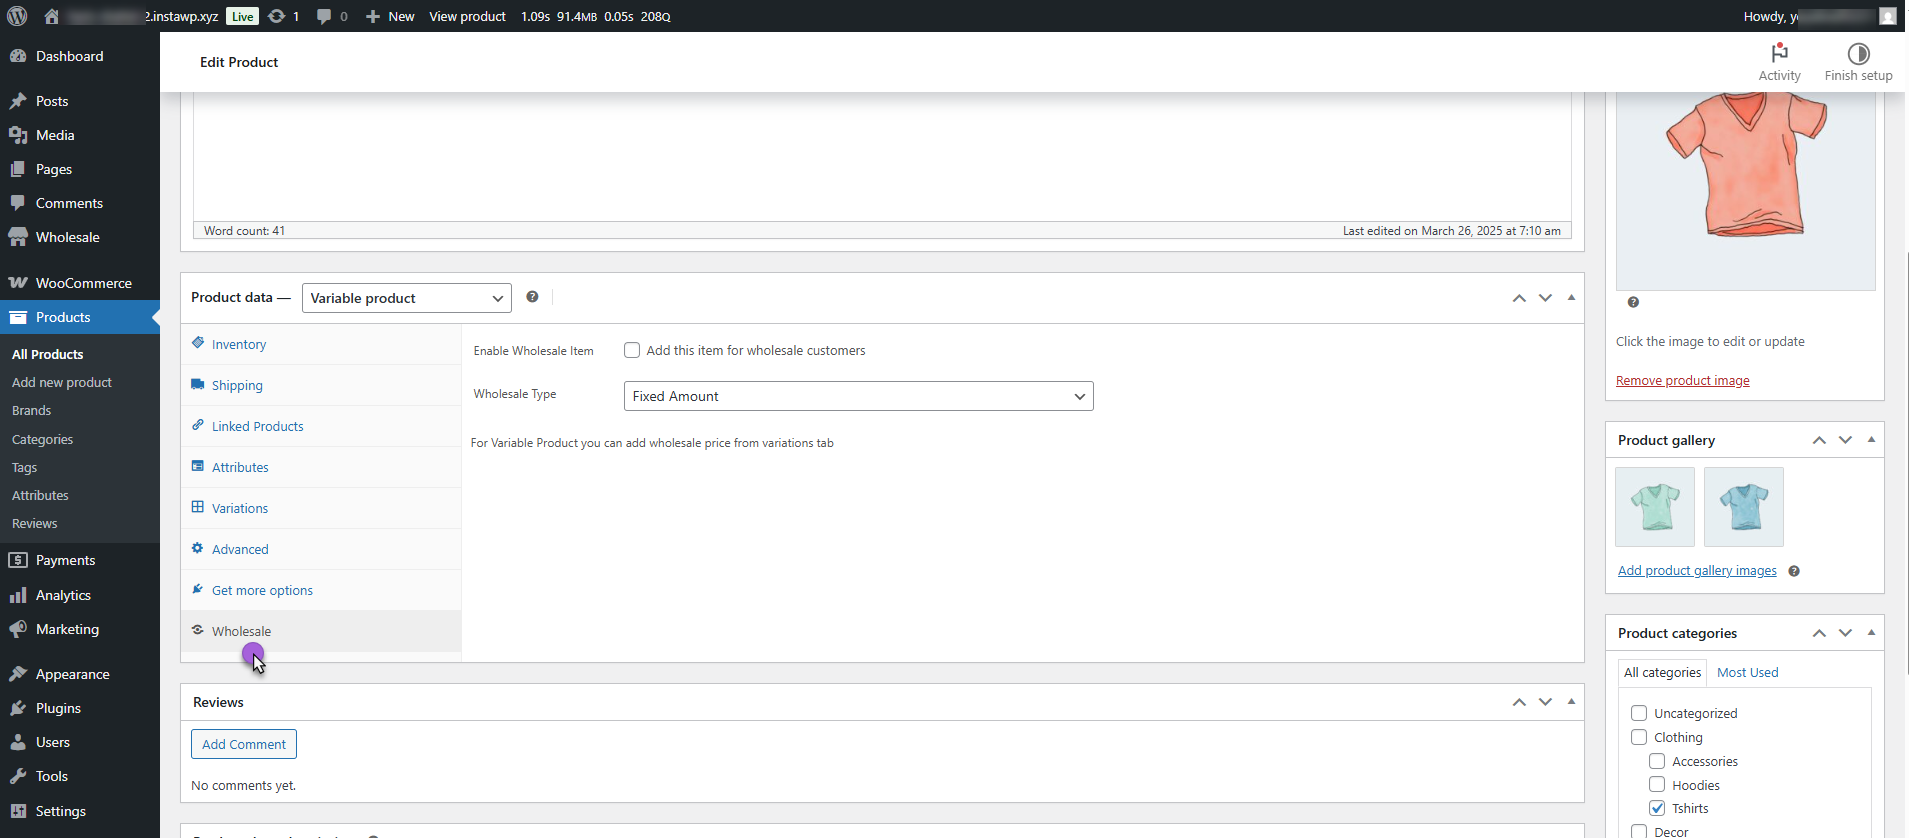
- Now, check the box to Enable Wholesale Item.
- Select the Wholesale Type from the dropdown:
- Fixed Amount
- Percentage

- Now, Navigate to the Variation Tab.
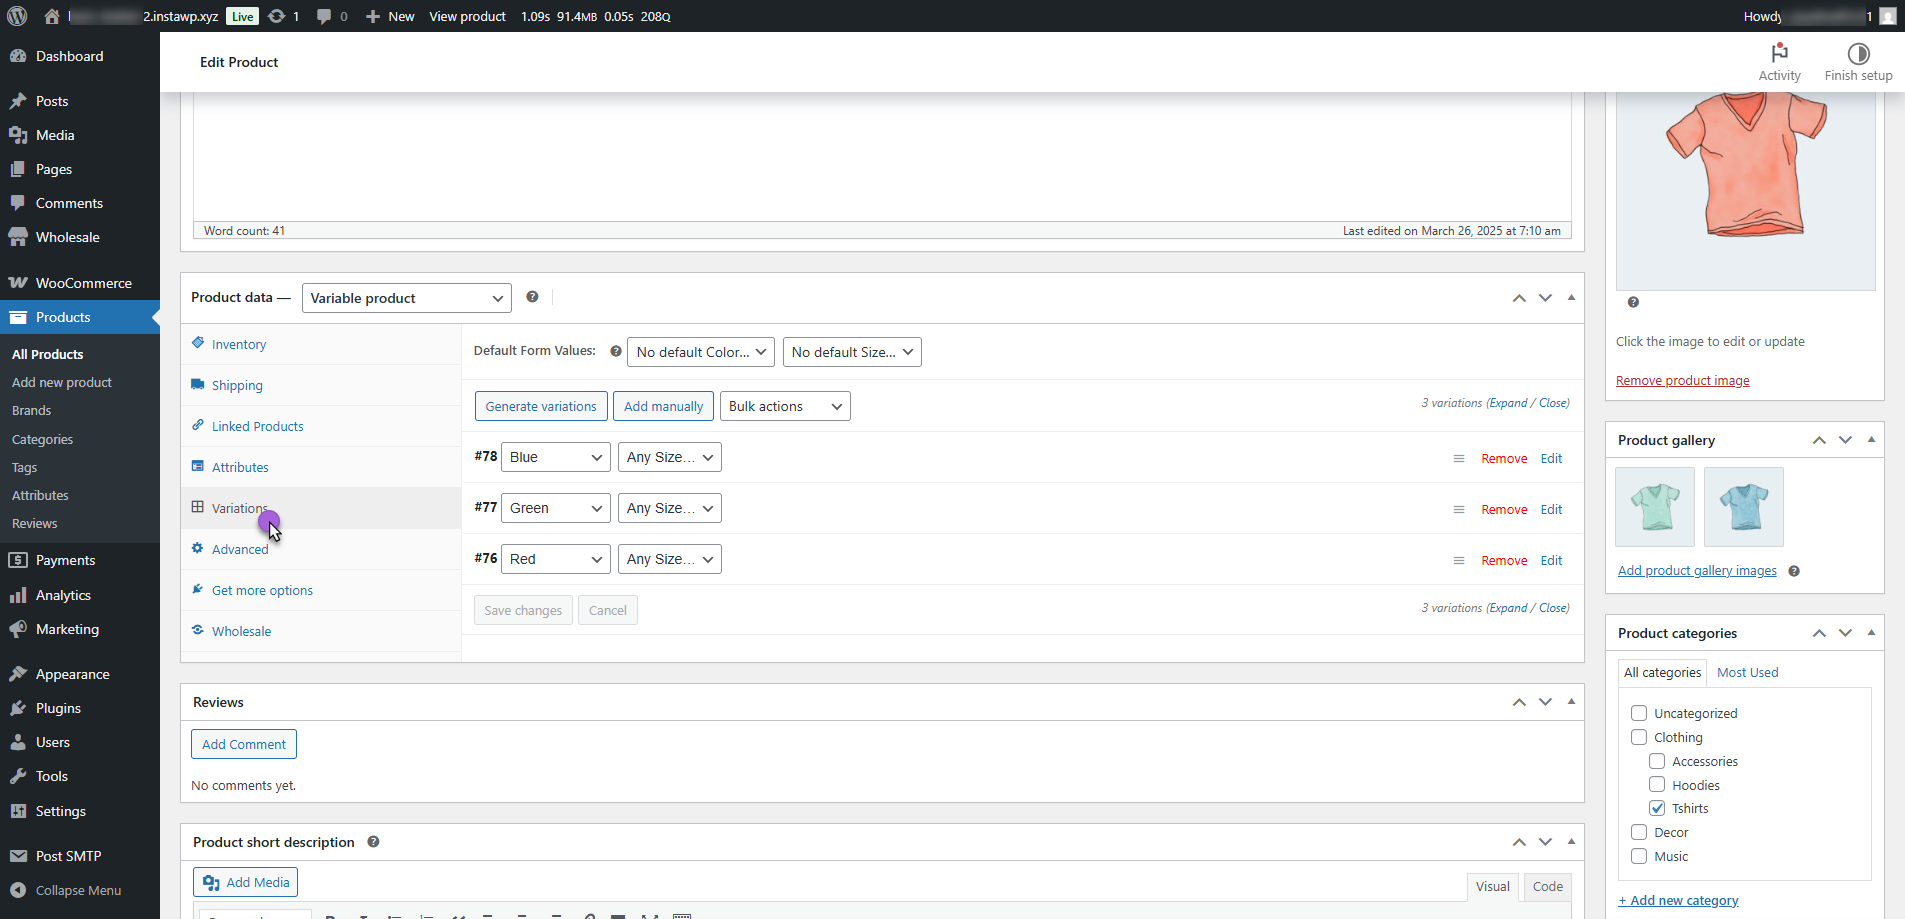
- Expand each variation.
- Scroll to find the wholesale fields:
- Enter Wholesale Price – this is the fixed price or the percentage discount, based on what you selected in Product Data > Wholesale > Wholesale Type.
- Minimum Quantity – (optional) Enter the minimum number of items a buyer must order to qualify for the wholesale price.
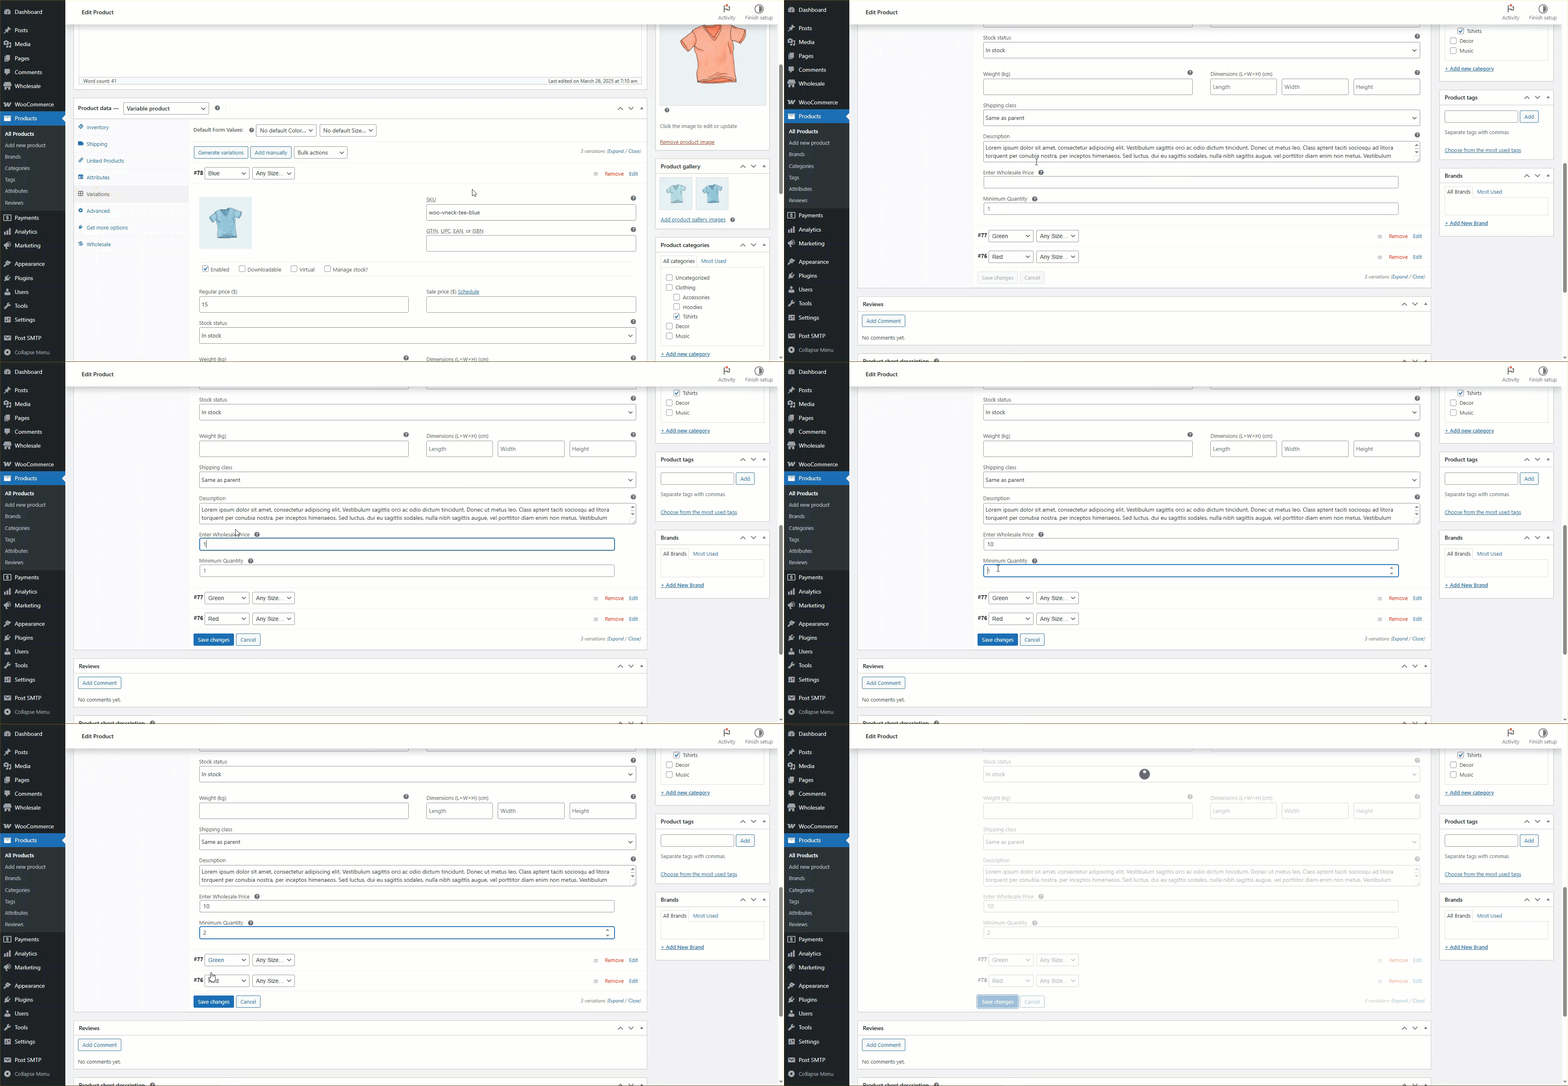
- Repeat this for all variations as needed.
- Click Update or Publish to save all changes.
Front-End Impact #
- Go to our website.
- Navigate to the Shop page (must be logged in as a wholesaler).
- Click on Wholesale Pricing Product.

Hide Price Labels (Retail and Save price) from wholesale customers #
This feature allows you to hide Retail and Save Price labels from Wholesale customers. This is the best solution for store owners who do not want to display retail prices on wholesale products.
Store owners who do not want to show retail and save prices can click on the hide price labels option from Wholesale > Settings. Retail and Save Price labels will be hidden from the shop and product page.
Hide price labels #
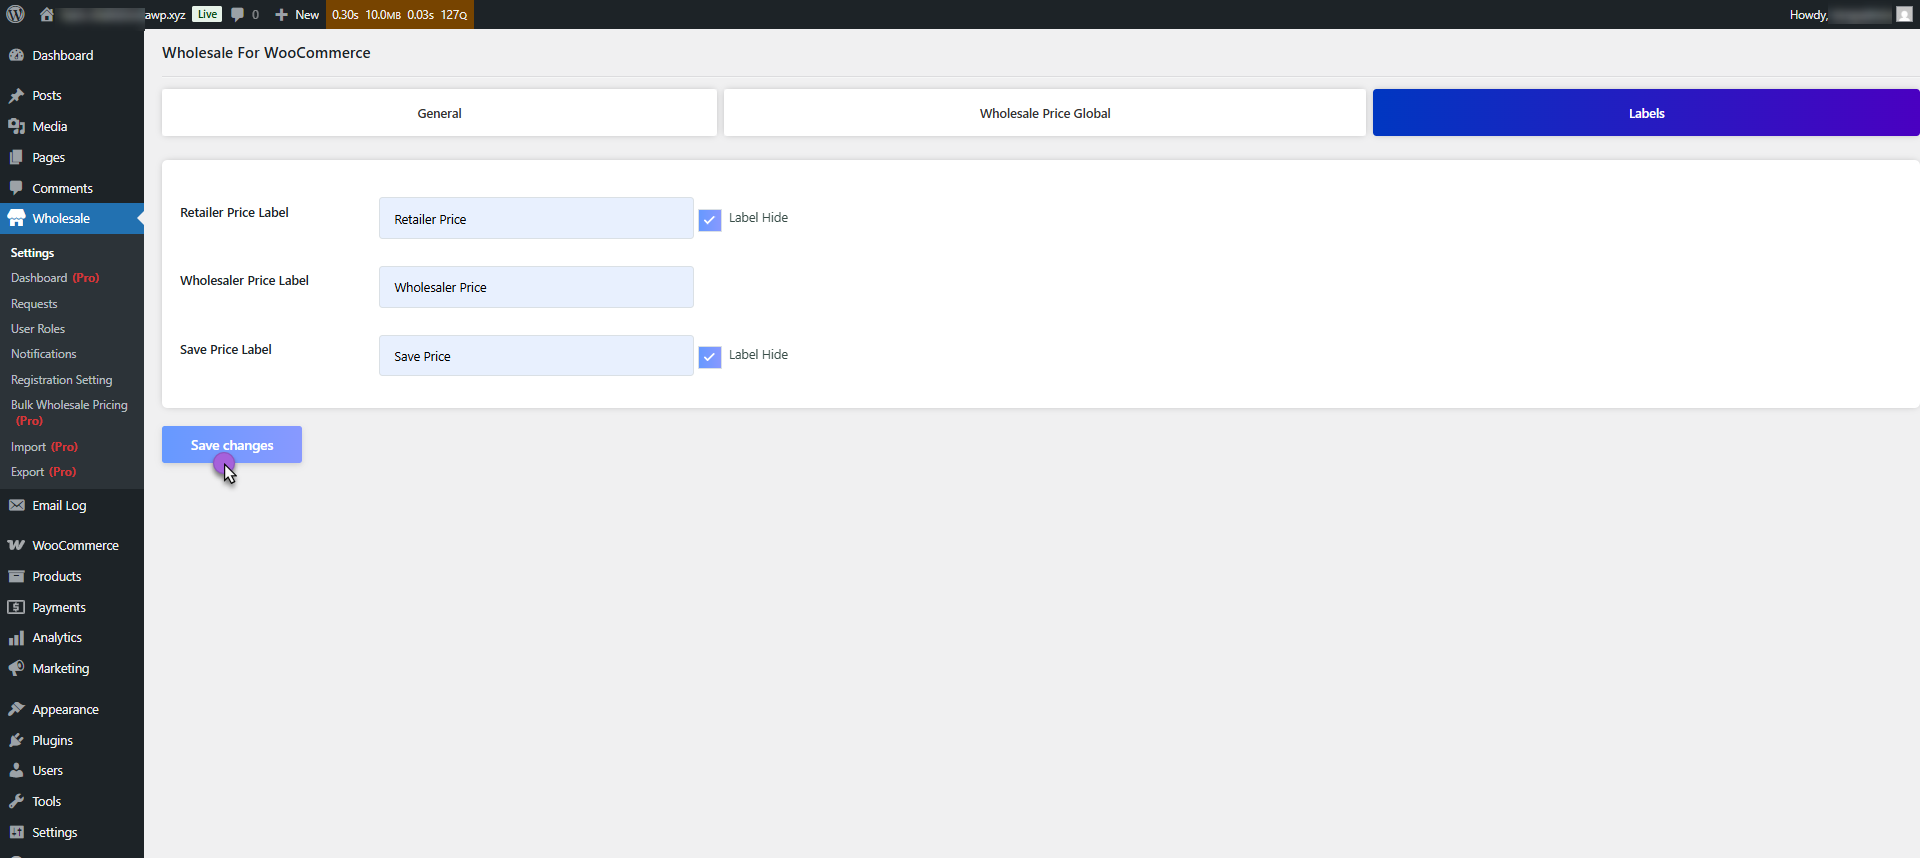
- Go to Wholesale > Settings.
- Click on the Labels tab.
- Enter the labels replacing the Retailer, Wholesaler Price, and Save Price.
- Click on the Label Hide check box.
- Click on Save changes.
General Tab #
Disable Coupons (General Tab) #
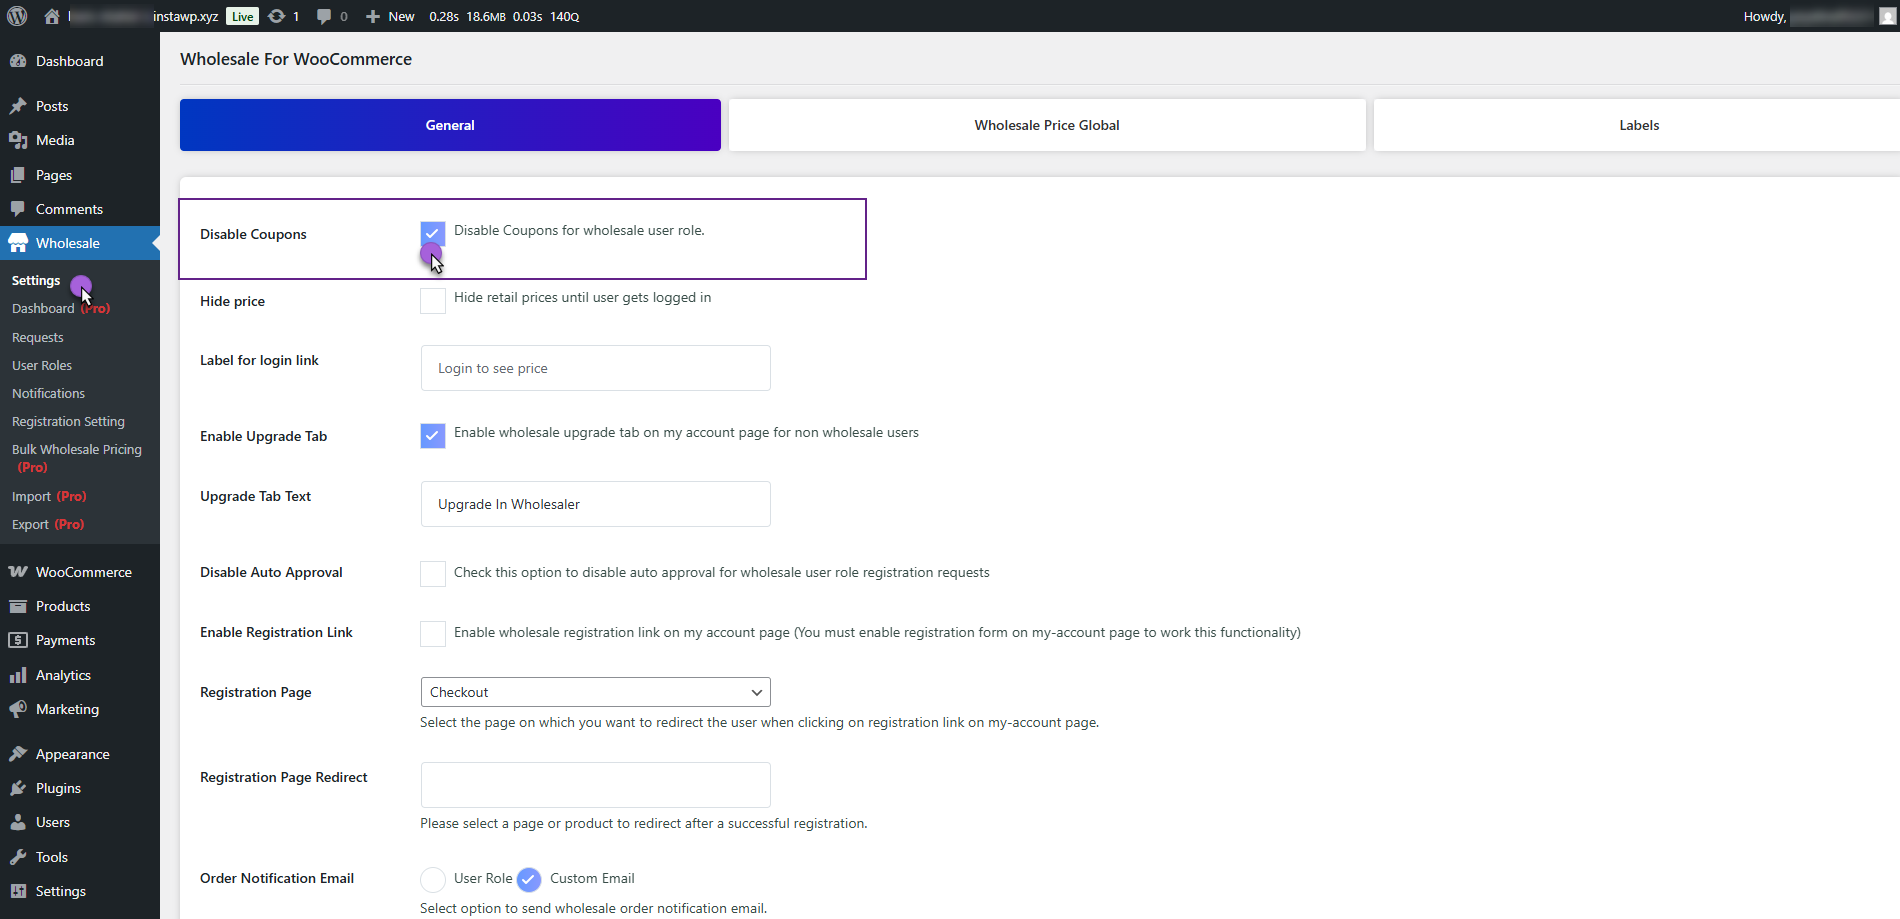
You can disable Coupon Codes for Wholesale customers by clicking the checkbox (as shown in the screenshot below). When coupon codes are disabled for all wholesale roles, customers cannot utilize their coupons on the cart and checkout pages.
- Navigate to Wholesale > Settings > General.
- Locate the option Disable Coupons for All Wholesale Users.
- Check the box to Disable Coupons for all user roles.
- Click Save Changes to apply the settings.
Hide Price(General Tab) #
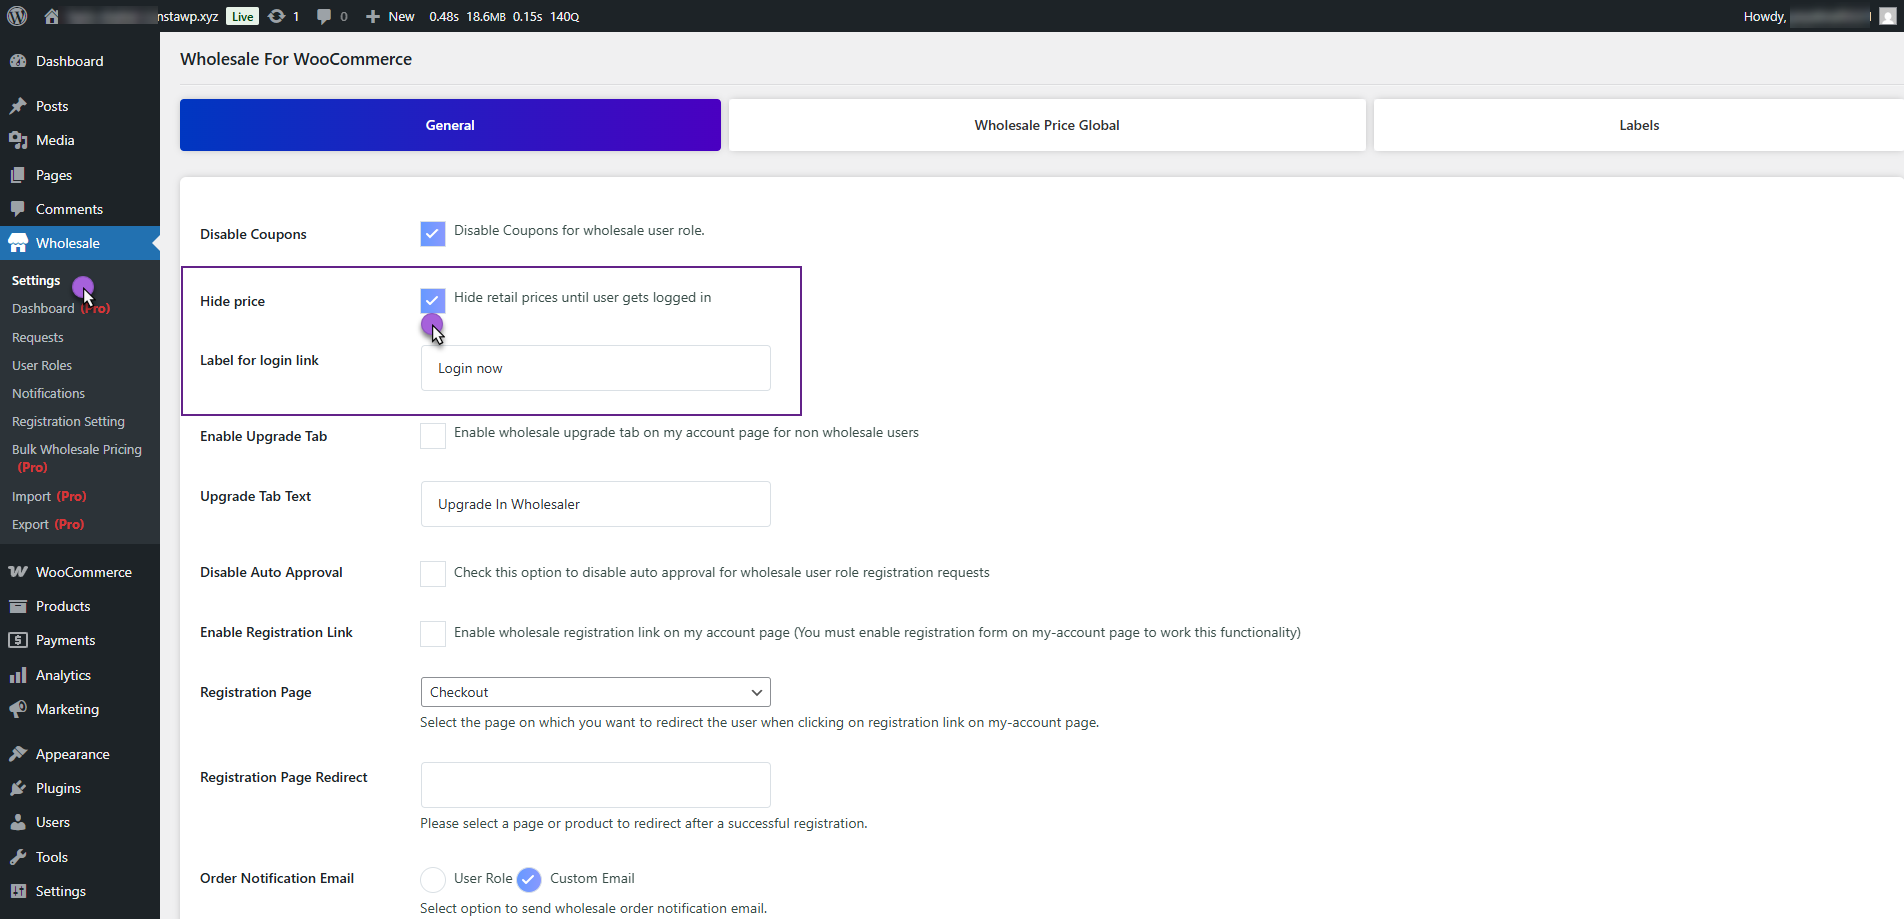
The Hide Price Until Login setting hides all product prices from guest (non-logged-in) users. It ensures that only registered and logged-in users can view product pricing, encouraging user registration and protecting wholesale pricing from the general public.
- Navigate to Wholesale > Settings > General.
- Locate the option “Hide Price”.
- Check the box to hide retail prices until the user is logged in.
- Set the Label for Login Link to display a custom message (e.g., “Login to view prices”).
- Click Save Changes to apply the settings.
Front-End Impact #
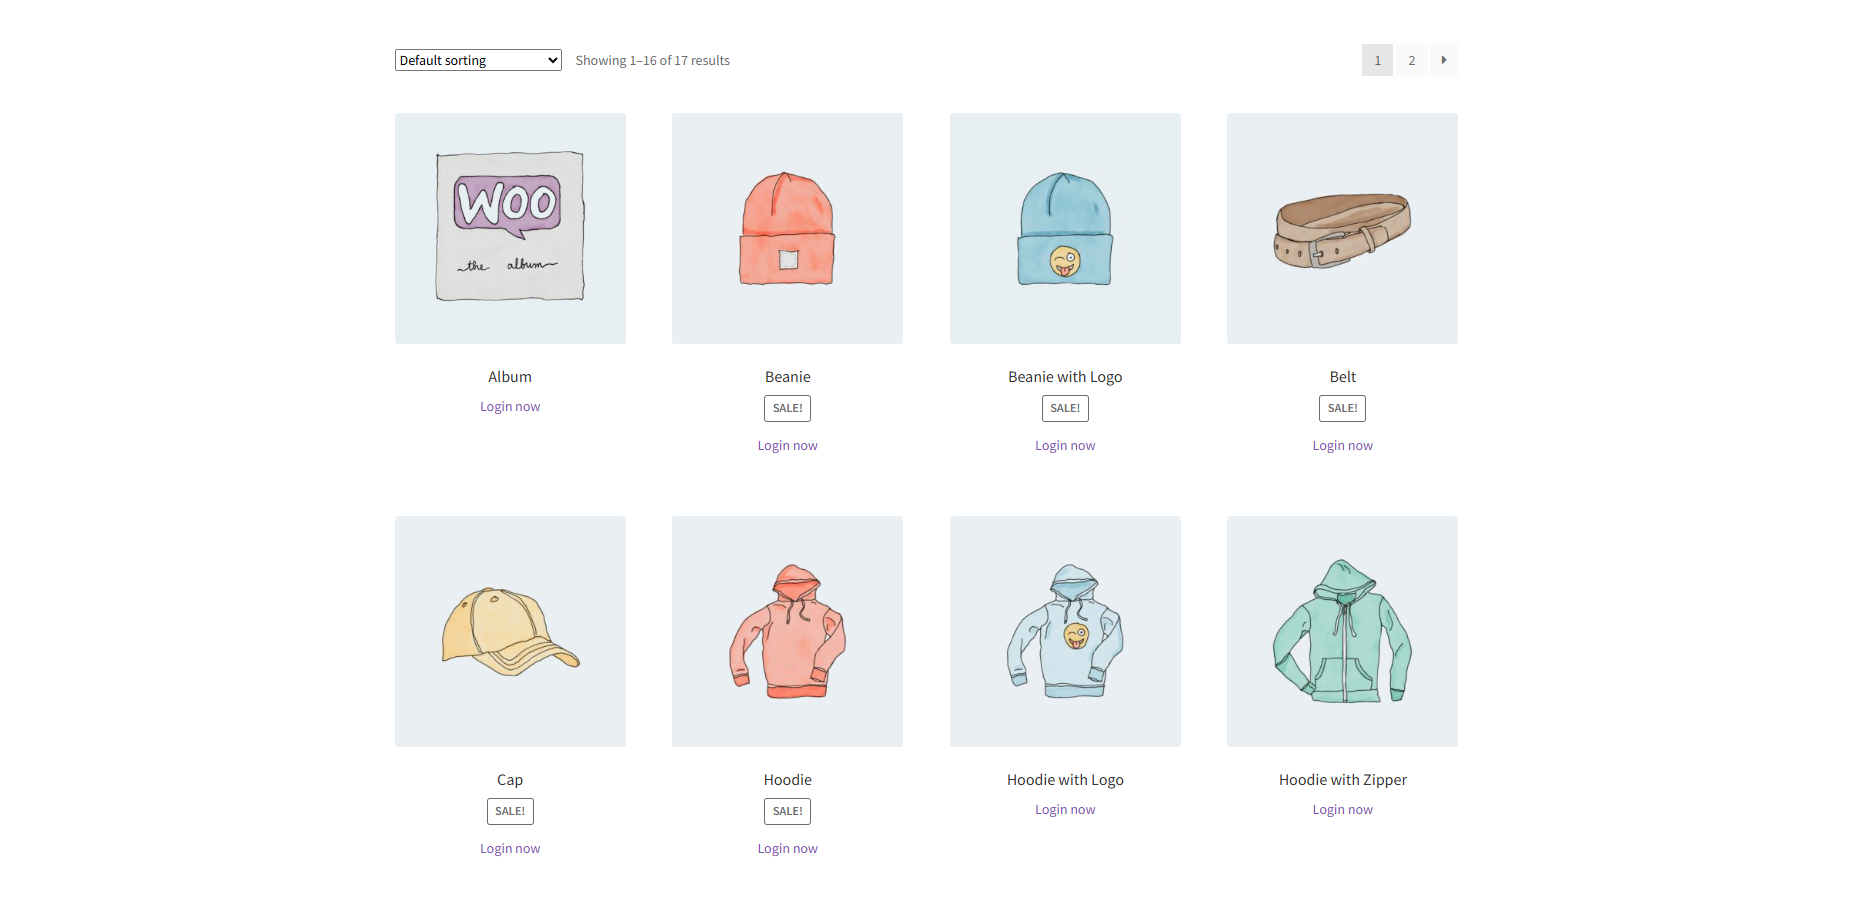
- Go to the Shop page in guest mode (not logged in users).
- You will see a label or message prompting you to log in to view wholesale prices (e.g., “Login to view wholesale pricing”).
Wholesale Order Notification Email Settings ( General Tab ) #
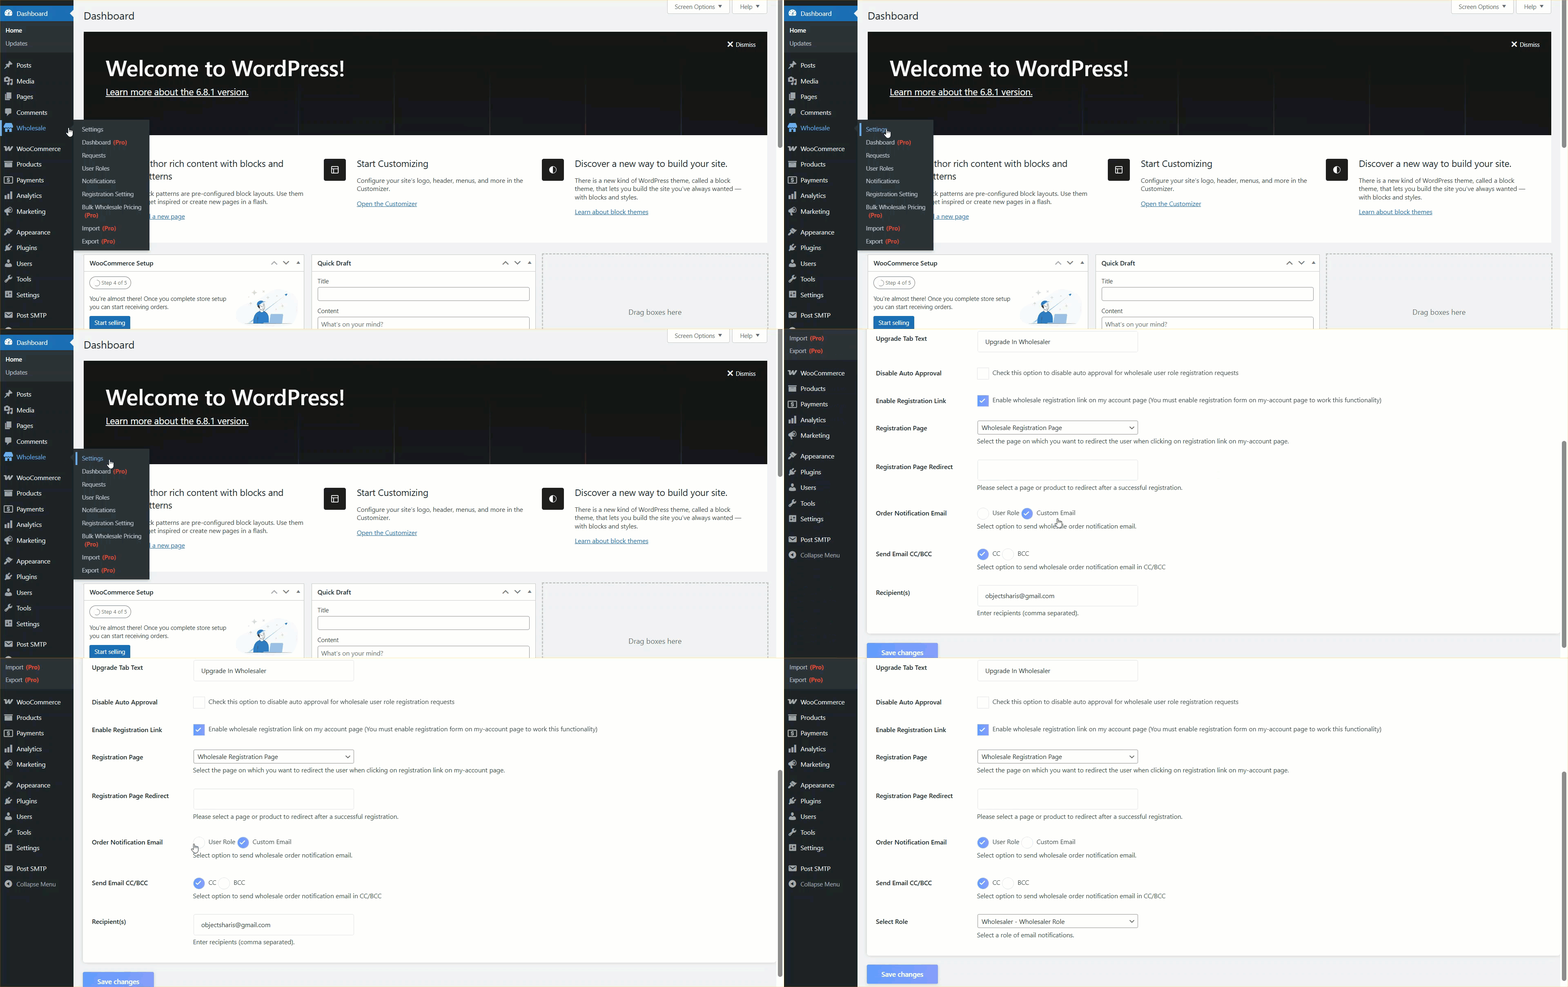
- Go to Wholesale > Settings > General Tab to configure the notification settings for wholesale orders.
- This option allows you to automatically send an email notification when a wholesale order is placed.
- You can choose between sending the email to a user role (e.g., Administrator, Shop Manager, Wholesaler—Wholesaler Role) or a custom email address.
Send Email CC/BCC #
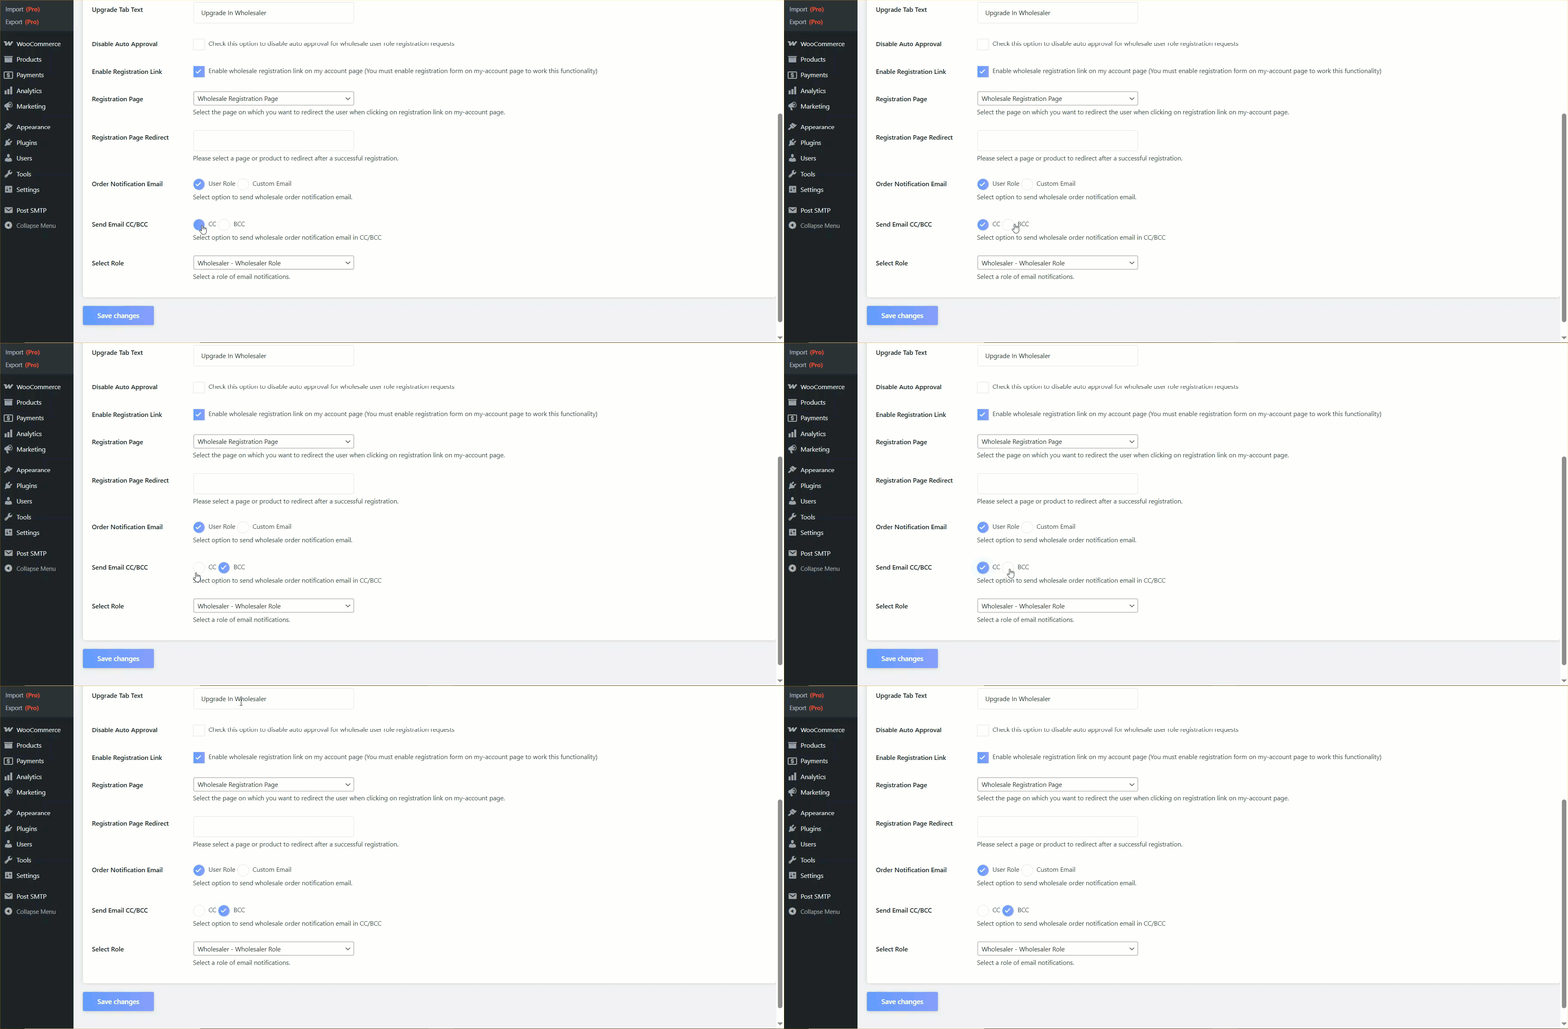
- This setting enables you to send a carbon copy (CC) or blind carbon copy (BCC) of the wholesale order notification email.
- Select whether the additional recipients should receive the email as a CC or BCC.
Recipient(s) #
- If User Role is selected, the field changes to a drop-down menu from which you can choose one user role at a time.

- If Custom Email is selected, the field remains a manual input, where you enter one or more email addresses separated by commas.
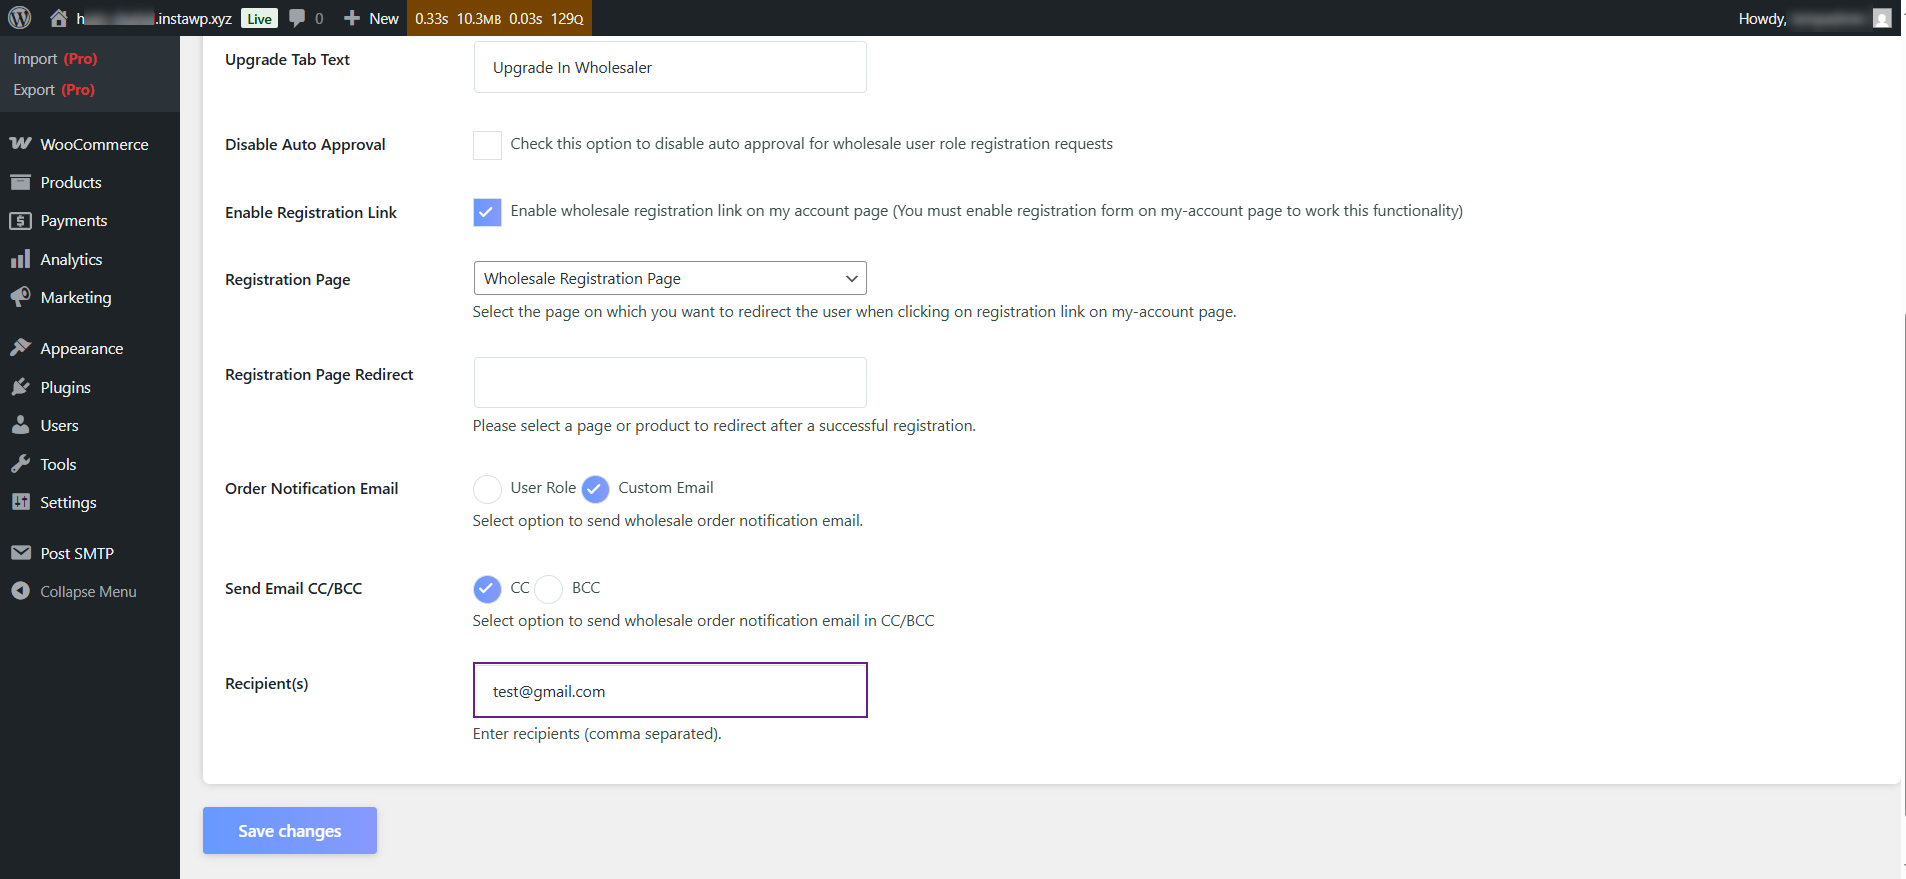
- Click on Save changes.
Frontend Impact
- After logging in as a Wholesaler role on the front end.
- Click the Add to cart button to buy the product as a wholesale.
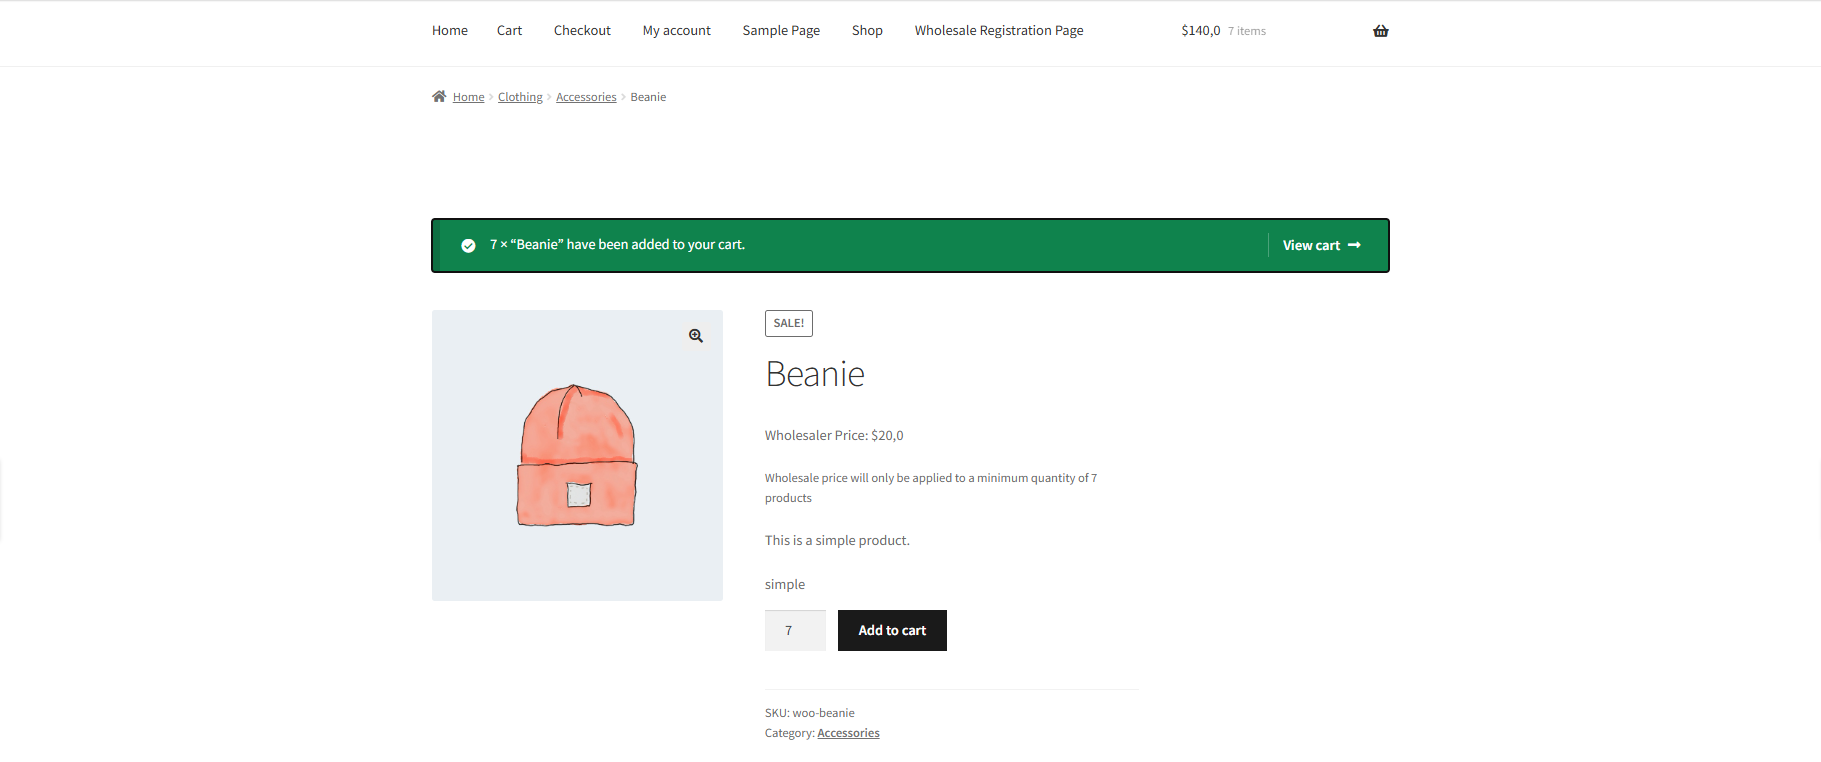
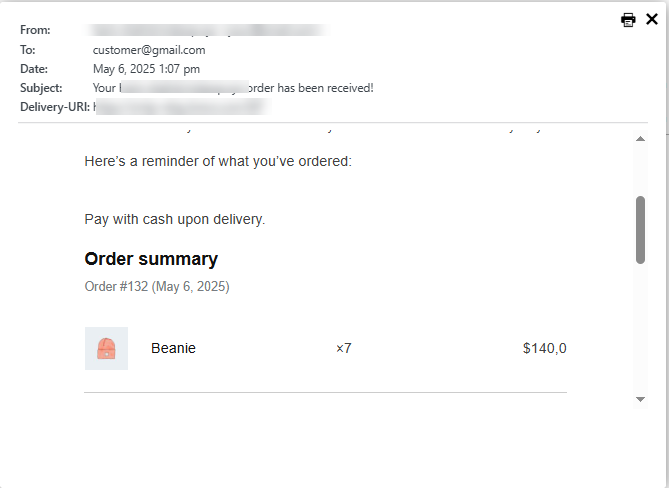
- Email sent to a customer
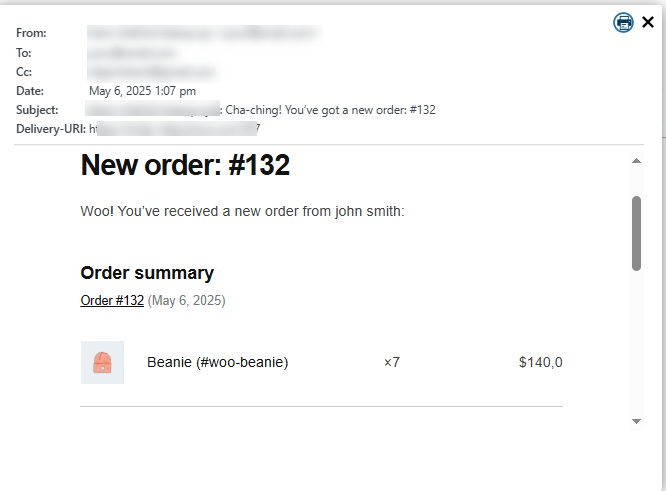
- Email sent to a Recipient(s).
Shipping Method Visibility #
Free Shipping #
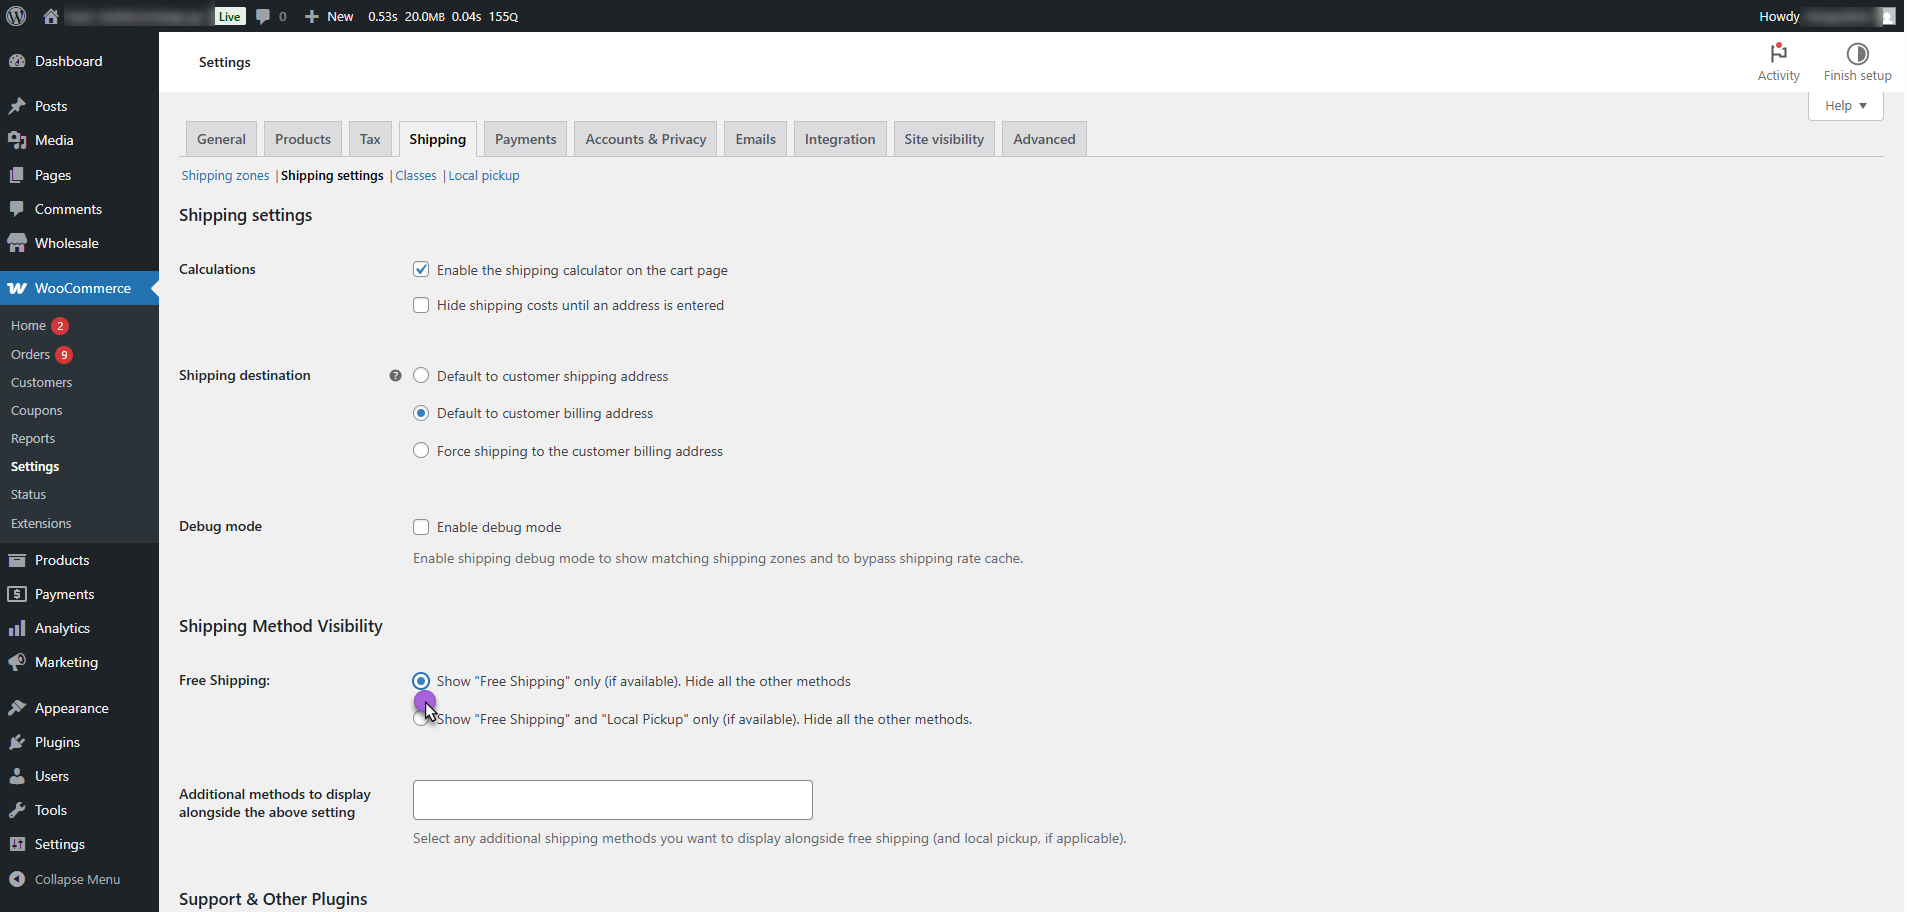
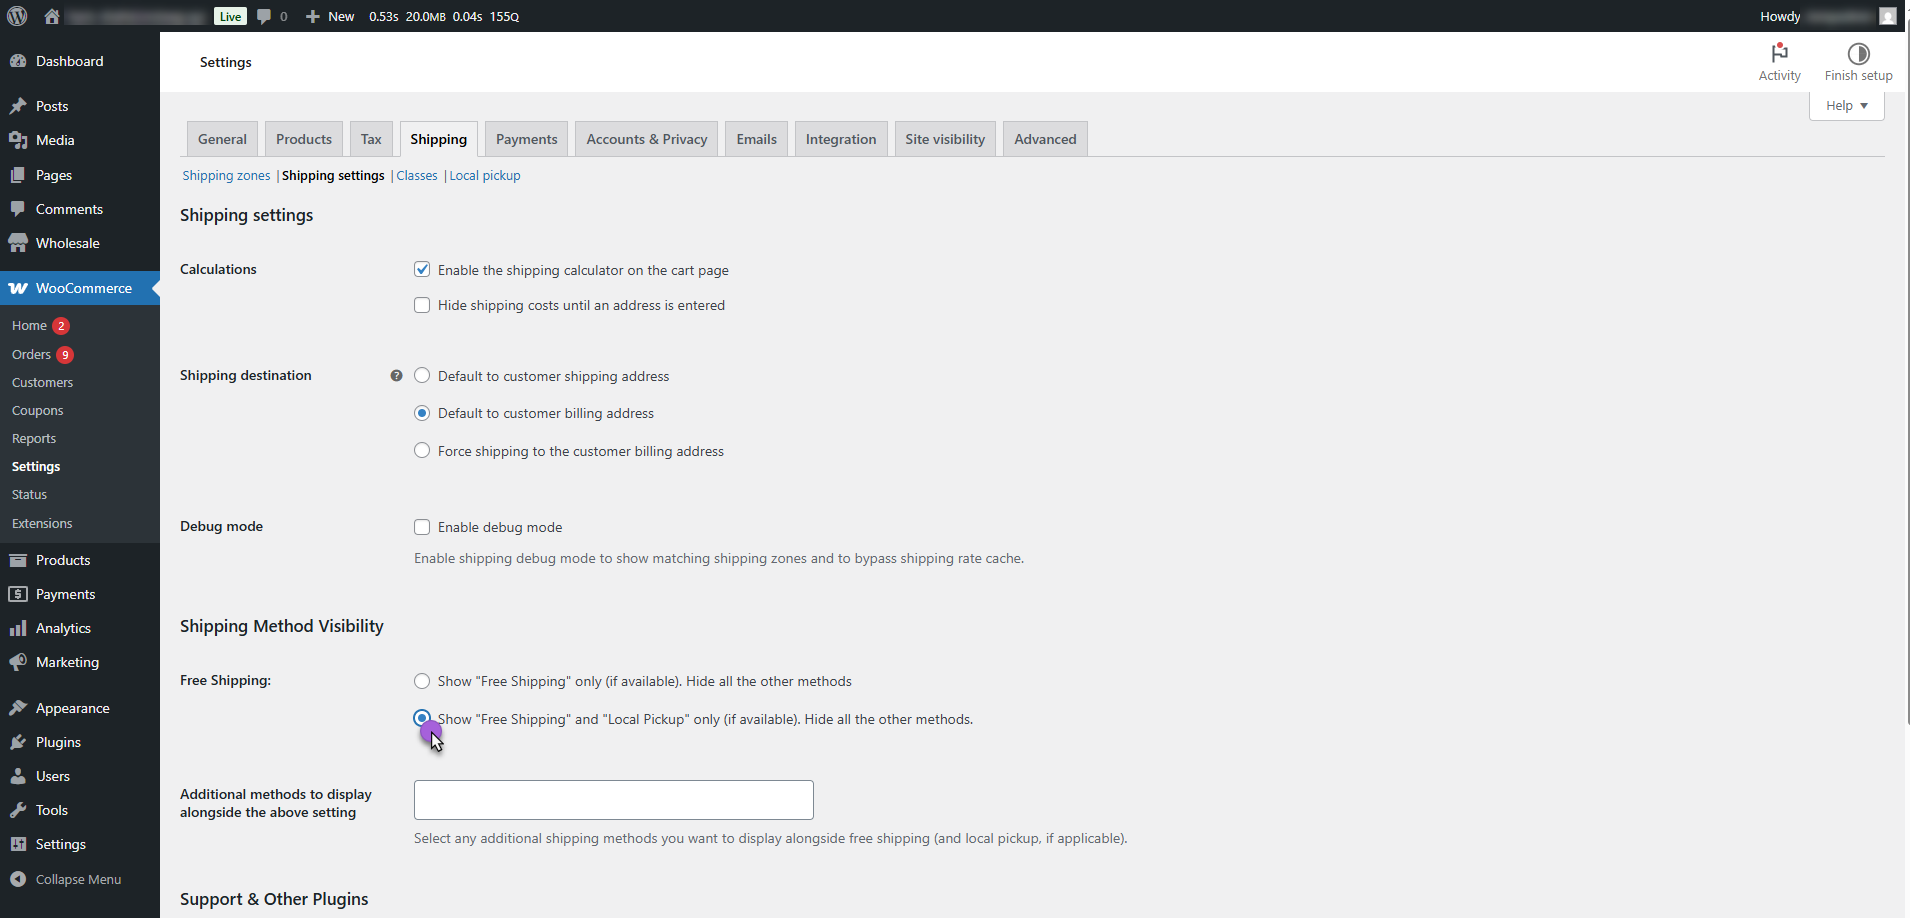
- Go to WordPress Admin Dashboard > WooCommerce > Settings > Shipping > Shipping Settings.
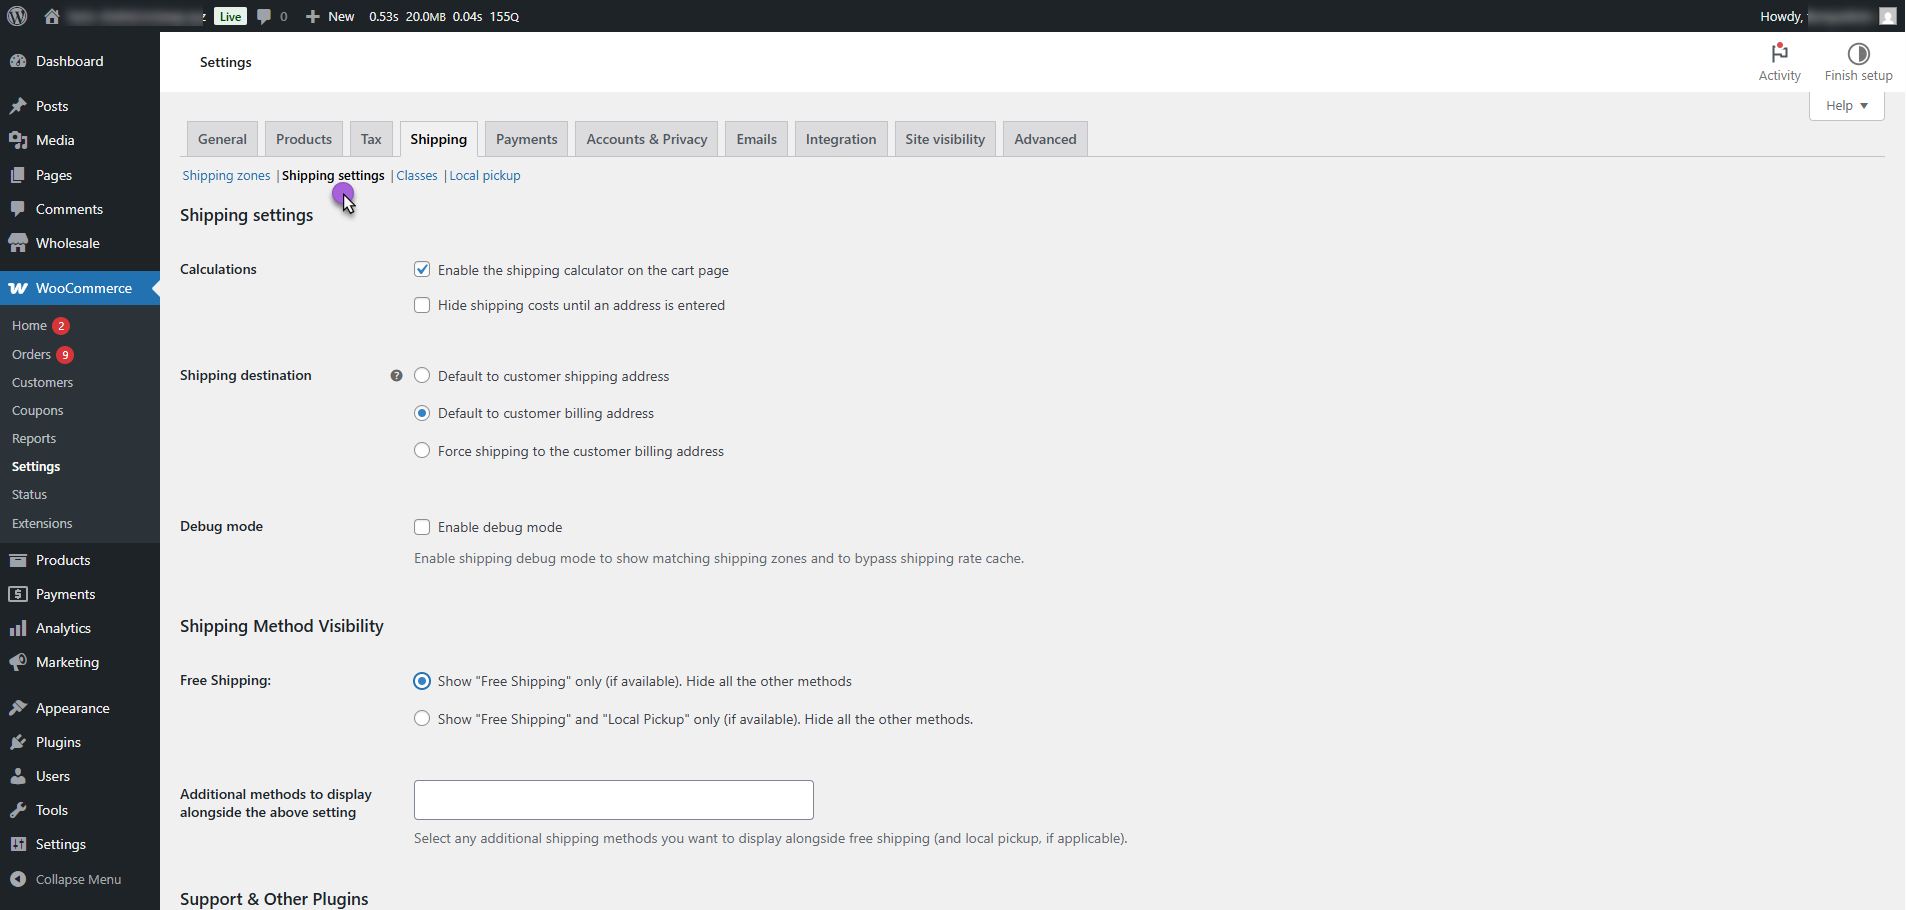
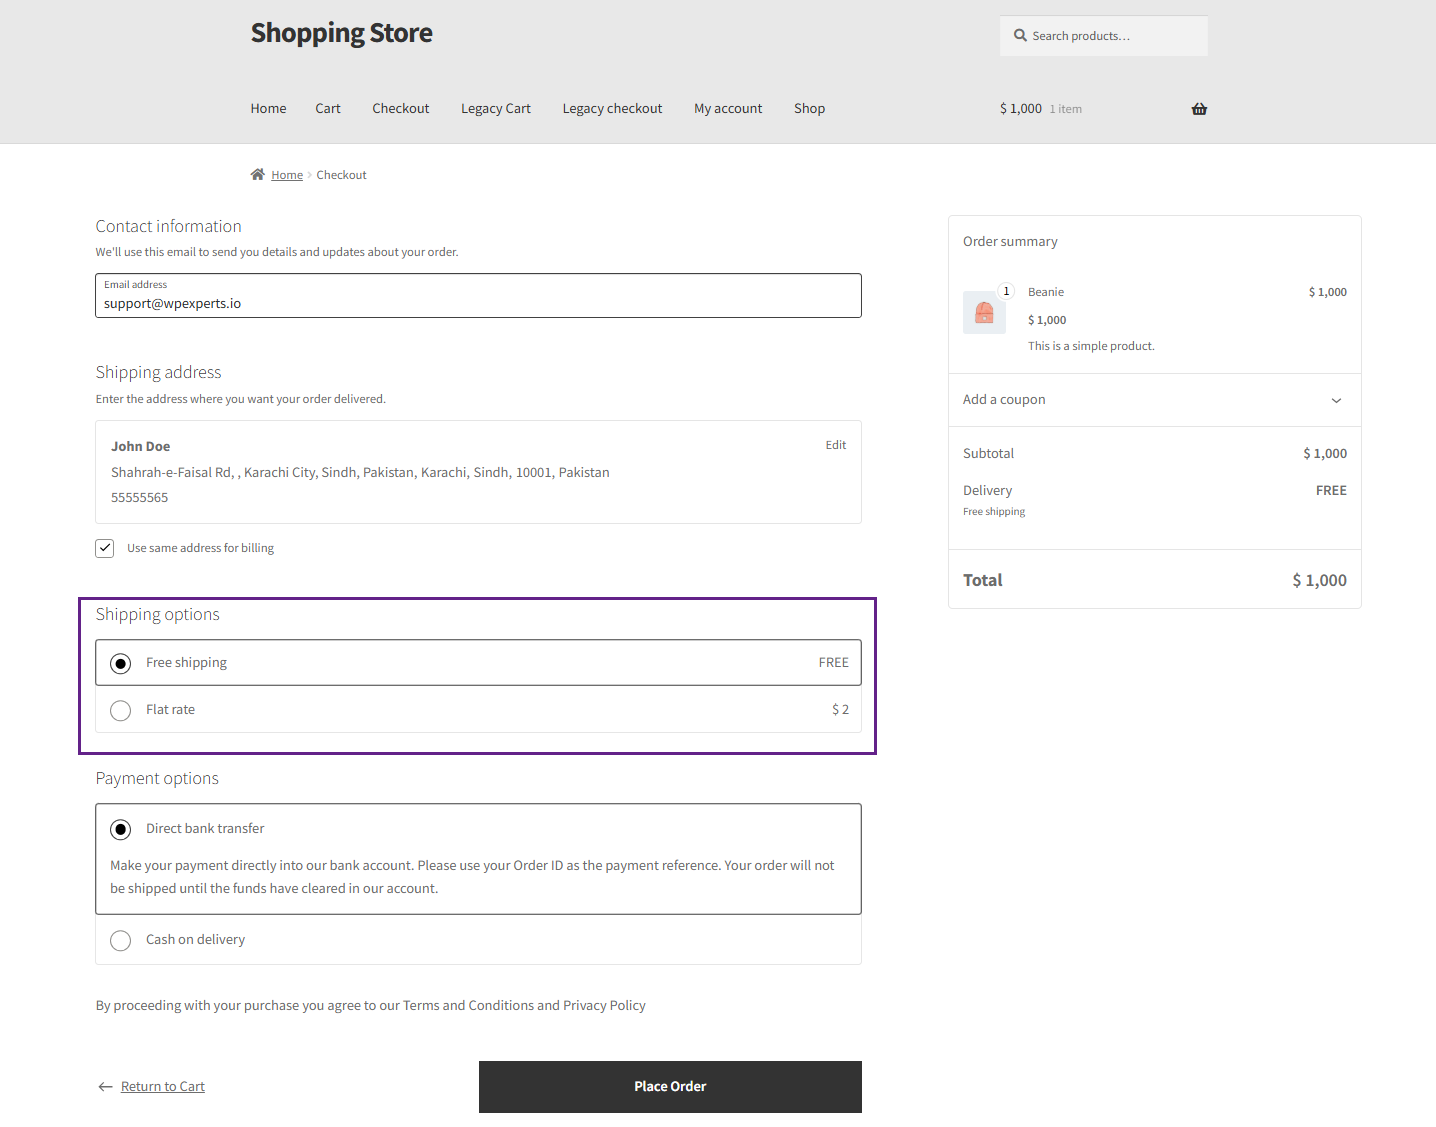
- Scroll down to the Shipping Method Visibility section. With Free shipping, the admin has two options to control which shipping methods should be visible to the customer at checkout:
- Option 1: Show Free Shipping only (if available). Hide all the other methods.
Only if free shipping is available will it be shown. All other methods, like Flat Rate, Local Pickup, etc., will be hidden.
- Option 2: Show Free Shipping and Local Pickup only (if available). Hide all the other methods.
If free shipping and local pickup are available, they will be shown. Other methods, like Flat Rates, will be hidden.
Front End Impact
- Log in to your account.
- Add an item to the cart and move to the checkout page.
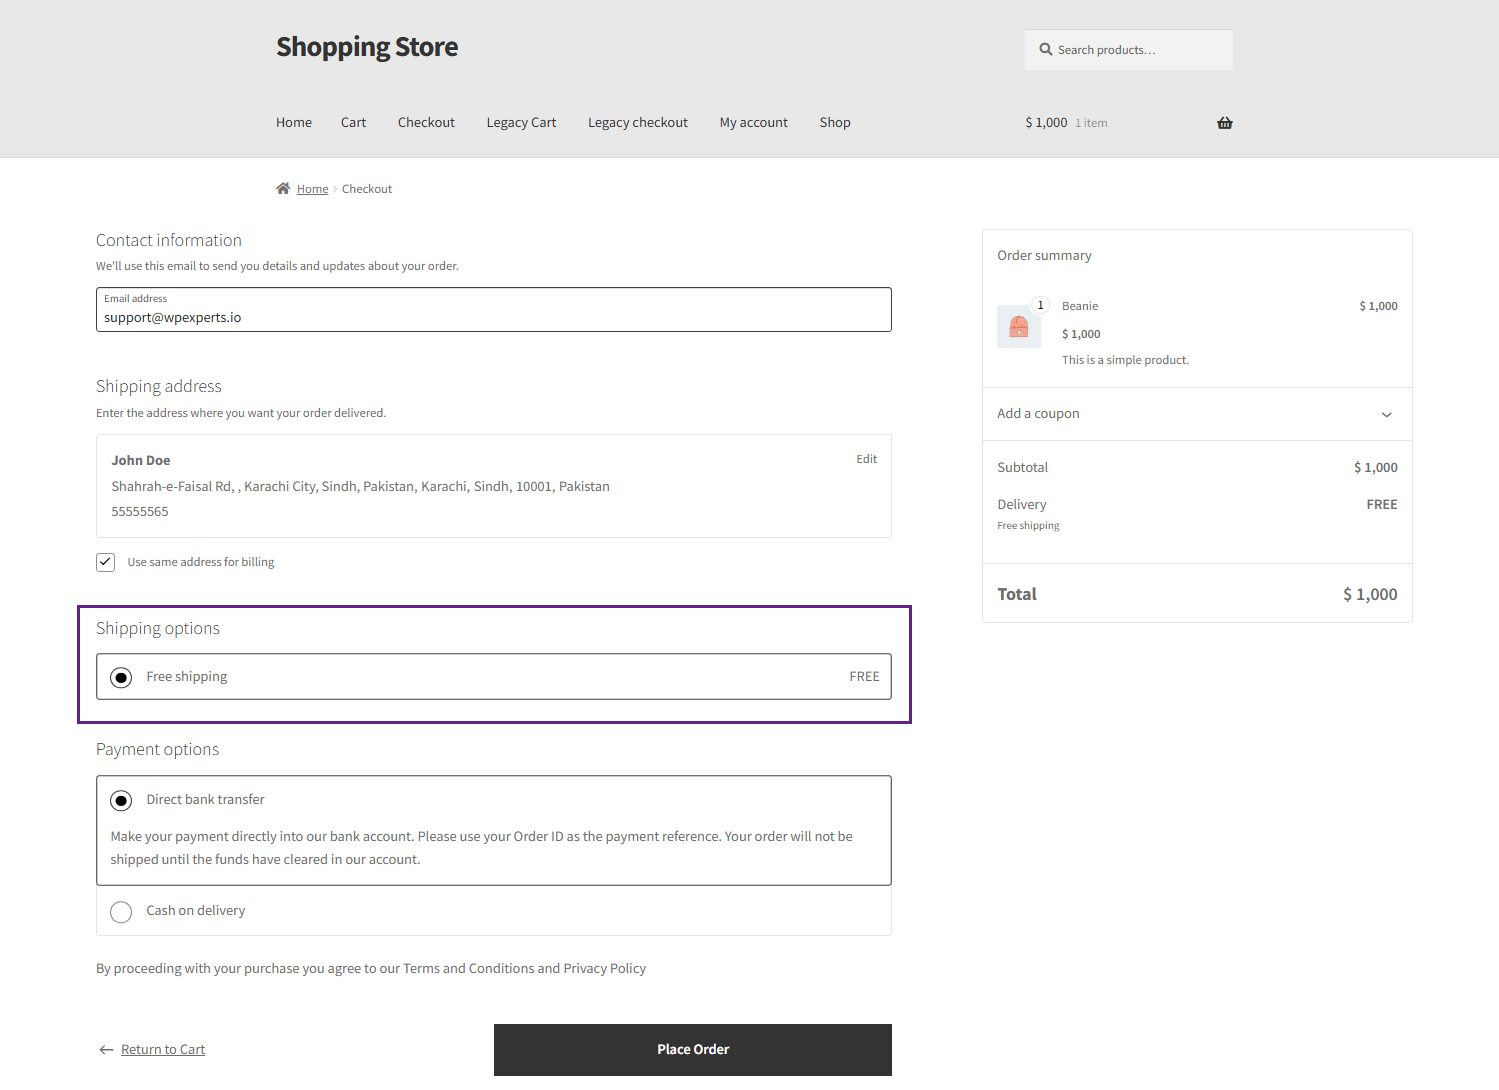
- Show Free Shipping only (if available). Hide all the other methods.
- Only the Free Shipping (if available) option will be available for the user on the checkout page.
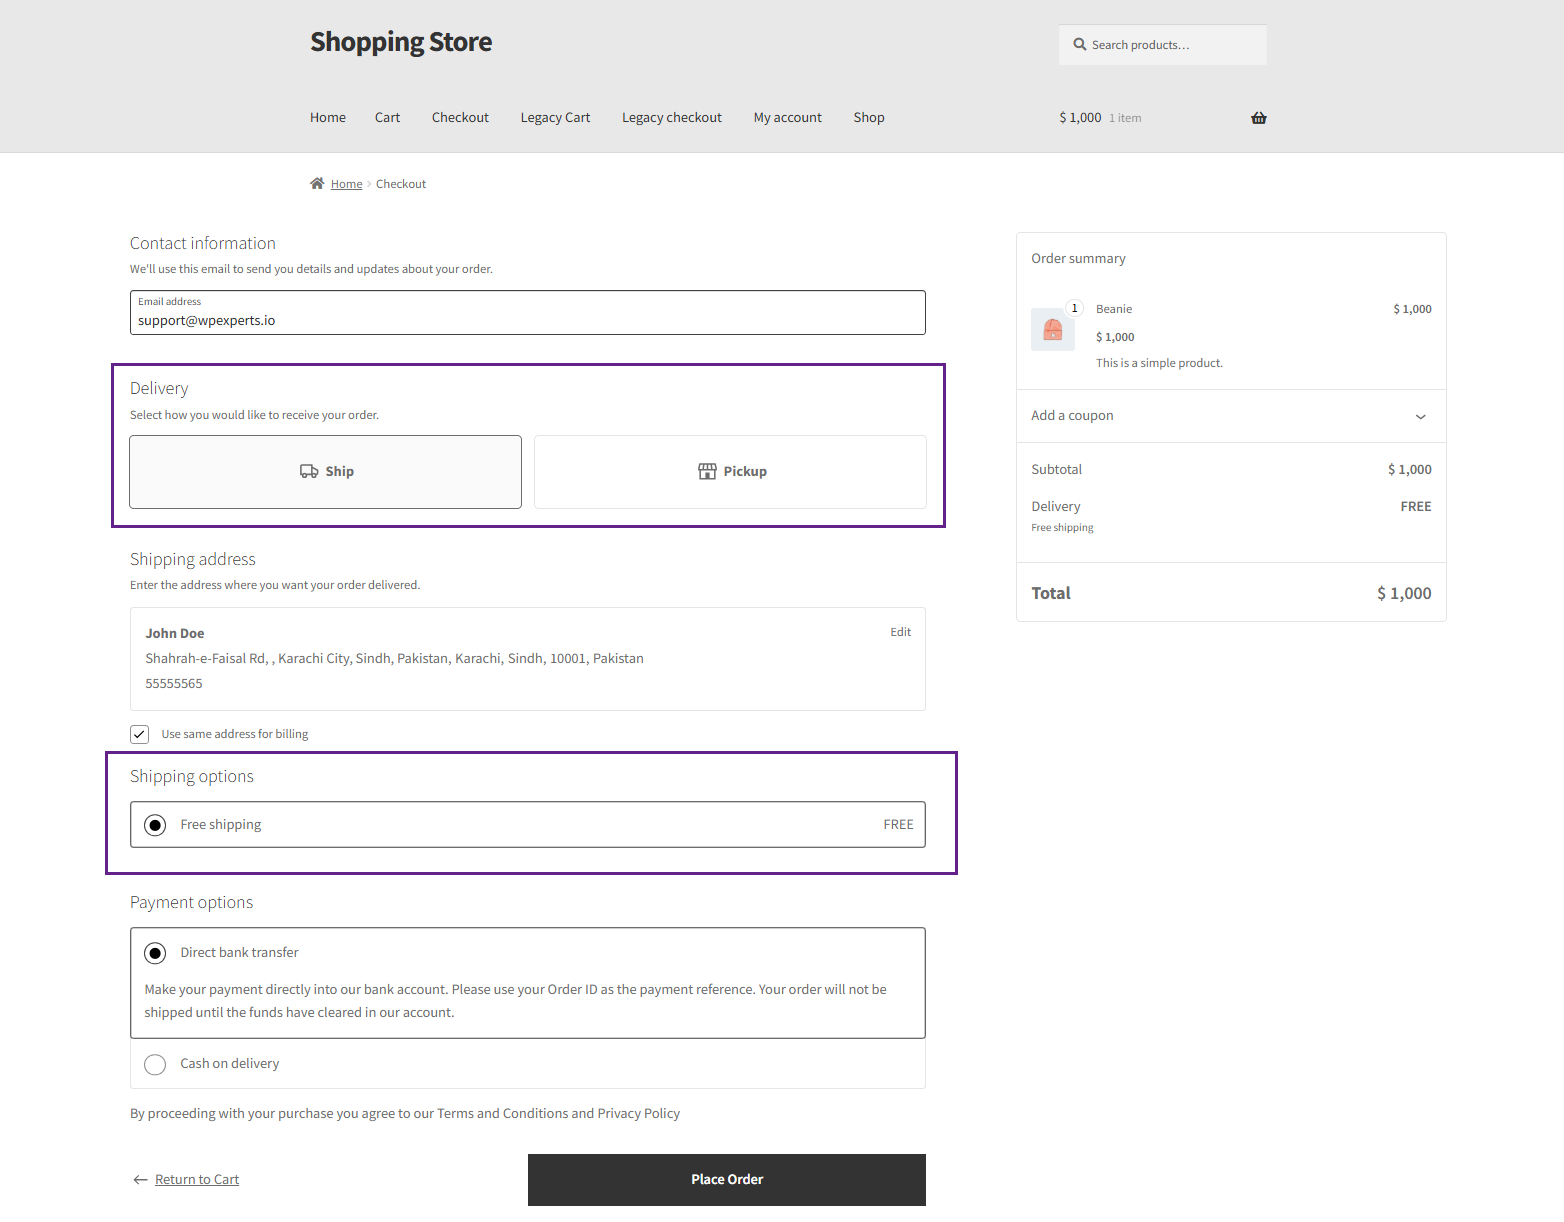
- Show Free Shipping and Local Pickup only (if available). Hide all the other methods.
- The user will have the option of Free Shipping and Local Pickup (if available) on the checkout page.
Additional methods to display alongside the above setting #
- They can add more shipping methods to display alongside Free Shipping (and Local Pickup) by entering them in the Additional methods to display alongside the above setting field.
For example: flat_rate( Specific), flat_rate(Global), etc.
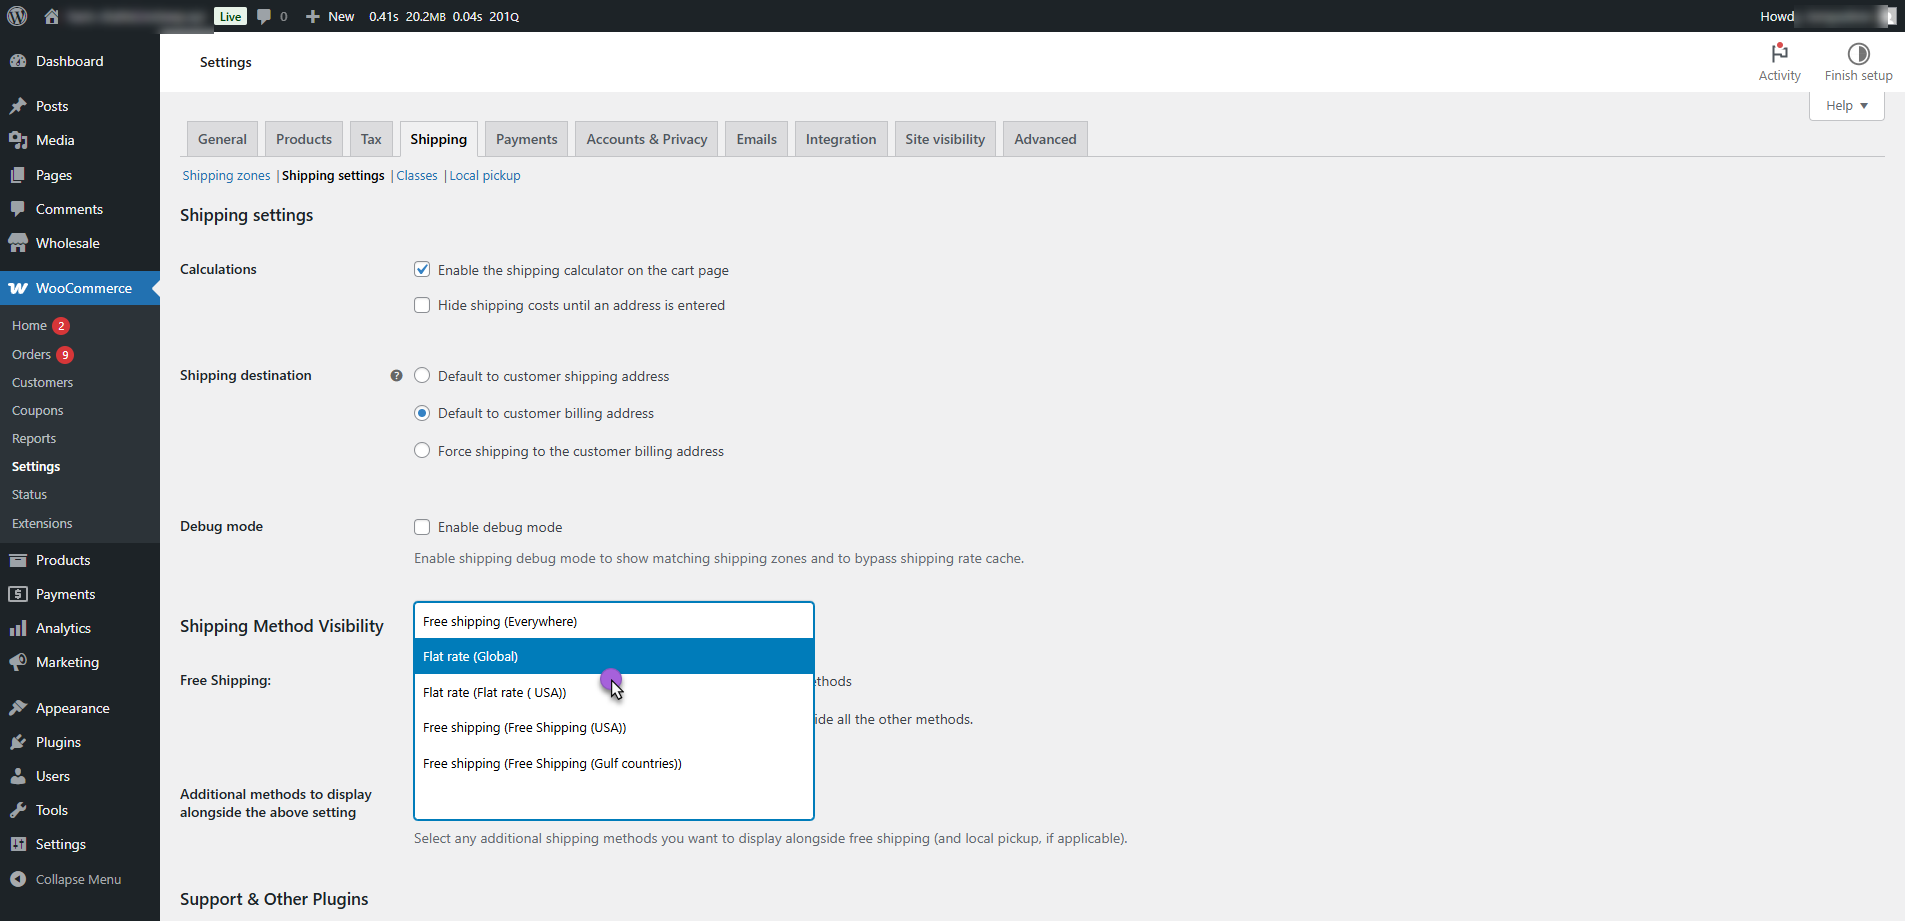
- Click on the Save Changes button to update the settings.
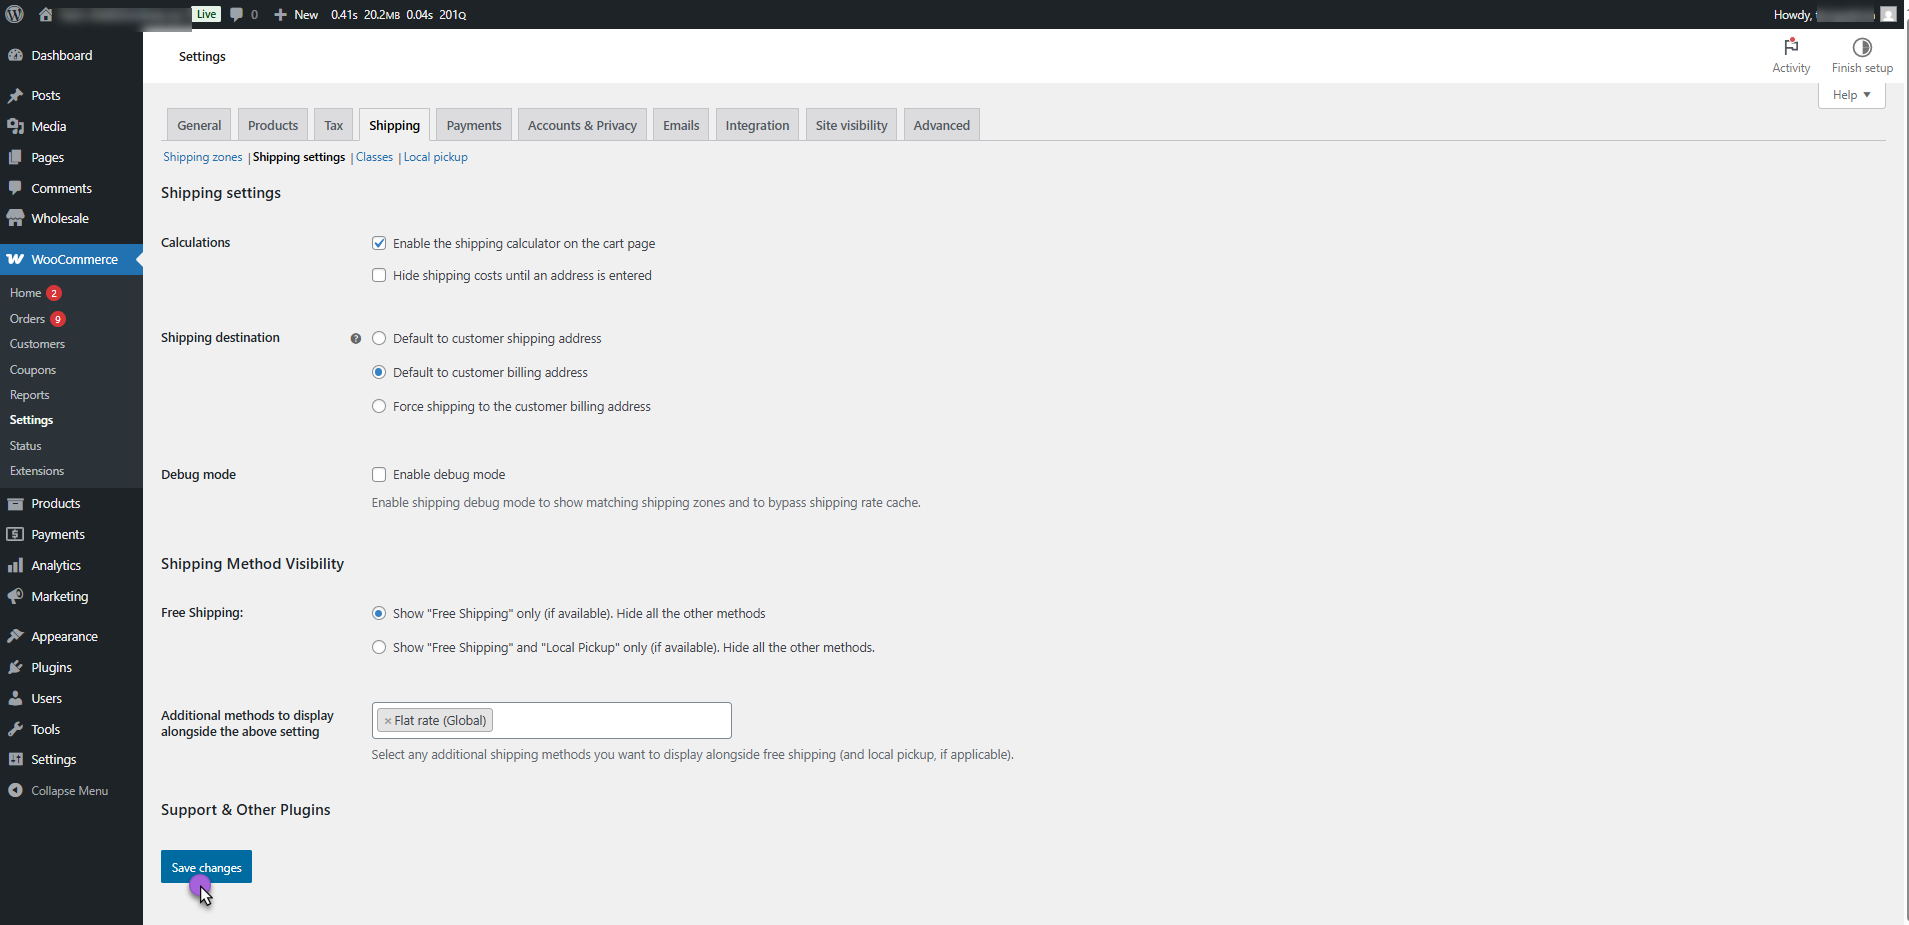
Front End Impact
- Log in to your account.
- Add an item to the cart and move to the checkout page. The selected Additional method will appear on the checkout page.